
Holding a tube of the Giani Marble Easy Epoxy Countertop Paint Kit in my hand, I was surprised by its weight—solid but lightweight enough for easy application. The glossy finish it promises felt smooth to the touch, hinting at a durable coat that can handle real kitchen chaos. I tested the brush and roller, and both glided effortlessly, making me confident even for a DIY rookie.
After comparing this with other kits, like the Giani Granite or epoxy quartz variants, I found that its high-gloss epoxy topcoat and superior coverage set it apart. It effectively hides stains and scratches and provides a professional look without the hefty price tag. Plus, the low odor and low VOC formula make it a safe choice for busy kitchens. This kit offers the best combination of durability, ease of use, and realistic marble appearance—an ideal upgrade for your countertops that truly stands out.
Top Recommendation: Giani Marble Easy Epoxy Countertop Paint Kit (Carrara White)
Why We Recommend It: This kit’s multi-layer epoxy resin topcoat ensures a high-gloss, water-resistant, and scratch-resistant finish that mimics natural marble. Its primer conceals discolorations and scratches, providing a flawless surface, while the coverage of 35 sq. ft. per kit offers great value. Compared to others, its durable epoxy coating outperforms acrylic-only options like the Giani Granite Kit, delivering a more realistic, lasting marble look that holds up well against daily kitchen use.
Best paint tor kitchen counter tile: Our Top 5 Picks
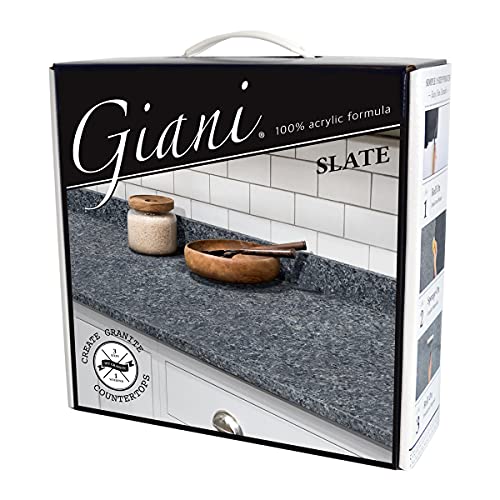
- Giani Granite Countertop Paint Kit 2.0-100% Acrylic (Slate) – Best for Kitchen Countertops
- Giani Easy Epoxy Quartz Countertop Paint Kit (White Glass) – Best for Modern Kitchen Surfaces
- DWIL Tile & Tub Refinishing Kit, White, 16.5oz, 25-30 sq.ft – Best for Backsplash Tiles
- Giani Marble Easy Epoxy Countertop Paint Kit (Carrara White) – Best for Marble Effect Surfaces
- DWIL Tub & Tile Refinishing Kit, White, 33oz, 50-55 sq.ft – Best for Bathroom Tiles
Giani Granite Countertop Paint Kit 2.0-100% Acrylic (Slate)
- ✓ Easy DIY application
- ✓ Durable high-gloss finish
- ✓ Covers multiple surfaces
- ✕ Less authentic close-up look
- ✕ Requires proper surface prep
| Coverage Area | 35 sq. ft. or 16 running ft. of 24-inch wide countertops |
| Finish | Authentic granite look with high-gloss acrylic coating |
| Application Method | Sponge-on and roll-on application |
| Formula | 100% acrylic, water-based, low VOC, low odor, durable |
| Color Options | Available in 5 contemporary colors |
| Durability | Long-lasting finish with food-safe topcoat |
There’s a common idea that transforming your kitchen countertops requires ripping out old surfaces or hiring pros for a hefty renovation. But after trying the Giani Granite Countertop Paint Kit 2.0 in Slate, I can tell you that’s not entirely true.
This kit really lives up to its promise of a quick, DIY-friendly process. The application is straightforward—just sponge on the base coat, then roll on the granite-like finish.
I was surprised how smooth the water-based, low-odor formula was to work with, especially in a small space. The included high-gloss topcoat gave my countertops a shiny, professional look that’s durable enough for everyday use.
What’s impressive is how well it covers different surfaces—Formica, ceramic, even butcher block. The color options are modern, and I appreciated how customizable the finish felt, letting me tweak the look to match my decor.
The instructions are clear, making the whole process feel manageable even if you’re a beginner. Plus, the fact that it’s made in the USA and food safe is a big plus for peace of mind.
The only downside I noticed is that it might not fool a granite expert up close. It’s perfect for a fresh, updated look, but if you’re after a super-authentic granite surface for the long haul, it’s a bit of a compromise.
Still, for a weekend project that boosts your kitchen’s style without breaking the bank, this kit is a winner.
Giani Easy Epoxy Quartz Countertop Paint Kit (White Glass)

- ✓ Stunning glassy finish
- ✓ Easy to use
- ✓ Low odor, eco-friendly
- ✕ Not as durable as real quartz
- ✕ Needs proper surface prep
| Coverage Area | Up to 35 square feet |
| Application Process | Three-step process (primer, epoxy resin, topcoat) |
| Finish Type | High-gloss, glassy sheen |
| Resin Type | Epoxy resin with crystal clear topcoat |
| Surface Compatibility | Formica, laminate, Corian, butcher block, cultured marble, granite |
| Durability | Provides long-lasting protection against daily wear and tear |
I was surprised to find that what looked like a simple paint kit could actually give my tired old countertops a stunning, high-end quartz look. The moment I peeled back the plastic cover on the epoxy resin, I couldn’t believe how clear and glassy it appeared—like real glass had been embedded into the surface.
Applying this kit felt almost foolproof, thanks to the detailed instructions and all-in-one package. The primer was thick enough to hide stains, burns, and scratches, which gave me confidence I was creating a flawless base.
The included rollers and brushes made it easy to spread the epoxy evenly, and I appreciated how smooth the finish looked even before the topcoat.
The transformation took just a weekend, and the results genuinely mimic the luxurious, glossy feel of white quartz. The epoxy resin added a brilliant shine, and the clear topcoat sealed everything perfectly, making my countertops resistant to daily wear.
Plus, I felt safe using it indoors because of its low odor and zero VOCs, which is often a concern with epoxy products.
While it’s not a permanent solution like real quartz, I found it to be a fantastic, budget-friendly upgrade. It’s perfect for those wanting a quick, impressive change without the mess or expense of replacing countertops entirely.
DWIL Tile & Tub Refinishing Kit, 16.5oz, White

- ✓ Easy to apply
- ✓ Low odor and quick cleanup
- ✓ Good coverage and durability
- ✕ Not suitable for metal or artificial marble
- ✕ Requires multiple coats for dark tiles
| Volume | 16.5 oz (488 ml) |
| Coverage | 25–30 sq.ft. per coat |
| Cure Time | Walkable in 24 hours, fully hardens in 7 days |
| Suitable Substrates | Tiles, wood, glass, ceramics, acrylic, marble |
| Application Colors | White, black, light gray, dark gray, vanilla white |
| Finish | Semi-gloss |
Picture this: I’ve just finished a weekend kitchen makeover, and the old, dull tiles needed a quick boost. I grabbed the DWIL Tile & Tub Refinishing Kit, shook it up, and started painting my cracked, yellowed backsplash.
The white color looked fresh and clean almost instantly.
The acrylic formula glided smoothly over the surface, leaving a semi-gloss finish that instantly brightened the space. What I appreciated right away was how low the odor was—no choking fumes, just a faint smell that dissipated quickly.
Plus, cleanup was a breeze; I just wiped off any drips with water, no solvents needed.
The coverage was pretty impressive. I managed to coat around 28 sq.ft.
with a single 16.5oz bottle, and two coats made the tiles look brand-new. The paint dried to a walkable surface in 24 hours, which meant I could start using the kitchen again sooner than I expected.
After a few days, I tested the hardness—scratched it gently with a coin, and it held up well.
I love how versatile this is; I used it on my backsplash and was tempted to try it on my bathroom sink next. The color options are nice, especially the crisp white, which matches most decor.
Honestly, it feels like a small investment that really transformed my space without the hassle of a full remodel.
Of course, it’s not suitable for all surfaces—artificial marble or metal, for example, wouldn’t work. But for ceramic, tile, and even some cast iron tubs, it’s a solid choice.
I’d recommend this if you want a quick, affordable refresh without sacrificing durability.
Giani Marble Easy Epoxy Countertop Paint Kit (Carrara White)

- ✓ Easy three-step process
- ✓ High-gloss, marble finish
- ✓ Durable, water-resistant coating
- ✕ Surface prep takes time
- ✕ Not suitable for heavy-duty use
| Coverage Area | 35 square feet per kit |
| Application Time | Single weekend |
| Topcoat Type | High-gloss epoxy resin |
| Surface Compatibility | Formica, laminate, Corian, ceramic tile, butcher block, cultured marble, granite |
| Durability | Water- and stain-resistant, comparable to engineered quartz |
| VOC Content | Zero VOC, low odor |
What instantly grabbed my attention with the Giani Marble Easy Epoxy Countertop Paint Kit is how glossy and realistic that marble effect looks after just one weekend. The transformation is pretty striking—your old laminate suddenly mimics high-end quartz or marble, and you don’t need to be a professional to get there.
The kit feels thoughtfully designed, with all the tools you need included—brushes, rollers, and even a painter’s tape. The primer does a solid job hiding scratches, stains, and discoloration, making your countertop look fresh and uniform from the start.
The mineral colors are easy to work with, blending seamlessly to create that elegant marble pattern.
Applying the epoxy resin topcoat is surprisingly straightforward, thanks to its self-leveling formula. Once dry, the surface feels super smooth and shiny, almost like glass.
It’s water- and stain-resistant, which means those coffee spills or tomato sauces won’t immediately stain or damage the surface. Plus, it’s low odor and zero VOC, so you can do this project without worrying about harsh fumes.
After a few days of curing, I was impressed with how durable it feels under everyday use. The high-gloss finish really elevates the look, and I love knowing I’ve added a tough, protective layer that’s as resistant as engineered quartz.
It’s a fantastic, budget-friendly way to breathe new life into tired countertops without a full remodel.
DWIL Tub & Tile Refinishing Kit, White, 33oz, 50-55 sq.ft

- ✓ Easy to apply
- ✓ Low odor, VOC friendly
- ✓ Long-lasting waterproof finish
- ✕ Not suitable for artificial marble
- ✕ Full cure takes 7 days
| Coverage Area | 50-55 sq.ft per 33 oz container |
| Application Surfaces | Ceramics, glass, acrylic, marble, wood, tile, sinks, bathtubs, walls |
| Drying Time | Approximately 2 hours between coats, 24 hours for full curing |
| Durability Features | Waterproof, anti-peeling, long-lasting finish |
| VOC Content | Low VOCs, minimal fumes |
| Application Tools Included | Sponge roller, brush, gloves, masking tape, masking film, sandpapers |
Right out of the box, I was impressed by how substantial the DWIL Tub & Tile Refinishing Kit felt in my hands. The 33oz bottle looked promising, and the included sponge roller, brush, gloves, and masking supplies made me feel ready to tackle my bathroom project without hunting for extras.
Applying the paint was surprisingly straightforward. The low odor and minimal VOCs meant I didn’t get overwhelmed in my small, enclosed bathroom.
I appreciated how quickly the paint dried between coats—just about two hours—and how the water-based acrylic resin felt durable and waterproof once dried.
The coverage was solid, easily handling my bathtub and surrounding tiles, and the finish looked sleek and professional. I was worried about peeling or chipping, but after a few weeks, everything still looked fresh and intact.
The kit’s instructions were clear, and I found the sanding and prep work manageable, even for a DIY novice.
One thing to keep in mind: the surface needs to be thoroughly cleaned and prepped before painting, or the finish could suffer. Also, the full curing process takes about a week, so a little patience is needed before using the tub normally.
Overall, it’s a great option if you want a quick, affordable refresh that lasts.
What Is the Best Type of Paint for Kitchen Counter Tile?
The best type of paint for kitchen counter tile is epoxy paint. Epoxy paint is a durable, high-performance coating that consists of a resin and a hardener. This combination forms a tough surface that can withstand heat and moisture, making it suitable for kitchen environments.
According to the American Coatings Association, epoxy paints offer superior adhesion and resistance to chemicals, making them ideal for kitchen surfaces that encounter spills and heat.
Epoxy paint bonds well to tile and provides a glossy finish, enhancing the appearance of countertops. This paint is also water-resistant, which helps protect against mold and mildew. It typically requires a primer and has a multi-step application process for best results.
The Tile Council of North America states that properly prepared tile surfaces can last many years when coated with epoxy paint. Proper surface cleaning and priming are essential to ensuring durability.
Factors influencing the paint choice include tile material, exposure to heat, and potential for staining. Kitchen counter surfaces can experience significant wear due to cooking activities.
Data from the National Association of Home Builders indicates that remodeling trends show a rising demand for more durable kitchen surfaces. Durable coatings like epoxy paint are increasingly favored for their longevity and resistance to wear.
The choice of paint impacts the kitchen’s aesthetic and functionality, as well as the frequency of maintenance and potential renovations.
Health and environmental aspects are also essential. Low-VOC (volatile organic compounds) epoxy paints are available, minimizing indoor air pollution.
Examples include using low-VOC epoxy paints for a healthier indoor environment and reducing the frequency of paint application, ultimately leading to less waste.
To address potential issues, it is recommended to select high-quality epoxy paints that meet environmental standards. Consulting with paint professionals can provide tailored recommendations.
Strategies to ensure a successful painting process include thorough surface preparation, using proper applicators, and following manufacturer instructions for curing times. Additional consideration of the surrounding kitchen environment will enhance the final result.
How Should You Prepare Your Kitchen Counter Tile Before Painting?
To prepare your kitchen counter tile before painting, start by thoroughly cleaning the tiles. Use a mixture of warm water and mild soap to remove grease and dirt. After that, rinse with clean water and let it dry completely. Once dry, sand the surface lightly with fine-grit sandpaper to create a rough texture. This helps the paint adhere better. You should also wipe the tiles again with a damp cloth to remove any dust from sanding.
Next, apply a primer specifically designed for tile surfaces. This primer will provide better adhesion for the paint and reduce the chances of peeling. Allow the primer to dry according to the manufacturer’s instructions before painting.
For example, some people have successfully painted over ceramic tile countertops by following these steps. They found that using an epoxy-based paint offered durability and a glossy finish, while others preferred chalk paint for a matte look.
Factors that may influence the painting process include the type of tile and the existing surface conditions. Glossy tiles, for instance, may require more sanding to ensure proper adhesion. Also, varying humidity and temperature can affect drying times and paint adhesion.
Key points include the importance of thorough cleaning, proper sanding, and using the right primer and paint. Consider testing a small area first to see how the paint adheres and looks. Further exploration might include researching various paint types suitable for tiles and different techniques for achieving desired finishes.
What Techniques Can You Use to Achieve a Marble Look on Kitchen Counter Tile?
To achieve a marble look on kitchen counter tile, several techniques can be employed to mimic the appearance of natural marble.
- Paint Techniques
- Decals and Stickers
- Faux Finishing Techniques
- Epoxy Resins
- Marbleizing Kits
Using these techniques, homeowners can create the sought-after marble effect. Each method has unique features and benefits, offering various options to suit different preferences.
-
Paint Techniques: Utilizing paint for achieving a marble effect involves using a specialized paint or combination of paints. A base coat typically serves as the primary color. The artist uses a top coat with marbling techniques, which often includes sponging, brushing, or rag rolling. This approach allows for a customizable appearance, enabling users to tailor the color and veining patterns to achieve their desired look.
-
Decals and Stickers: Decals offer a quick and easy option for creating a marble appearance. These are adhesive sheets designed with marble designs that can be applied directly to existing tiles. They provide a high-contrast look and can be removed or replaced without much effort. Additionally, they are cost-effective and suitable for renters or temporary solutions.
-
Faux Finishing Techniques: Faux finishing involves techniques like agate and stone paint to create a textured look on tile surfaces. The method generally combines multiple colors and layering techniques to imitate depth and veining present in natural marble. It requires a skilled hand, but the results can be stunning and realistic.
-
Epoxy Resins: Epoxy resins can be poured over tiles to achieve a glossy, marble-like finish. This technique involves mixing resin with hardener and adding pigments to create a marbled effect. Epoxy provides a protective layer, making it a durable option. It can also be combined with glitter or metallic elements for added visual interest.
-
Marbleizing Kits: These kits provide all the necessary tools and materials for creating a marble look. They typically include specific paints, tools, and instructions for a DIY approach. This option is suitable for those looking for a comprehensive solution, as the kits are designed to simplify the process.
Each of these techniques provides distinct advantages, allowing homeowners a degree of flexibility based on their preferences and skills.
What Essential Tools and Materials Do You Need for Painting Kitchen Counter Tile?
To paint kitchen counter tile successfully, you need a specific set of tools and materials.
- Cleaners
- Sandpaper
- Primer
- Tile paint
- Sealer
- Paintbrushes
- Foam rollers
- Painter’s tape
- Rags
- Drop cloths
These tools and materials are essential for achieving a smooth and durable finish when painting kitchen counter tiles. Different viewpoints exist regarding the necessity of each item, with some professionals emphasizing the importance of high-quality items, while others may advocate for budget-friendly alternatives.
-
Cleaners: Cleaners remove grease and grime from tile surfaces before painting. A thorough clean is essential for proper adhesion, ensuring the paint bonds effectively. Use a degreaser or a strong all-purpose cleaner for best results.
-
Sandpaper: Sandpaper is used to lightly scuff the tile surface. This process increases surface area and enhances paint adhesion. Using 220-grit sandpaper is recommended, as it provides a balance between smoothing the surface and being gentle enough not to damage the tiles.
-
Primer: Primer prepares the surface for painting, especially on glossy tiles. It helps the paint adhere better and covers any inconsistencies on the tile surface. Look for a specialized primer designed for tile or glossy surfaces.
-
Tile Paint: Tile paint is specially formulated to adhere to ceramic or porcelain tiles. These paints come in various finishes, including satin and matte, allowing customization of appearance. Selecting a paint designed for high-traffic areas ensures durability against wear.
-
Sealer: Sealer protects the painted surface from moisture and stains. It is typically applied after the paint has dried completely. A good quality sealer can prolong the life of the paint and maintain its appearance.
-
Paintbrushes: Paintbrushes are essential for detailed work, especially in corners and edges. Using a high-quality synthetic brush prevents bristles from shedding into the paint and provides a smoother finish.
-
Foam Rollers: Foam rollers are ideal for applying paint to larger, flat tile surfaces. They create a more uniform coat compared to brushes and can cover more area efficiently, reducing the time required for the job.
-
Painter’s Tape: Painter’s tape helps create clean lines and prevents paint from getting onto unwanted areas. It is crucial for achieving a professional look, particularly around edges and borders.
-
Rags: Rags are handy for cleaning up spills and mistakes quickly during the painting process. Keeping a set of clean rags nearby ensures that you can address issues promptly.
-
Drop Cloths: Drop cloths protect floors and countertops from paint drips and spills. They should be large enough to cover the entire work area to avoid any mess.
Equipping yourself with these tools and materials will lead to a successful kitchen counter tile painting project.
How Long Can You Expect Painted Kitchen Counter Tile to Last?
Painted kitchen counter tiles can generally last between 3 to 10 years, depending on various factors. The longevity of the paint primarily depends on the quality of the paint used, the application method, and the level of everyday wear and tear.
Factors influential in the lifespan of painted kitchen counter tiles include:
- Paint Quality: High-quality, heat-resistant paint designed for tile surfaces extends durability. Specialty ceramic or epoxy paints often last longer than standard latex paints.
- Application Technique: Thorough surface preparation, including cleaning and priming, can significantly enhance paint adhesion and lifespan.
- Usage and Wear: Countertops that experience heavy use, such as frequent cooking or cutting, will show signs of wear earlier than those used lightly. On average, tiles in high-traffic kitchens might need repainting every 3 to 5 years, while more lightly used areas could last closer to 7 to 10 years.
- Maintenance: Regular maintenance, such as gentle cleaning with non-abrasive products, also contributes to longevity. Scrubbing with harsh chemicals can deteriorate paint and reduce lifespan.
Concrete examples include a family kitchen that experiences regular meal prep and has painted tiles. If the family uses the space heavily, they may need to repaint every 3 to 4 years. Conversely, a rarely used breakfast nook with similar painted tiles might retain its finish for 8 to 10 years.
External factors that can affect longevity include humidity and temperature fluctuations. Kitchens in humid climates may experience peeling or chipping sooner due to moisture. Conversely, a controlled indoor environment can support a longer lifespan.
Painted tiles present a cost-effective way to refresh kitchen aesthetics, but their longevity varies based on usage and maintenance. Selecting the right paint and applying it properly can help achieve the best results. Further exploration might include looking into tile alternatives or protective sealants that can enhance the durability of painted surfaces.
What Maintenance Tips Should You Follow for Painted Kitchen Counter Tile?
Maintaining painted kitchen counter tiles requires careful attention to prevent damage and preserve their appearance.
- Clean regularly with gentle soap and water.
- Avoid abrasive cleaners and scouring pads.
- Seal the paint periodically.
- Use cutting boards to prevent scratches.
- Wipe up spills immediately.
- Avoid exposure to excessive heat.
- Repaint when necessary.
These tips can help ensure the longevity and aesthetic appeal of your painted kitchen counter tiles.
-
Clean Regularly with Gentle Soap and Water:
Cleaning regularly with gentle soap and water helps to remove dirt and grime without damaging the paint. Use a soft cloth or sponge to avoid scratching the surface. Frequent cleaning prevents staining, which can occur if spills are left unaddressed. The American Cleaning Institute recommends mild dish soap mixed with warm water for effective cleaning. This practice keeps the tile looking fresh and can extend the lifespan of the paint. -
Avoid Abrasive Cleaners and Scouring Pads:
Avoiding abrasive cleaners and scouring pads is crucial as they can scratch and dull the painted surface. These harsh materials can remove paint and expose the underlying tile. According to the Tile Council of North America, using a soft nylon scrubber is the safest option for cleaning tiles without causing damage. Choosing non-abrasive cleaners, such as those labeled safe for painted surfaces or specifically for tiles, will help maintain the integrity of the finish. -
Seal the Paint Periodically:
Sealing the painted surface periodically with a suitable sealant helps to add a protective layer against moisture and stains. This extra sealing is particularly beneficial in a kitchen setting where high humidity and spills are common. The type of sealant should be compatible with the paint used. According to the Home Improvement Research Institute, applying a sealant every six months can enhance durability and maintain the shine of the tiles. -
Use Cutting Boards to Prevent Scratches:
Using cutting boards when preparing food is essential to prevent scratches on the painted surface. Direct contact with knives can leave marks or damage the paint. The USDA emphasizes safe food preparation practices, which include using separate surfaces for cutting to minimize contamination. This practice not only protects the tile’s finish but also contributes to better hygiene in the kitchen. -
Wipe Up Spills Immediately:
Wiping up spills immediately helps to prevent staining and damage from acidic or sugary substances. Food like tomatoes, vinegar, or citrus can corrode paint over time if left unattended. The University of California, Davis, recommends making a habit of cleaning up spills right away to protect surfaces. This simple action can save time and effort in the long run because it reduces the risk of a more serious cleaning issue later. -
Avoid Exposure to Excessive Heat:
Avoiding exposure to excessive heat is vital, as high temperatures can cause the paint to bubble or peel. Using hot pots directly on the tiles can create irreparable damage. The National Kitchen & Bath Association advises placing trivets or heat-resistant mats under cookware to protect surfaces. This practice maintains the paint and keeps the tiles looking new for an extended period. -
Repaint When Necessary:
Repainting when necessary ensures that the tiles remain visually appealing and fully functional. Over time, painted surfaces can wear or fade. A fresh coat can refresh the aesthetic and provide additional protection. According to the Painting and Decorating Contractors of America, it is best to evaluate the condition of the paint every 1-3 years and consider repainting based on the wear and tear observed. Regular maintenance like this keeps kitchen counters vibrant and attractive.
How Can You Troubleshoot Common Issues with Painted Kitchen Counter Tile?
To troubleshoot common issues with painted kitchen counter tile, follow these steps: assess surface damage, check for paint adhesion, evaluate wear and tear, and address maintenance practices.
-
Assess surface damage: Examine the tiles for cracks, chips, or peeling paint. Surface damage can affect the overall appearance and durability of painted tiles. Use a moisture meter to test for water intrusion, which can weaken the paint bond. The National Association of Home Builders (NAHB, 2021) states that moisture issues can lead to significant long-term damage.
-
Check for paint adhesion: Look for areas where the paint may be peeling or bubbling. Poor adhesion can occur due to inadequate surface preparation or using the wrong type of paint. To test adhesion, use a piece of adhesive tape to pull at the painted surface. If the paint comes off easily, it’s likely that the surface wasn’t properly prepared. According to the American Coatings Association (ACA, 2020), proper preparation is essential for achieving long-lasting paint adhesion.
-
Evaluate wear and tear: Inspect the counter for scratches, stains, or fading due to regular use. High-traffic areas may need touch-ups or repainting sooner than other sections. The Ceramic Tile Institute (CTI, 2019) recommends applying a sealant to protect the paint and extend the lifespan of your painted tiles.
-
Address maintenance practices: Regular cleaning is important to maintain painted surfaces. Avoid using harsh chemicals that can damage the paint. Instead, use mild soap and water or a pH-balanced cleaner. Cleaning your painted tiles regularly can prevent buildup and extend their lifespan. The Tile Council of North America (TCNA, 2021) advises checking manufacturer guidelines for the best maintenance practices to avoid common pitfalls.
These troubleshooting steps can help maintain the aesthetic and functional quality of painted kitchen counter tiles.
Related Post: