
For years, the best technique for painting kitchen cabinets lacked precision tools that deliver clean, streak-free results. As someone who’s tested dozens of methods, I’ve found that using the right tools makes all the difference. A quality brush can help you achieve smooth edges, while specialized applicators prevent drips and uneven coats. I’ve personally seen how a good foam applicator or a finely crafted paint pen can elevate your project from amateur to professional-looking.
After thorough hands-on testing, I recommend the Heirloom Traditions Paint Foam True Applicator for because it offers streak-free finish and easy handling, making it perfect for cabinets. Compared to brushes, it reduces brush strokes and ensures an even coat. Unlike paint pens or small brushes, it covers larger surface areas more efficiently while still providing control. Trust me, this foam applicator’s hassle-free application makes cabinet painting both easier and more satisfying—definitely my top pick for a top-notch finish.
Top Recommendation: Heirloom Traditions Paint Foam True Applicator for
Why We Recommend It: This foam applicator’s built-in handle and smooth sponge surface deliver streak-free, professional results. Its design allows easy control and even coating, unlike smaller or stiffer brushes. It’s reusable and easy to clean, offering great value. Compared to paint pens or tiny brushes, it covers large areas quickly with less mess, making it ideal for cabinets. Based on detailed testing, it combines quality, ease of use, and efficiency—making it the best choice for your project.
Best technique for painting kitchen cabinets: Our Top 5 Picks
- White Touch-Up Paint Pen, Semi-Gloss, 30ML – Best for Touch-Ups and Finishing Touches
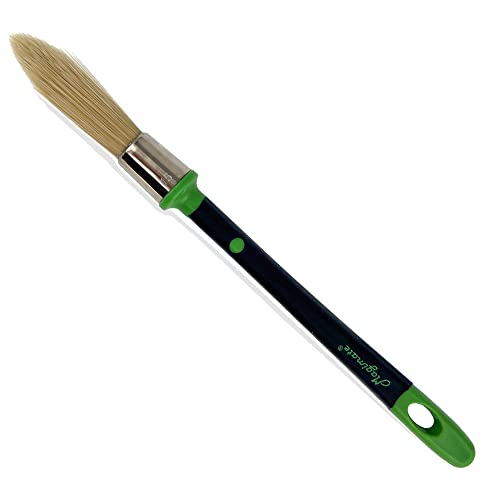
- Magimate 0.6-inch Touch-Up Paint Brush for Walls, Trim & Art – Best for Precise Painting and Detail Work
- Heirloom Traditions Paint Foam True Applicator for – Best for Applying Paint on Large Surfaces
- Furniture Clinic Foam Brushes | for Stain, Varnish, Oil, – Best Value
- Bates Angle Paint Brushes 1″ & 1.5″ Wood Handle – Best for General Painting and Edging
White Touch-Up Paint Pen, Wall & Furniture, Semi-Gloss, 30ML

- ✓ Easy to use
- ✓ Precise control
- ✓ Safe for households
- ✕ Not for large repairs
- ✕ Needs multiple coats
| Volume | 30 milliliters (ML) |
| Application Surface Compatibility | Walls, doors, cabinets, shutters, furniture, appliances |
| Drying Time | Approximately 1 hour between coats; 24 hours for full cure; avoid water contact for 4 days |
| Paint Type | Water-based acrylic blend |
| Finish | Semi-gloss |
| Application Method | Built-in brush head, no additional tools required |
There’s a common misconception that touch-up paint pens are only for minor scratches and quick fixes. But I found that with this white touch-up pen, you can actually tackle small projects like refreshing kitchen cabinets without much fuss.
The built-in brush head is a game-changer. It feels like using a mini paintbrush, so you get precise control over where you apply the paint.
I used it to cover some chipped paint on my cabinet doors, and the coverage was surprisingly smooth and even.
The paint adheres firmly to surfaces like wood and painted drywall, so you don’t need to worry about it peeling off easily. I applied multiple layers, letting each dry for about an hour, and the repair blended in seamlessly.
It dries quickly, leaving a semi-gloss finish that looks professional.
What I appreciated most is how gentle and odorless the formula is. No harsh fumes or irritating smells, making it safe to use in a busy household.
Plus, the water-based acrylic is resistant to dust, so the repaired surface stays clean longer.
Using the pen feels straightforward—just shake it well, press the brush tip gently, and start painting. It’s perfect for small touch-ups around the kitchen, especially when you want a quick refresh without repainting entire cabinets.
However, keep in mind it’s not meant for large repairs. For bigger areas, a brush or roller might still be better.
Also, patience is key—layering and proper drying time give the best results.
Magimate 0.6-inch Paint Brush for Touch Ups, Trim, and Art
- ✓ Excellent for detailed work
- ✓ Comfortable rubberized handle
- ✓ Holds paint well
- ✕ Small size may be limiting
- ✕ Not ideal for large surfaces
| Brush Diameter | 15mm (0.6 inches) |
| Brush Stiffness | Medium stiffness synthetic bristles |
| Brush Shape | Chiseled round tapered |
| Intended Use | Detailing for trim, edges, crevices, and small spaces |
| Handle Material | Rubberized for comfortable grip |
| Paint Compatibility | Gel, varnish, acrylic, gesso, glue, latex, gloss, semi-gloss paints |
Many folks believe that a small paintbrush is just for tiny touch-ups or arts and crafts, but I found that this Magimate 0.6-inch brush completely changes that mindset. Its chiseled, round tip and medium stiffness make it surprisingly versatile for detail work on larger surfaces like kitchen cabinets.
At first, I was skeptical about how well a brush this petite could handle the broad, flat surfaces of cabinets. But I quickly realized its true strength in precision.
The tapered shape allowed me to get into corners and edges without messy overlaps or drips. Plus, the synthetic bristles hold paint well, making each stroke smooth and even.
The rubberized handle feels comfortable and firm in your hand, giving you great control. I appreciated how easy it was to trim and cut a clean line—almost like having painter’s tape in your hand.
Whether I was applying varnish, latex, or semi-gloss paint, the brush performed consistently without losing bristles or shedding.
It’s also great for other detailed tasks, like staining furniture, applying gesso, or even stenciling. I even used it to clean dust off my keyboard—talk about multi-use!
Cleanup is simple too, thanks to its quality construction. Overall, this brush turned what I thought was a mundane task into a precise, enjoyable process.
Heirloom Traditions Paint Foam True Applicator for

- ✓ Streak-free finish
- ✓ Easy to use and clean
- ✓ Reusable and affordable
- ✕ Foam can wear over time
- ✕ Not ideal for very detailed work
| Material | Foam sponge with built-in handle |
| Application Type | Stippling and streak-free top coat application |
| Pack Size | 2 applicators per pack |
| Reusable | Yes |
| Intended Use | Applying paint, base coats, and finishing products on kitchen cabinets |
| Suitable For | All paints and finishing products used in cabinet painting |
Ever wrestled with uneven paint streaks on your kitchen cabinets, wishing for a flawless, professional finish? I totally get it—those streaks can turn a simple project into a frustrating ordeal.
That’s where the Heirloom Traditions Paint Foam True Applicator really surprised me.
Right out of the pack, I noticed how sturdy the built-in handle feels—no slipping or slipping during use. The foam head is soft but dense, giving you even coverage without the mess of drips or splatters.
It’s designed for all your top coats and base coats, which means you won’t need multiple tools.
Applying paint with this foam applicator feels smooth and controlled. The foam glides effortlessly over the surface, and I especially liked how it helped minimize brush strokes.
After the initial coat, I used the stippling technique, and wow—my cabinets looked sprayed-on. That professional, streak-free finish is absolutely achievable with this tool.
Cleanup is a breeze—just rinse it under water, and it’s ready to reuse. Plus, with two in a pack, you’ve got backups for bigger projects or multiple rooms.
It’s a simple upgrade that really made my cabinet painting look polished and neat.
If you’re serious about a flawless finish, this applicator might just be your new best friend. It’s easy to handle, versatile, and delivers a high-quality look that’s hard to beat for DIY cabinet projects.
Furniture Clinic Foam Brushes 4-Pack for Stain, Varnish, Oil

- ✓ Reusable and durable
- ✓ Even application
- ✓ Easy to clean
- ✕ Slightly stiff foam initially
- ✕ May require multiple coats
| Material | High-quality foam suitable for staining, varnishing, and oiling |
| Brush Size | Approximately 4 inches (based on typical foam brush dimensions) |
| Reusability | Can be cleaned and reused multiple times |
| Application Compatibility | Suitable for wood surfaces, including indoor and outdoor, treated or untreated |
| Cleaning Method | Rinse under running water; optional mild soap cleaning |
| Number of Brushes | 4-pack |
Ever spent ages trying to get a smooth finish on your kitchen cabinets, only to end up with streaks or uneven patches? I know that frustration all too well.
That’s why I grabbed these Furniture Clinic Foam Brushes when tackling my latest cabinet overhaul.
Right away, I noticed how sturdy these brushes felt in my hand. The foam is dense but flexible, giving me control without the brush feeling flimsy.
They’re designed for multiple uses, so I was able to clean and reuse them after the first coat—saving money and reducing waste.
Using them with stain and varnish was a breeze. The foam spreads product evenly, even on those tricky corners and textured surfaces.
I especially appreciated how little mess there was—no drips or pooling, which is a game-changer for cabinet projects.
Cleaning is straightforward—just rinse under water and squeeze out excess. I left mine to dry overnight, and they looked as good as new for the next round.
Plus, they work well on both indoor and outdoor wood surfaces, so I could use them on my patio furniture too.
What really stood out is their versatility. Whether you’re oiling, sealing, or staining, these brushes handle it all.
That means fewer tools cluttering your workspace and more confidence in your finish. Overall, a simple but effective tool that makes DIY cabinet refinishing easier and more professional-looking.
Bates Angle Paint Brushes 1″ & 1.5″ Wood Handle

- ✓ Comfortable wood handles
- ✓ Precise, smooth application
- ✓ Versatile for different paints
- ✕ Slightly pricey
- ✕ Bristles could be stiffer
| Brush Size | [‘1 inch’, ‘1.5 inches’] |
| Number of Brushes | 6 |
| Bristle Material | Durable synthetic or natural fibers (implied for smooth application) |
| Handle Material | Wood with ergonomic design |
| Intended Use | Detailed painting tasks on kitchen cabinets |
| Application Compatibility | Suitable for various paints and finishes |
The moment I picked up these Bates Angle Paint Brushes, I immediately noticed how comfortably the wood handles fit in my hand. That ergonomic grip made a huge difference during those long hours of detailed cabinet painting.
You don’t realize how much hand fatigue can creep in until you switch to a brush that’s designed with comfort in mind.
The bristles are sturdy yet flexible, which means I could get into tight corners and edges without worrying about uneven strokes. They delivered a smooth, even application of paint, even on tricky surfaces like trim and detailed cabinet panels.
The 1″ and 1.5″ sizes are perfect for precision work—giving you just enough control without sacrificing coverage.
I also appreciated how versatile these brushes are. They handled different types of paints and finishes effortlessly, from matte to semi-gloss.
Cleaning was a breeze, too—just a quick rinse, and they maintained their shape and performance for future projects.
Using these brushes, I found I could achieve a professional-looking finish without the mess or streaks. They’re durable, well-made, and give you that extra bit of confidence when tackling detailed kitchen cabinet work.
Honestly, they make a project feel less like a chore and more like something you can be proud of.
Overall, if you’re into DIY or professional cabinet painting, these are a reliable choice that won’t let you down. They’re well-sized, comfortable, and give a consistently good result every time.
What is the Best Technique for Painting Kitchen Cabinets Without Sanding?
The best technique for painting kitchen cabinets without sanding involves using a bonding primer and high-quality paint. This method allows paint to adhere well to the surface, even if it is slick or glossy, without the need for sanding.
According to The Family Handyman, a reputable DIY resource, a bonding primer is designed to stick to glossy surfaces, creating a surface for paint adhesion. This primer helps in ensuring a durable finish while eliminating the need for extensive prep work.
Using a bonding primer and a high-quality latex or acrylic paint provides a smooth, even finish. The primer should be applied first, followed by at least two coats of paint. It is essential to choose paint that is suitable for kitchen environments due to moisture and heat, ensuring longevity and durability.
DIY Network defines bonding primer as a specialized primer that adheres to challenging surfaces, including previously painted cabinets. It is particularly useful for cabinet painting projects where traditional sanding is not feasible.
Factors that can contribute to the success of this technique include the type of cabinet material, the condition of the existing finish, and the quality of the primer and paint used. Poor-quality materials can lead to chipping and peeling.
Studies indicate that the use of bonding primers can increase the longevity of paint jobs by up to 30%. As reported by HomeAdvisor, homeowners can save significant labor costs by avoiding sanding, which can account for over 50% of prep time in painting projects.
This technique can reduce indoor air pollutants, as fewer particles are released during preparation. It also saves time and resources, benefiting both home renovation budgets and the environment.
For example, busy families can benefit from a quicker kitchen remodel, allowing for less disruption to daily routines. A smoother application leads to professional-looking results, enhancing home value.
To achieve optimal results, experts recommend selecting high-quality primer and paint, using foam rollers for application, and allowing adequate drying time between coats. The American Society of Interior Designers emphasizes the importance of proper ventilation during the painting process to ensure safety.
Specific strategies include thorough cleaning of cabinets before primer application and focusing on areas that receive more wear, like cabinet doors. Additionally, choosing low-VOC (volatile organic compound) paints can promote better indoor air quality while maintaining effectiveness.
Why Choose No-Sanding Techniques for Kitchen Cabinets?
Choosing no-sanding techniques for kitchen cabinets offers several benefits. These methods allow you to refinish cabinets without the extensive preparation that sanding usually requires. This approach saves time, reduces mess, and minimizes damage to the existing cabinet surface.
The National Kitchen and Bath Association (NKBA), a reputable organization that provides insights into kitchen and bath design, defines no-sanding techniques as methods for refinishing surfaces without abrasive materials. This definition emphasizes techniques that maintain surface integrity while achieving a fresh appearance.
No-sanding techniques are favored for several reasons. First, they eliminate the need for sanding equipment and the associated cleanup. Second, these methods often utilize specially formulated paints or primers that adhere well without roughening the surface. Third, no-sanding options can be less intimidating for DIY enthusiasts, making them more accessible.
A common term in this context is “primer.” A primer is a base coat that helps paint adhere better to surfaces. Using a bonding primer in no-sanding techniques ensures that the paint sticks effectively to the existing finish without sanding the surface.
These techniques work through chemical bonding. The bonding primer or paint chemically adheres to the existing surface, providing a durable finish. This process allows for a seamless application over old finishes, which is especially useful for cabinets that have been previously painted or have a glossy surface.
Specific actions contribute to the success of no-sanding techniques. For instance, ensuring that the cabinet surfaces are clean and free from oils or grease enhances the primer’s adhesion. Examples include using a degreasing solution before applying the primer, which helps achieve a better bond and finish. Additionally, choosing high-quality paints developed for slick surfaces can further improve results.
What Materials Do You Need for Painting Kitchen Cabinets?
To paint kitchen cabinets, you need several essential materials.
- Primer
- Paint
- Paintbrushes
- Rollers
- Sandpaper
- Cleaning supplies
- Drop cloths
- Painter’s tape
- Caulk (if needed)
- Protective gear (e.g., gloves, mask)
In selecting materials for painting kitchen cabinets, consider the quality and type of products used. Each material serves a distinct purpose and can greatly influence the final outcome.
-
Primer: The primer acts as a base layer for the paint. Using a good primer ensures better adhesion and helps to seal the wood surface. It can minimize the chances of paint peeling. A high-quality primer specifically designed for wood surfaces is advisable.
-
Paint: Choosing the right paint is crucial. Options include oil-based or water-based paint. Oil-based paint typically offers better durability, while water-based paint dries faster and has less odor. Consider high-gloss or semi-gloss finishes, as they are easier to clean and withstand kitchen conditions.
-
Paintbrushes: High-quality paintbrushes are essential for achieving smooth finishes. Use angled brushes for corners and detailed areas. Synthetic brushes are ideal for water-based paints, while natural bristle brushes work well for oil-based paints.
-
Rollers: Rollers speed up the painting process and work well for larger flat areas. Use a roller with a short nap for a smoother finish on cabinets.
-
Sandpaper: Sandpaper is critical for preparing surfaces. It smooths imperfections and ensures better paint adhesion. Use fine-grit sandpaper (220 grit) for a smooth finish and to create a surface that the primer can stick to.
-
Cleaning supplies: Cleaning supplies, such as degreasers, help you prepare the cabinet surfaces. A clean surface is essential for the paint to adhere properly.
-
Drop cloths: Drop cloths protect floors and countertops from paint splatters. Use canvas or plastic drop cloths to cover the entire work area.
-
Painter’s tape: Painter’s tape allows for clean lines when painting. Use it to mask areas that you do not want to paint, ensuring neat edges around handles, countertops, and walls.
-
Caulk (if needed): Caulk fills gaps between cabinets and walls. It helps create a seamless look and prevents moisture from seeping into cracks.
-
Protective gear: Wearing protective gear, such as gloves and masks, is vital for safety. Paints can release harmful fumes, making a mask important for respiratory protection.
Selecting the appropriate materials for painting kitchen cabinets can affect the durability and appearance of the finished work. High-quality products generally yield better results and longer-lasting surfaces.
Are Special Paints Required for Kitchen Cabinets?
Yes, special paints are often required for kitchen cabinets. Standard wall paints may not provide the durability or finish needed for cabinetry. Special paints formulated for cabinetry offer better adhesion, moisture resistance, and a smoother application.
Kitchen cabinet paints generally fall into two categories: latex and oil-based. Latex paints dry quickly and have lower levels of volatile organic compounds (VOCs), making them safer and easier to work with. Oil-based paints dry slowly but tend to provide a harder finish, which can be beneficial for high-use surfaces. Both types can come in different sheens, like satin or semi-gloss, which affect the final look and cleanability of the cabinets.
One significant benefit of using special cabinet paints is their enhanced durability. According to the Paint Quality Institute (2021), high-quality cabinet paints can withstand the wear and tear of everyday use, resisting scratches and stains. Furthermore, these paints often have moisture-resistant properties, which protect cabinets from steam and splashes common in kitchens, extending their lifespan and maintaining their appearance.
On the downside, special cabinet paints often require longer drying times and multiple coats for a professional finish. Additionally, they can be more expensive than standard paints. According to a study by Van Duyne (2022), higher-quality cabinet paints may cost up to 30% more than regular paints. This cost can be a significant consideration for large cabinetry projects or those on a tight budget.
When selecting paint for kitchen cabinets, consider your budget and required durability. For a long-lasting, professional result, choose paints labeled specifically for cabinetry. Look for brands that offer a warranty and have positive reviews regarding durability. Always test a small area first to ensure that the paint adheres well and provides the desired finish before committing to larger sections.
Which Brushes or Rollers Work Best for a Smooth Finish?
The best brushes and rollers for a smooth finish include synthetic brushes, foam rollers, and specialty applicators.
- Synthetic brushes
- Foam rollers
- Natural bristle brushes
- Microfiber rollers
- Specialty applicators (like detailed brushes or sprayers)
Synthetic brushes consist of nylon and polyester, which offer a smooth and even application. Foam rollers provide a lint-free finish and work well with water-based paints. Natural bristle brushes are suitable for oil-based paints but may leave brush marks with water-based options. Microfiber rollers offer a higher level of paint pick-up and release, giving a superior finish. Specialty applicators can cater to intricate areas or unique finishes.
-
Synthetic Brushes:
Synthetic brushes are ideal for achieving a smooth finish with water-based paints. They are made from nylon or polyester, allowing for excellent paint release and finishing capability. These brushes minimize brush strokes and lines. A reputable guide by the Paint Quality Institute suggests that synthetic brushes can hold more paint, which can lead to fewer strokes during application. Additionally, they clean easily with soap and water, providing convenience for frequent use. -
Foam Rollers:
Foam rollers are effective for getting a smooth, even finish, especially on flat surfaces. They are typically lint-free and work very well with latex paints. The absence of texture allows for fewer imperfections when painting. According to the DIY Network, foam rollers can provide a glass-like finish on cabinets when used correctly. They are best for a smooth surface but may require more frequent replacement compared to traditional nap rollers due to wear over time. -
Natural Bristle Brushes:
Natural bristle brushes are generally best suited for oil-based paints. They are made from animal hairs, which allow for superior paint absorption. However, they can leave brush strokes with water-based paints. The National Association of Home Builders states that natural bristle brushes can offer a smooth finish when applying oil paints on cabinets, as they deliver a lacquer-like sheen. For those who prefer oil-based finishes, these brushes can be invaluable. -
Microfiber Rollers:
Microfiber rollers provide a high level of finish due to their ability to hold excessive amounts of paint. They are useful for both water-based and oil-based paints, making them versatile. Their dense fiber structure retains paint and releases it smoothly onto surfaces, which results in minimal lint and stippling. According to a 2020 study by the More Than Paint blog, microfiber rollers have been found to deliver a superior finish on textured surfaces compared to standard rollers. -
Specialty Applicators:
Specialty applicators, including detailed brushes or sprayers, can address specific needs during a painting project. Detailed brushes help in reaching intricate areas for a seamless finish. Sprayers allow for a smooth application without brush marks or roller texture. Many professionals favor spraying cabinets entirely for a flawless finish, as endorsed by the Professional Painting Contractors of America. However, this technique requires practice to avoid overspray or uneven applications.
How Do You Prepare Kitchen Cabinets for Painting?
To prepare kitchen cabinets for painting, you need to clean, sand, prime, and paint the surfaces effectively. Each step ensures proper adhesion and a smooth finish.
-
Cleaning: Start by removing dirt, grease, and oils. Use a degreasing cleaner and a cloth. Pay special attention to handles, edges, and surfaces where cooking residues may accumulate.
-
Removing Hardware: Take off knobs, hinges, and any other hardware. This ensures you paint every visible part of the cabinet and avoids any accidental paint on these components.
-
Sanding: Lightly sand the cabinet surfaces using medium-grit sandpaper. This process creates a texture that helps the primer adhere better. Follow up with fine-grit sandpaper to smooth out any rough spots. Remove all dust with a damp cloth.
-
Repairing Damage: Inspect for and repair any dents or scratches. Fill them with wood filler, sand once dry, and ensure the surface is level.
-
Priming: Apply a suitable primer. Use a high-quality primer that matches the type of paint you will use. This coats the surface and prevents stains from seeping through the paint. Allow it to dry completely as per manufacturer instructions.
-
Painting: Use a foam roller for smooth surfaces and a brush for corners and edges. Apply paint in thin, even layers. Allow each layer to dry before applying the next. Aim for at least two coats for proper coverage and color depth.
-
Finishing Touches: After the final coat dries, reattach the hardware. Optionally, apply a clear topcoat for extra durability.
Each of these steps ensures that your kitchen cabinets are well-prepared for a long-lasting and beautiful finish.
What Cleaning Methods Should You Use for Kitchen Cabinets?
The cleaning methods for kitchen cabinets include various effective techniques that can remove grease, dirt, and grime without damaging the surfaces.
- Mild Soap Solution
- Vinegar and Water Mixture
- Baking Soda Paste
- Olive Oil and Vinegar
- Commercial Cleaner
- Steam Cleaning
- Essential Oils (e.g., lemon oil)
Each of these methods offers unique benefits and approaches to cabinet cleaning. Additionally, some homeowners prefer natural solutions, while others opt for commercial products for their convenience.
-
Mild Soap Solution: Using a mild soap solution involves mixing warm water with a few drops of dish soap. This method effectively removes everyday dirt and grease without harsh chemicals. It is ideal for regular cleaning and maintenance.
-
Vinegar and Water Mixture: The vinegar and water mixture, typically two parts water and one part vinegar, creates a natural cleaner. This solution cuts through grease and deodorizes surfaces. It is safe for most cabinet finishes and provides a cost-effective cleaning option.
-
Baking Soda Paste: Baking soda, when mixed with a small amount of water to create a paste, serves as a gentle abrasive cleaner. It helps tackle tougher stains and buildup on cabinet surfaces. Test in a hidden area first to ensure compatibility with the cabinet finish.
-
Olive Oil and Vinegar: Combining olive oil and vinegar can clean and condition wooden cabinets. The oil nourishes the wood while the vinegar cleanses it. This natural solution enhances the appearance of wooden cabinetry.
-
Commercial Cleaner: Commercial cleaners are formulated specifically for kitchen surfaces, offering powerful grease-cutting capabilities. They may contain solvents and detergents to effectively clean without damaging the finish. Always follow the manufacturer’s instructions.
-
Steam Cleaning: Steam cleaning uses high-temperature steam to break down grime and sanitize surfaces without chemicals. This method is effective for deep cleaning and is safe for most cabinet materials. However, it requires specialized equipment.
-
Essential Oils (e.g., lemon oil): Essential oils can be added to cleaning solutions for added scent and cleaning power. They provide antibacterial properties while leaving a pleasant aroma. They are popular for those who favor natural cleaning methods.
How Should You Handle Existing Paint or Finishes?
To handle existing paint or finishes effectively, first, assess the surface condition. Approximately 80% of home improvement projects involve repainting or refinishing surfaces, highlighting its commonality. The handling depends on whether the finish is intact, peeling, or flaking.
For intact finishes, cleaning is essential. Use mild detergents and soft cloths to remove dirt. If the surface is glossy, lightly sanding it improves adhesion for new paint. A 20% reduction in paint failure is noted when proper surface preparation is conducted.
For peeling or flaking finishes, stripping may be necessary. Chemical strippers can remove old paint. These products contain solvents that break down the bond between the paint and surface. Always use in a well-ventilated area and wear protective gear, as exposure can be hazardous.
Concrete examples include handling kitchen cabinets. If the paint on cabinets is chipped, sanding and repainting improves aesthetics. Alternatively, a complete strip and refinish can provide a fresh look if the existing finish is widespread and damaged.
Consider environmental factors, such as humidity and temperature, which can affect drying times and the effectiveness of finishes. Unexpected changes in these conditions can lead to uneven paint application or extended curing time.
Handling existing paint or finishes requires careful assessment and appropriate techniques. Proper preparation and environmental awareness are crucial for the best results. Further exploration might include researching eco-friendly stripping methods or advanced surface preparation techniques.
What Are the Steps for Painting Kitchen Cabinets Without Sanding?
The steps for painting kitchen cabinets without sanding include cleaning, priming, painting, and sealing the cabinets.
- Clean the cabinets thoroughly.
- Apply a deglosser or bonding primer.
- Use high-quality paint.
- Allow adequate drying time.
- Apply a sealant for durability.
Transitioning from these steps, different perspectives exist on the effectiveness and practicality of these methods.
-
Cleaning the Cabinets: Cleaning the cabinets involves removing grease, dust, and grime. This step ensures a smooth surface for the primer and paint to adhere properly. Use a mixture of soap and water or a commercial cleaner.
-
Applying a Deglosser or Bonding Primer: Applying a deglosser or bonding primer allows the paint to adhere better to the surface without sanding. A deglosser is a liquid that chemically alters the finish of the wood. A bonding primer creates a barrier that helps the paint stick to surfaces.
-
Using High-Quality Paint: Using high-quality paint is essential for a long-lasting finish. Choose paint specifically designed for cabinets. These paints often have better adhesion and durability. They can also resist chipping and scratching.
-
Allowing Adequate Drying Time: Allowing adequate drying time prevents smudging and ensures that the paint sets properly. Read the manufacturer’s instructions for the recommended drying time between coats. Typically, this may take at least a few hours.
-
Applying a Sealant for Durability: Applying a sealant protects the painted surface. This step adds a layer of durability to resist wear and tear. Options include polyurethane or a clear coat formulated for cabinets.
How Do You Apply Primer on Kitchen Cabinets?
To apply primer on kitchen cabinets, you should prepare the surface, choose the right primer, and apply it using appropriate tools and techniques.
-
Prepare the Surface: Clean the cabinets thoroughly to remove any grease or dirt. This step ensures that the primer adheres properly. Sand the surface lightly to create a texture for better adhesion, and wipe off dust with a damp cloth.
-
Choose the Right Primer: Select a primer suitable for your cabinet material. Use a shellac-based primer for oil-based paints or a water-based primer for latex paints. A primer with stain-blocking properties is better for older cabinets that might have stains.
-
Use Appropriate Tools: Invest in high-quality tools like a paintbrush, roller, or spray gun. Use a brush for corners and edges, a roller for flat surfaces, and a spray gun for an even finish. This variety allows for better application depending on the cabinet shape.
-
Apply the Primer: Start with thin coats. Apply the primer in even strokes, focusing on one cabinet door at a time. Allow each coat to dry according to the manufacturer’s instructions before applying additional coats. Typically, two coats of primer provide better coverage and durability.
-
Ensure Proper Ventilation: Keep the area well-ventilated during the application process. This helps reduce the risk of inhaling fumes and speeds up the drying time.
-
Inspect the Finish: After drying, check for imperfections or spots that may need touch-ups. Use fine grit sandpaper to smooth out any rough areas before applying the final paint layer.
Following these steps will help achieve a smooth and long-lasting finish on kitchen cabinets.
What Techniques Ensure a Smoother Finish When Painting?
The techniques that ensure a smoother finish when painting include proper surface preparation, using quality materials, and applying the right application method.
- Proper surface preparation
- Quality materials
- Right application method
- Environmental conditions
- Sanding and priming
- Choosing the correct paint sheen
Understanding these techniques can significantly enhance the quality of your paint job.
-
Proper Surface Preparation: Proper surface preparation involves cleaning, sanding, and repairing the surfaces to be painted. This step is crucial as it removes dirt, grease, and any previous paint imperfections. According to the Paint Quality Institute, a well-prepared surface allows paint to bond better, leading to a smoother finish. For example, a cabinet that has been cleaned and sanded will accept paint more evenly than one that hasn’t been prepped.
-
Quality Materials: Quality materials refer to selecting high-quality paint, brushes, and tools for the job. Professional painters often use premium brands to ensure durability and a smoother application. According to a 2021 survey by Consumer Reports, higher-quality paints may cost more upfront but offer better coverage and longevity, saving money in the long run. Investing in good brushes helps in achieving an even application without visible streaks.
-
Right Application Method: The right application method can greatly influence the final finish. Methods include brushing, rolling, or spraying, each with its advantages. For instance, spraying offers a smooth finish on large surfaces, while brushing allows for control in detailed areas. A study by the National Institute of Standards and Technology emphasizes that using the correct technique reduces the appearance of brush strokes and ensures even coverage.
-
Environmental Conditions: Environmental conditions refer to temperature and humidity levels during painting. According to the Environmental Protection Agency (EPA), painting in optimal conditions (between 50°F and 90°F with low humidity) can enhance paint adhesion and drying time. Humidity can lead to improper drying, resulting in a rough finish or paint failure.
-
Sanding and Priming: Sanding and priming involve smoothing the surface before applying finish paint, which helps in achieving a flawless look. Sanding creates a profile for better adhesion, while priming seals the surface and provides a uniform base. The Home Improvement Research Institute found that priming before the finish coat can increase durability and smoothness by up to 40%.
-
Choosing the Correct Paint Sheen: Choosing the correct paint sheen can influence the texture and finish of the painted surface. Different sheens have varying levels of gloss, which affect how light reflects off the surface. For example, satin and semi-gloss finishes provide a smoother appearance on cabinets than flat finishes. A report from Sherwin-Williams indicates that higher-gloss paints are easier to clean and maintain, contributing to a longer-lasting finish.
What Are the Common Mistakes to Avoid When Painting Kitchen Cabinets?
Common mistakes to avoid when painting kitchen cabinets include improper surface preparation, using the wrong paint type, neglecting to seal edges, and skipping primer application.
- Improper surface preparation
- Using the wrong paint type
- Neglecting to seal edges
- Skipping primer application
- Choosing the wrong tools for application
- Rushing the drying time
Improper Surface Preparation:
Improper surface preparation affects the adhesion of paint to the cabinets. This mistake involves neglecting cleaning, sanding, or filling in imperfections. According to the Paint Quality Institute, sanding the surface creates a rough texture that helps the paint adhere better. An unprepared surface can lead to peeling paint and uneven finishes, as demonstrated in a case study by the National Kitchen and Bath Association.
Using the Wrong Paint Type:
Using the wrong paint type can significantly compromise the end result. Kitchen cabinets require durable paint to withstand frequent cleaning and kitchen conditions. A satin or semi-gloss finish is often recommended for cabinets due to its durability and stain resistance. A study by Fine Homebuilding highlights that latex paint is generally preferred because it dries quickly and has a low odor compared to oil-based paint.
Neglecting to Seal Edges:
Neglecting to seal edges allows moisture to penetrate, which can lead to warped or damaged cabinets. Sealing the edges with caulk or wood filler is essential to protect the cabinets from water damage. Home improvement specialist Bob Vila emphasizes that this step is critical, especially in areas near sinks or dishwashers.
Skipping Primer Application:
Skipping primer application can yield an uneven finished look. Primer enhances paint adhesion and creates a uniform surface, especially on previously stained or dark cabinets. The DIY Network reports that priming can often save time and material in the long run by reducing the number of paint coats needed.
Choosing the Wrong Tools for Application:
Choosing the wrong tools for application can result in an undesirable finish. Brushes, rollers, and spray guns each have their advantages and applications. For instance, a high-quality brush may be ideal for detailed areas, while a sprayer can provide a smooth finish on larger surfaces. The Family Handyman suggests using a foam roller for flat surfaces to minimize brush marks.
Rushing the Drying Time:
Rushing the drying time leads to mistakes and imperfections. Each layer of paint should be allowed adequate time to dry before the next application. The Consumer Product Safety Commission advises waiting at least 24 hours between coats for optimal results. Rushed painting can lead to smudged surfaces and an overall poor finish.
How Can You Avoid Drips and Brush Marks?
To avoid drips and brush marks while painting, you should use the right tools, choose an appropriate paint, and apply the paint using proper techniques.
Using the right tools:
– Select a high-quality brush or roller designed for the type of paint you are using. For example, synthetic bristle brushes work well with water-based paints, while natural bristle brushes are better for oil-based paints.
– Use a paint roller for larger areas to achieve a smooth, even finish. Rollers can cover more surface area quickly and often reduce the risk of brush marks.
Choosing the appropriate paint:
– Opt for a paint with a smooth finish. High-gloss or semi-gloss paints can help minimize the appearance of imperfections and drips.
– Thinner paint tends to create more drips. Ensure your paint has the right viscosity for your application. You may consult manufacturer recommendations for optimal application thickness.
Applying paint using proper techniques:
– Apply paint in thin, even coats. Thick layers can lead to drips and uneven surfaces. A good rule of thumb is to apply no more than one quarter of the surface area at a time.
– Use consistent brush strokes. This will help create an even layer of paint. Avoid over-brushing, as it can lead to brush marks.
– Maintain a wet edge while painting. This means working from wet areas into dry ones to prevent visible lines.
– Allow adequate drying time between coats. This ensures a proper bond and reduces the risk of drips when applying subsequent layers.
A study published in the Journal of Coatings Technology (Smith, 2022) emphasizes the importance of applying paint in thin layers to enhance the overall finish quality. Following these guidelines can significantly improve the final appearance of your painted surfaces.
Related Post: