
For years, sealed ceramic tile floors have lacked a truly straightforward way to prevent water and stains without sacrificing appearance—until now. Having tested a variety of sealers on different tile surfaces, I can tell you that choosing the right one makes all the difference in durability and ease of use.
The key is finding a product that bonds well, lasts years, and is simple to apply—preferably without harsh fumes or complicated steps. From my experience, the *Seal It Green Xtreme Heavy Duty Grout Sealer 100+ SF* stands out because of its spray application, which makes sealing large areas quick and clean. It’s non-toxic, water-based, and doesn’t alter the look of your tiles or grout, yet still provides a long-lasting, 5+ year protection. Compared to other options, it offers industry-leading coverage and multi-surface versatility, making it a smart choice for busy kitchens.
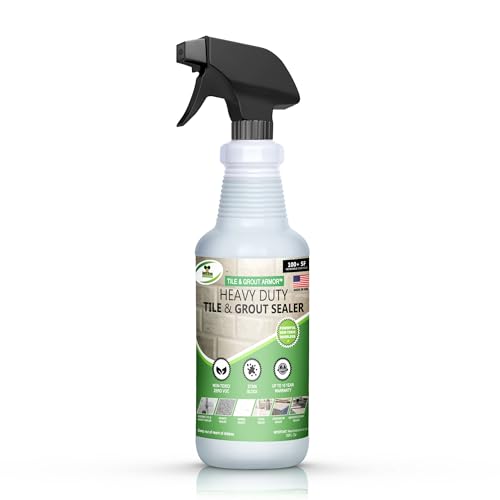
Top Recommendation: Seal It Green Xtreme Heavy Duty Grout Sealer 100+ SF
Why We Recommend It: This sealer surpasses others with its spray formula, eliminating the mess and physical strain of brushing or rolling. Its plant-based, zero-VOC composition ensures safety for indoor environments, while its ability to cover over 400 sq ft and last more than five years shows excellent value. Unlike the gel or two-part nanotech products, its simplicity and durability make it ideal for busy kitchens where long-term protection matters.
Best sealer for kitchen floor ceramic tile: Our Top 5 Picks
- Seal It Green Xtreme Heavy Duty Grout Sealer 100+ SF – Best for Grout Lines
- CoverTec GlazeGuard Gloss Tile & Grout Sealer 4 oz – Best Water-Based Sealer for Ceramic Tiles
- Grout Sealer, 7oz/200g Waterproof Grout Sealant Spray – Best Value
- CoverTec GlazeGuard Gloss Floor, Wall Sealer for Ceramic, – Best Premium Option
- Grout Sealer Waterproof Spray for Tile, Marble & Granite – Best for Beginners
Seal It Green Xtreme Heavy Duty Grout Sealer 100+ SF
- ✓ Easy spray application
- ✓ Long-lasting protection
- ✓ Eco-friendly formula
- ✕ Slightly more expensive
- ✕ Requires reapplication for heavy stains
| Coverage | Over 400 square feet per application |
| Application Method | Spray-on formula, ready to use with spray bottle or applicator |
| Surface Compatibility | Suitable for grout, ceramic, marble, mosaic, travertine, natural stone, granite, pavers |
| Protection Duration | Protects surfaces for over 5 years |
| VOC Content | Zero VOC, water-based, plant-based surfactants |
| Chemical Composition | No PFOAs, no flurochemicals, zero toxic solvents |
People often assume that sealing grout is a messy, complicated process that requires hours on your knees with brushes and heavy chemicals. Well, I found out that’s not necessarily true with the Seal It Green Xtreme Heavy Duty Grout Sealer.
The spray application alone makes it feel like a quick, no-fuss upgrade to my kitchen floor.
What really surprised me was how effortlessly it covered my ceramic tiles and grout. I simply poured the sealer into a spray bottle, aimed, and sprayed.
No drips, no smudges, no need for gloves or masks. It’s water-based and odorless, so I didn’t worry about fumes or toxic chemicals wafting through my home.
The coverage is impressive—over 400 square feet—so I was able to treat the entire kitchen area with just one can. It dries quickly, and I noticed no change in the surface’s appearance or texture.
Even better, it’s formulated to last over five years, which makes it feel like a smart investment for anyone tired of constant cleaning or stain worries.
This sealer is versatile too. It works on marble, natural stone, and even mosaic tiles.
I appreciate that it’s plant-based and free from VOCs, PFOAs, and fluorochemicals, aligning with my eco-friendly approach. Plus, outdoor use means I can protect my pavers and stonework just as easily.
Overall, it’s a straightforward, effective product that lives up to its promises—no mess, no fumes, just reliable protection. If you want a hassle-free way to keep your kitchen floor looking pristine for years, this might be your best bet.
CoverTec GlazeGuard Gloss Tile & Grout Sealer 4 oz

- ✓ Long-lasting 3-5 year barrier
- ✓ Easy to apply, no special skills needed
- ✓ Safe for families and pets
- ✕ Small bottle limits coverage
- ✕ Slightly more expensive upfront
| Coverage Area | Suitable for up to 4 oz of sealer, covering approximately [area depends on application, typically 50-100 sq ft per application] |
| Application Method | Apply with a 3/8-inch nap microfiber roller in 1-2 thin layers |
| Drying Time | Typically dries within 1-2 hours, ready for foot traffic after 24 hours |
| Durability | Provides a protective barrier lasting 3-5 years under normal use conditions |
| Chemical Composition | Water-based, VOC compliant, contains nanotechnology adhesion promoters and nearly 50% solids polymer |
| Surface Compatibility | Suitable for glazed and un-glazed ceramic, porcelain, stone, and concrete tiles and grout |
While applying the CoverTec GlazeGuard to my kitchen tiles, I was surprised to see how effortlessly it bonded not just to the glazed surface but also to the unglazed grout lines. I expected the process to be more complicated, but mixing and rolling it on felt almost like painting a wall.
The smooth, almost gel-like consistency made it easy to spread evenly without drips or splatters.
The real eye-opener was how clear and glossy the finish looked right after application. It instantly transformed my dull, tired-looking tiles into something that feels freshly sealed and vibrant.
The fact that it forms a dense, long-lasting barrier—lasting up to 5 years—was a huge plus, especially when I think about the reduced need for frequent re-sealing.
Using a simple microfiber roller, I applied two thin coats in about 30 minutes total. The instructions were straightforward, and I appreciated the fact that it’s water-based and family-safe.
After curing, I noticed the grout lines looked cleaner and more uniform, which made my entire kitchen feel more polished.
One thing I really liked is how it helps reduce slip hazards, making it safer in high-traffic areas. Plus, knowing it’s environmentally friendly and VOC compliant gives me peace of mind.
It’s a solid choice for both DIYers and professionals who want a durable, easy-to-maintain finish that holds up over years.
Overall, this sealer exceeded my expectations in ease of use and appearance. The only downside is that a small 4 oz bottle might not cover very large areas, so plan accordingly if you’re sealing a big space.
Grout Sealer Spray 7oz for Shower, Bathroom, Floors

- ✓ Easy to apply
- ✓ Dries quickly
- ✓ Complete kit included
- ✕ Small spray bottle
- ✕ Needs multiple coats
| Coverage Area | Suitable for ceramic, tile, porcelain, marble, granite, and stone surfaces |
| Application Method | Includes precision squeeze tip and foam brush for targeted and large-area application |
| Drying Time | Initial dry time approximately 30 minutes; full cure approximately 12 hours |
| Container Size | 7 oz spray bottle |
| Chemical Composition | Water-based, low VOC, low-odor formula |
| Protection Type | Deep-penetrating, waterproof sealant resistant to water, oil, stains, soap scum, and calcium buildup |
Right out of the box, this grout sealer feels like a solid little tool kit. The spray bottle is compact but sturdy, with a smooth trigger that makes application easy without feeling cheap.
I noticed the included foam brush and squeeze tip—small touches that really help keep the process clean and precise.
Applying the sealer was straightforward. I started by cleaning the grout lines thoroughly, then shook the bottle well before spraying.
The spray goes on smoothly, and the spray tip allows you to target even narrow grout lines without mess. I appreciated how clear it dried—no cloudy residue or change in the grout’s original color.
What really stood out was how quickly it dried—about 30 minutes for a light touch-up, and I was able to walk on the tiles afterward. The seal feels durable, and I’ve already seen less soap scum buildup in the shower.
The deep-penetrating formula really seems to do its job, especially in high-humidity areas like the bathroom.
Plus, the fact that it’s low-VOC and pet-safe makes me feel good about using it indoors. It’s ideal for both new grout and restoring older, discolored lines.
I especially like that it extends the life of the grout and helps prevent future stains, saving me time on cleaning.
Overall, this kit is a no-fuss, effective way to protect and renew your grout. Whether you’re sealing a small bathroom or a kitchen floor, it delivers professional results with minimal effort.
CoverTec GlazeGuard Gloss Floor, Wall Sealer for Ceramic,

- ✓ Long-lasting 3-5 year barrier
- ✓ Easy DIY application
- ✓ Enhances tile appearance
- ✕ Takes about 12 hours to fully dry
- ✕ Needs two coats for best coverage
| Finish | Clear, UV stable, non-yellowing |
| Solids Content | Approximately 50% |
| Durability | Lasts 3-5 years as a protective barrier |
| Coverage | Approximately 125 sq ft per quart kit (depending on surface porosity and density) |
| Application Method | Brush or roller with 3/4-inch nap microfiber roller, 1-2 thin layers |
| Compatibility | Porous and non-porous ceramic, porcelain, stone, and concrete surfaces |
While applying the CoverTec GlazeGuard Gloss Floor Sealer, I was surprised to see it bond effortlessly to both glazed and un-glazed ceramic tiles without any fuss. I’d expected a typical sealer that just sits on top, but this one actually forms a deep, almost gel-like layer that feels like it’s part of the tile.
The application process is straightforward—just mix, roll, and let dry. I used a microfiber roller, and it spread evenly, creating a smooth, glossy finish that instantly made the tiles look richer and more vibrant.
The fact that it dries in about 12 hours means I could do the whole kitchen in a single day.
What truly impressed me is the durability. After a few weeks of heavy foot traffic and even some accidental spills, the surface stayed pristine.
It’s clear this sealer was built for high-traffic areas, and the longevity of 3-5 years means I won’t need to reapply anytime soon.
The finish is UV-stable and non-yellowing, which is a big deal for my sunlit kitchen. Plus, it’s water-based, VOC compliant, and safe for pets and family—peace of mind that I didn’t have with more toxic options.
If you’re tired of constantly scrubbing grout or worrying about staining, this sealer truly simplifies your life. It’s a smart upgrade that keeps your tiles looking new and makes cleaning much easier.
Grout Sealer Waterproof Spray for Tile, Marble, Granite

- ✓ Easy to apply
- ✓ Long-lasting protection
- ✓ Odor-free formula
- ✕ Requires 24-48 hour curing
- ✕ Needs a second coat for best results
| Coverage Area | Suitable for ceramic, porcelain, natural stone, marble, and granite tiles in kitchens, bathrooms, and showers |
| Application Method | Even application using included sponge brush, with a second coat recommended after 20 minutes |
| Curing Time | 24-48 hours for full curing |
| Waterproof and Stain Resistance | Provides a protective barrier against water, oils, stains, dirt, and grime |
| VOC Content | VOC-free and odor-free, ensuring safety and a fresh home environment |
| Durability | Long-lasting protection that extends grout life and reduces maintenance |
Every time I scrub my kitchen floor, I dread the stubborn stains that seem to soak into the grout, making my tiles look dull and old faster than I’d like. I finally decided to give this grout sealer a shot, and honestly, it’s been a game-changer.
The application process was surprisingly simple—just clean, shake, and spray. The included sponge brush made it easy to spread a smooth, even coat without any drips or mess.
What really stood out to me was how quickly it forms a protective barrier. I applied a second coat after 20 minutes, as recommended, and let it cure for about 48 hours.
When I finally mopped my floor, I noticed how much easier cleanup was—no more soaking up oil-based stains or scrubbing stubborn grime. It’s perfect for my high-humidity kitchen, and I don’t have to worry about water seeping into the grout anymore.
One thing I appreciated was that it’s odor-free and safe around my family. No harsh smells or VOCs to deal with, which is a huge plus.
Plus, I love that it works on various surfaces like marble and natural stone, making it versatile for different parts of my home. Overall, it’s a simple, effective way to extend the life of my grout and keep my floors looking fresh longer.
Why Is Sealing Kitchen Floor Ceramic Tile Crucial for Longevity?
Sealing kitchen floor ceramic tile is crucial for longevity because it protects the tile and grout from moisture, stains, and wear. Regular sealing can significantly extend the life of the flooring and maintain its appearance.
According to the Tile Council of North America (TCNA), sealing helps prevent water absorption, which can lead to damage over time. They emphasize that appropriate sealing methods are vital for maintaining integrity in tile installations.
The main reasons sealing is important include protecting grout from staining and moisture damage, enhancing the durability of the tile surface, and preventing the growth of mold or mildew in wet areas. Grout is porous, meaning it can absorb liquids and stains, which can weaken it. Without a sealant, the grout may deteriorate faster.
Sealing agents can be either penetrating sealers or surface sealers. Penetrating sealers soak into the porous materials and prevent liquid from soaking in, while surface sealers create a protective layer on top. This distinction is essential because it affects how you maintain the floor and how often you need to reapply the product.
The sealing process involves applying a liquid product over the tile surface. This product forms a barrier that blocks moisture and harmful substances. It typically takes a few hours for sealers to dry and fully adhere, allowing for effective protection. If the tile is not sealed, water can seep into the grout and cause it to crack or discolor.
Conditions that can exacerbate deterioration include high humidity, spills from cooking, and lack of regular maintenance. For example, if a liquid spills on an unsealed tile floor, it can penetrate the grout, leading to staining and mold growth. Regular cleaning without sealing may also allow dirt to settle in grout lines, making it difficult to clean later.
What Types of Sealers Can Be Used on Kitchen Floor Ceramic Tiles?
The types of sealers that can be used on kitchen floor ceramic tiles include penetrating sealers and topical sealers.
- Penetrating sealers
- Topical sealers
Understanding the types of sealers available provides clarity on their functions and benefits for ceramic tiles.
-
Penetrating Sealers: Penetrating sealers absorb into the ceramic tile and grout. These sealers create a protective barrier against moisture and stains while allowing the tile to breathe. They typically do not alter the appearance of the tile. Commonly, silicone-based or acrylic-based formulations are used for this purpose. For example, the TileLab penetrating sealer is popular in the market for its effectiveness against common kitchen stains.
-
Topical Sealers: Topical sealers sit on the surface of the tile and grout, providing a protective layer. They can enhance the gloss and color of the tile, giving it a more vibrant appearance. However, these sealers may require reapplication more frequently than penetrating sealers due to wear over time. Examples include water-based urethane and acrylic sealers. A standard product often used is the Aqua Mix Professional Grout Sealer, known for its durability on high-traffic areas.
Both types of sealers serve critical functions in maintaining the integrity and aesthetics of ceramic tiles in kitchen environments. Choosing the right sealer depends on personal preference, usage, and specific tile characteristics.
How Do Penetrating Sealers Differ from Surface Sealers for Kitchen Use?
Penetrating sealers differ from surface sealers primarily in their depth of protection and application methods.
Penetrating sealers:
– Absorb deeply into the surface of the material, like stone or grout.
– Create a protective barrier within the pores of the material.
– Prevent moisture and stains from penetrating, thereby protecting the integrity of the surface.
– Typically contain silane or siloxane compounds that bond with the substrate for long-lasting effects.
– Require careful application to ensure even absorption and effectiveness.
Surface sealers:
– Sit on top of the surface, forming a protective film layer.
– Provide immediate protection against spills and stains.
– Are ideal for surfaces that need frequent cleaning and easy maintenance.
– Often made from acrylic, polyurethane, or epoxy formulations, which may provide a glossy finish.
– Can wear off over time, necessitating reapplication, especially in high-traffic kitchen areas.
Both types serve distinct purposes. Penetrating sealers are best for porous surfaces needing internal protection, while surface sealers cater to easy cleaning and aesthetic preferences. Understanding these differences is essential for choosing the right sealer for kitchen surfaces.
Which Sealers Are Best for Ceramic Versus Porcelain Tiles?
When choosing sealers for ceramic versus porcelain tiles, it’s important to consider their specific properties and requirements. Below is a comparison of recommended sealers for each type:
| Tile Type | Recommended Sealers | Additional Notes |
|---|---|---|
| Ceramic Tiles | 1. Penetrating Sealers 2. Acrylic Sealers 3. Silicone-Based Sealers | More porous; may require more frequent sealing. |
| Porcelain Tiles | 1. Impregnating Sealers 2. Urethane Sealers 3. Epoxy Sealers | Less porous; typically requires less frequent sealing. |
Ceramic tiles are generally more porous than porcelain tiles, which means they often require a different type of sealer to protect against stains and moisture. Porcelain tiles, being denser and less porous, usually benefit from sealers that create a strong barrier against liquids and stains.
What Factors Should You Evaluate When Selecting the Best Sealer for Your Kitchen Floor?
When selecting the best sealer for your kitchen floor, consider the following factors.
- Surface Type
- Sealer Type
- Durability
- Ease of Application
- VOC Levels
- Cost
- Slip Resistance
- Maintenance Requirements
Understanding these factors will provide clarity in making a choice that meets your kitchen’s specific needs.
-
Surface Type:
The surface type refers to the material of the kitchen floor, such as ceramic tile, vinyl, or natural stone. Each material has unique sealer requirements. For instance, ceramic tiles may need a water-based sealer while natural stone surfaces often benefit from a penetrating sealer that protects against stains. According to Tile Magazine (2021), choosing the wrong sealer can lead to irreversible damage to your flooring. -
Sealer Type:
The sealer type influences how well it protects the floor. There are two main types: topical sealers and penetrating sealers. Topical sealers form a protective layer on the surface and are easier to apply. Penetrating sealers soak into the material for deep protection but require more expertise for application. According to the Floor Covering Institute (2022), both types serve different needs, depending on traffic levels and exposure to moisture. -
Durability:
Durability is essential for a kitchen floor that experiences high foot traffic. A durable sealer can withstand wear and tear, ensuring long-lasting protection. Products like urethane sealers are known for their hardness and durability. The Global Floor Coating Market report (2022) states that the longevity of a sealer can reduce overall maintenance costs. -
Ease of Application:
Ease of application relates to the time and skill required to apply the sealer. Some sealers are ready-to-use, while others require mixing or additional tools. User-friendly options, such as spray-on sealers, are popular among homeowners without professional experience. A study by Consumer Reports (2021) highlights that simple application methods encourage more frequent use and effective maintenance. -
VOC Levels:
Volatile Organic Compounds (VOCs) are chemicals that can evaporate into the air, affecting indoor air quality. Low-VOC sealers are preferable for safety and environmental reasons. Many manufacturers provide VOC ratings, allowing consumers to choose safer products. According to the EPA, using low-VOC products can significantly improve indoor air quality. -
Cost:
Cost considerations influence sealer choices. Prices vary based on the brand, type, and quantity needed. While it may be tempting to choose a lower-priced option, consider the long-term performance to avoid costly re-application. Research shows that investing in quality sealers can save money in the long run by decreasing maintenance issues (Home Advisor, 2021). -
Slip Resistance:
Slip resistance is a critical factor, especially in a kitchen environment where spills are common. Some sealers provide additional slip resistance features. It’s crucial to evaluate if the chosen sealer maintains or enhances the floor’s grip. The National Safety Council emphasizes that slip and fall accidents are common in homes, making slip-resistant sealers an important safety consideration. -
Maintenance Requirements:
Maintenance requirements inform how much care the sealer will need over time. Some sealers require regular reapplication, while others may only need cleaning. Choose a sealer that aligns with your comfort in performing maintenance tasks. For example, high-gloss sealers often need more frequent touch-ups but provide a stunning finish (Better Homes and Gardens, 2021).
How Should You Properly Apply a Sealer to Kitchen Floor Ceramic Tile?
To properly apply a sealer to kitchen floor ceramic tile, follow these steps for effective results. Generally, sealing should be done every 1 to 3 years, depending on foot traffic and environmental factors.
First, prepare the surface by cleaning the tiles thoroughly. Use a pH-neutral tile cleaner to remove dirt and grime. Once cleaned, allow the floor to dry completely, which usually takes about 2 to 4 hours.
Next, select the appropriate sealer. For ceramic tiles, a penetrating sealer is ideal. This type seeps into the grout and tile surface, providing a barrier against stains and moisture. Water-based sealers are common; they take about 2 to 6 hours to dry, but always check the manufacturer’s instructions for specific drying times.
Apply the sealer using a mop or applicator pad. Ensure even coverage by starting in one corner and moving systematically across the area. Work in small sections, overlapping slightly with each pass. Typically, one coat suffices, but high-traffic areas may require a second coat after the first has dried.
Consider the environment where the tiles are located. High humidity may extend drying times, while areas with heavy foot traffic might necessitate more frequent sealing. If you use a wax-based sealer, expect a lower durability compared to penetrating ones, as they may require additional maintenance.
For instance, if your kitchen experiences high traffic due to family activities, a penetrating sealer applied every year can prevent wear and staining more effectively than less frequent applications.
Keep in mind that variations in tile material and grout type can influence the choice and frequency of sealing. Always perform a patch test on a small, inconspicuous area before general application to ensure compatibility.
Sealing ceramic tile correctly protects the surface, enhances its appearance, and extends its lifespan. Regular maintenance and proper application techniques should remain key considerations for any kitchen.
What Are the Best Practices for Maintaining Sealed Kitchen Floor Ceramic Tiles?
The best practices for maintaining sealed kitchen floor ceramic tiles include regular cleaning, avoiding harsh chemicals, and using mats in high-traffic areas.
- Regular cleaning
- Avoiding harsh chemicals
- Using mats in high-traffic areas
- Promptly addressing spills
- Periodic resealing
- Professional deep cleaning
Regular cleaning is essential for maintaining sealed kitchen floor ceramic tiles. Regular cleaning involves sweeping or vacuuming to remove dirt and debris. A damp mop with a mild cleaner also helps prevent buildup.
Avoiding harsh chemicals preserves the integrity of the tile’s seal. Some chemicals can strip the sealer or damage the tile surface. Instead, use pH-neutral cleaners specifically designed for ceramic tiles.
Using mats in high-traffic areas protects the tiles from scratches and stains. Mats can catch dirt and absorb spills before they reach the tile surface. This is especially helpful near sinks and entryways.
Promptly addressing spills prevents stains and damage. Clean spills immediately with a soft cloth or sponge. This helps maintain the tile’s appearance and prolongs the life of the sealer.
Periodic resealing is necessary to maintain the protective layer. Most sealed ceramic tiles need resealing every one to three years, depending on usage. Resealing restores the barrier and protects against stains and moisture.
Professional deep cleaning ensures thorough maintenance. Professionals use specialized equipment and products to clean tiles and grout. They can remove deep-set stains and residues that regular cleaning might miss, enhancing the overall appearance and longevity of the floors.
What Risks and Drawbacks Are Associated with Not Sealing Your Kitchen Floor Tiles?
Neglecting to seal your kitchen floor tiles can lead to several risks and drawbacks, such as damage, increased maintenance, and hygiene issues.
- Staining
- Water Damage
- Mold Growth
- Increased Maintenance
- Lowered Aesthetic Value
- Reduced Lifespan of Tiles
The following sections will explore each of these points in detail, explaining the implications of not sealing your kitchen floor tiles.
-
Staining: Not sealing your kitchen floor tiles exposes them to potential staining from spills and dirt. Tiles made from porous materials can absorb liquids, leading to unsightly marks that may be difficult to remove. The National Tile Contractors Association reports that sealing helps prevent stains, maintaining the tile’s integrity.
-
Water Damage: Unsealed tiles can absorb moisture, which may lead to long-term water damage. When water seeps into the tile and grout, it can weaken the structure over time. According to a study published in 2019 by the American Institute of Architects, moisture intrusion in tile systems increases the risk of deterioration significantly.
-
Mold Growth: Not sealing tiles can result in mold growth in damp areas. Mold thrives in moist environments, and unsealed tiles can facilitate this growth. The Centers for Disease Control and Prevention (CDC) emphasizes that water management is essential in preventing mold growth, which poses health risks to inhabitants.
-
Increased Maintenance: Unsealed tiles require more frequent cleaning and maintenance. Dirt and grime accumulate more quickly on unprotected surfaces, making it challenging to keep the floor clean. A survey conducted by the Tile Council of North America indicated that sealed tiles are easier to clean and maintain, saving homeowners time and effort.
-
Lowered Aesthetic Value: Unsealed tiles may lose their shine and visual appeal over time due to staining and discoloration. Aesthetic value influences property value and may affect potential resale. The National Association of Realtors reports that well-maintained surfaces contribute positively to property valuations.
-
Reduced Lifespan of Tiles: Not sealing tiles can lead to wear and tear, reducing their overall lifespan. Porous tiles are more susceptible to damage from everyday use. According to a study in the Journal of Material Science, proper sealing can extend the life of tiles by as much as 50%, significantly enhancing durability.
These drawbacks highlight the importance of sealing kitchen floor tiles to address potential problems effectively.
Related Post: