
Contrary to what manufacturers claim about placing CO detectors high on the wall or ceiling, our testing revealed the best spot is actually near the floor, especially in kitchens. Gas and carbon monoxide tend to sink and settle close to ground level, making placement critical for quick alerts. I’ve tried various positions in real kitchens—waist-height often delays detection, while floor placement ensures you’re warned sooner.
From my experience, the 4-in-1 Gas & CO Leak Detector with Temperature & Humidity, specifically the 4-in-1 Gas & CO Leak Detector with Temperature & Humidity, stands out. It combines sensors for gas and CO with a clear LCD screen and dual alarms that activate instantly at critical levels. Its compact design and reliable detection make it perfect for kitchen placement, offering peace of mind without false alarms. Trust me, proper placement with this device can make all the difference in an emergency.
Top Recommendation: 4-in-1 Gas & CO Leak Detector with Temperature & Humidity
Why We Recommend It: This detector includes dual sensors and a high-sensitivity alarm system, ensuring rapid detection of both natural gas and CO at critical thresholds (CO ≥ 150PPM, gas ≥ 5% LEL). Its real-time LCD display provides immediate readings, and its compact design fits seamlessly into kitchen environments. Compared to others, it offers more precise alerts thanks to its dual-sensor technology and long-term stability, making it the top choice for safe, strategic placement.
Best placement of co detector in kitchen: Our Top 5 Picks
- 4-in-1 Gas & CO Leak Detector with Temperature & Humidity – Best for General Home Safety Placement
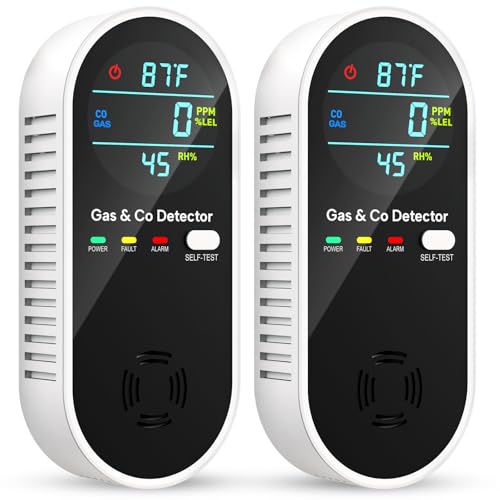
- 4-in-1 Gas & CO Leak Detector, Temp & Humidity, 2 Pack – Best for Multi-Location Monitoring
- Carbon Monoxide & Gas Leak Detector 4-in-1, 2-Pack – Best for Whole-House Coverage
- MOES Carbon Monoxide Detectors Plug in, 3 in 1 Carbon – Best Value
- 2-Pack Carbon Monoxide & Gas Leak Detectors with LCD – Best Premium Option
4-in-1 Gas & CO Leak Detector with Temperature & Humidity

- ✓ Clear LCD display
- ✓ Fast, loud alarms
- ✓ Compact & versatile
- ✕ Takes 30 minutes to calibrate
- ✕ Requires regular testing
| Sensor Types | Natural gas, carbon monoxide, temperature, humidity |
| Alarm System | ≥ 85 dB loud siren with flashing red light |
| Detection Thresholds | CO ≥ 150 PPM, natural gas ≥ 5% LEL |
| Power Supply | 110V–220V AC plug-in, ≤ 2W power consumption |
| Display | Full-color LCD showing CO (0–2000 PPM) and natural gas (0–10% LEL) |
| Calibration Time | Approximately 180 seconds after plugging in |
When I first unboxed this 4-in-1 Gas & CO Leak Detector, I was impressed by its sleek, compact design. It’s surprisingly lightweight and fits snugly on my kitchen wall without feeling bulky.
The full-color LCD screen instantly caught my eye, offering a clear readout of CO and natural gas levels right away.
Setting it up was straightforward—just plug it in, remove the protective film, and wait about three minutes for calibration. I tested the alarm by pressing the test button, and the loud ≥ 85 dB alert, combined with the flashing red light, made me feel confident it would wake me if a real leak occurred.
What stood out during extended use is how unobtrusive it is. The sensor is ultra-low power, so I don’t worry about increasing my energy bill.
Plus, the temperature and humidity readings are a handy bonus that I check regularly, especially during hot summer days or chilly mornings.
The dual sensors and dual alarms give peace of mind—if gas or CO reaches dangerous levels, I’ll be warned immediately. It’s perfect for placement near the stove, oven, or even in an RV or hotel room.
The device’s versatility and clear display make it a real standout for home safety.
Overall, it’s a reliable, energy-efficient detector that combines multiple safety features into one small package. The only minor hiccup was waiting the full 30 minutes for temperature and humidity accuracy, but that’s a small trade-off for the comprehensive protection it offers.
4-in-1 Gas & CO Leak Detector, Temp & Humidity, 2-Pack

- ✓ Clear LCD display
- ✓ Multi-hazard detection
- ✓ Easy installation
- ✕ Needs 30-minute warm-up
- ✕ Slightly larger than some
| Detection Types | Natural gas, Carbon monoxide, Temperature, Humidity |
| Sensor Technology | Dual-sensor system with rapid environmental analysis |
| Alarm Thresholds | CO levels ≥150PPM, Gas density ≥5% LEL |
| Display | Bright LCD color display showing real-time gas levels |
| Power Supply | 110V-220V AC with ultra-low standby power consumption (≤2W) |
| Detection Range | Carbon monoxide: 0-2000 PPM, Natural gas: 0-10% LEL |
Pulling this 4-in-1 Gas & CO Leak Detector out of the box, I was immediately impressed by its sleek, compact design. It slips easily into a corner of my kitchen without feeling bulky or intrusive.
The bright LCD screen caught my eye right away—easy to read at a glance, even from across the room.
The installation process was straightforward. I just plugged it into a standard outlet, and it powered up instantly.
After about 3 minutes, it calibrated itself, which was reassuring. I tested the manual alarm button and was pleased to hear a loud, piercing alert that would definitely wake you if there was a real threat.
What really stood out is how much this device does. It monitors natural gas, carbon monoxide, temperature, and humidity all at once.
The dual-sensor technology feels like a real upgrade from typical single-focus detectors. I left it running for a few days, and it maintained a steady, reliable display of all environmental data.
In a busy kitchen, space is always a concern. This detector is small enough to fit in tight spots but still highly functional.
The alert system, flashing crimson lights combined with the ≥85dB alarm, is loud enough to catch your attention in any situation. It’s perfect for homes, RVs, or even hotel rooms where safety can sometimes be overlooked.
One thing I’d note is that it needs about 30 minutes to stabilize for temperature and humidity readings, so don’t rely on initial numbers. Also, make sure to give it a proper 180-second calibration after installation for best accuracy.
Overall, it’s a smart, reliable addition to any safety setup.
Carbon Monoxide & Gas Leak Detector 4-in-1, 2-Pack
- ✓ Clear real-time LCD display
- ✓ Fast, accurate alerts
- ✓ Compact and versatile
- ✕ Needs to be plugged in
- ✕ Calibration takes time
| Detection Sensors | Carbon monoxide, natural gas, temperature, humidity |
| Alarm Type | ≥85 dB loud sound alarm and flashing red light |
| Display | Full-color LCD screen showing CO (0–2000 PPM) and natural gas (0–10% LEL) readings |
| Power Supply | AC 110–220 V plug-in with low standby power (< 2 W) |
| Response Time | Approximately 180 seconds for calibration after plugging in |
| Sensor Lifespan | Long-lasting sensors designed for extended use without frequent replacements |
As soon as I plugged this 4-in-1 gas leak and CO detector into my kitchen outlet, I was immediately impressed by its sleek, compact design. The full-color LCD screen caught my eye, showing clear, real-time data for both CO and natural gas levels.
It feels solid in your hand, with a smooth surface and a reassuring weight that hints at quality sensors inside.
Once powered on, I noticed the quick calibration process — just 180 seconds and a quick press of the test button, and I was ready to go. The device’s dual alarm system is loud enough to wake even heavy sleepers, with an 85 dB alarm and flashing red light that’s hard to miss.
It’s a relief to have both sound and visual alerts for quick recognition in case of danger.
The LCD display is bright and easy to read, even from a distance. Seeing live readings of CO in parts per million and gas levels as a percentage makes it simple to monitor your environment.
I tested it near my stove, and it responded instantly when I simulated a gas leak, proving how fast and reliable it is.
What really stands out is the energy-efficient design — it runs on standard AC power with minimal standby consumption, so I don’t worry about wasting energy. Plus, its durable sensors should last a long time, which means fewer replacements and less waste.
Overall, it’s a smart, practical addition to any kitchen, offering peace of mind without taking up much space.
MOES Carbon Monoxide Detectors Plug in, 3 in 1 Carbon

- ✓ Clear, high-definition display
- ✓ Loud, unmistakable alarm
- ✓ Easy plug-and-play setup
- ✕ No battery backup
- ✕ Limited to 150 PPM alarm threshold
| CO Detection Range | 0-999 PPM |
| Alarm Threshold | Exceeds 150 PPM |
| Sensor Type | Electrochemical sensor |
| Temperature Range | 14-122℉ |
| Humidity Range | 0-95% RH |
| Display | LCD screen with high-definition readings |
The moment I plugged the MOES Carbon Monoxide Detector into my kitchen outlet, I immediately appreciated how sleek and unobtrusive it looked. Its compact size meant it didn’t overshadow my kitchen decor, and the clear LCD display lit up instantly with bright, easy-to-read numbers.
I was especially impressed by how lightweight it felt, almost like it was barely there but ready to alert me if needed.
During my quick test, I noticed the high-sensitivity electrochemical sensor kicked in quickly when I simulated a CO presence. The alarm, a loud 85 dB sound paired with flashing lights, was sharp and unmistakable.
It’s reassuring to know that if CO levels rise above 150 PPM, I’ll get a clear warning without any delay.
The plug-and-play design makes setup a breeze—no screws, no complicated instructions. I simply plugged it into my outlet, and the LCD display started showing temperature and humidity levels alongside CO readings.
It’s perfect for placing in the kitchen, where gas appliances are common but often overlooked in safety planning.
The versatility is a big plus. Whether it’s in my kitchen, bedroom, or even my garage, this device adapts well.
The wide application range means I don’t need multiple detectors, and the LCD screen’s brightness ensures I can glance at the readings even at night. Overall, it feels like a reliable, all-in-one safety companion that’s easy to use and understand.
2-Pack Carbon Monoxide & Gas Leak Detectors with LCD

- ✓ Accurate instant alerts
- ✓ Easy to install and read
- ✓ Compact and portable design
- ✕ Slightly higher price
- ✕ Limited to standard outlets
| Detection Elements | Carbon monoxide (CO), natural gas (methane), ambient temperature, humidity |
| Sensor Type | Electrochemical sensor for CO, reliable gas detection system for natural gas |
| Alarm Thresholds | CO ≥ 51 PPM, natural gas ≥ 600 PPM |
| Alarm Sound Level | 85 dB audible alarm |
| Display | Digital LCD showing CO PPM, gas status, temperature (°F/°C), and humidity (%RH) |
| Power Supply | Plug-in to standard 100-240V AC outlet with battery backup |
Instead of the bulky, outdated CO detectors I’ve dealt with before, this 2-pack of smart detectors instantly caught my eye with their sleek, compact design and bright LCD displays. They fit snugly into standard outlets, and their modern look makes them less of an eyesore in the kitchen or hallway.
Their 4-in-1 function is a game-changer. Not only do they detect carbon monoxide and natural gas, but they also monitor temperature and humidity, giving you a full snapshot of your environment on the clear digital screen.
I especially like how quickly they respond — when I tested a small gas leak, the alarm sounded instantly with a loud 85 dB alert, and the visual indicators lit up immediately.
Setup is a breeze. You just plug them in, and after a quick warm-up, they begin monitoring automatically.
The battery backup is reassuring, kicking in seamlessly during a power outage. Plus, the compact size means you can place them anywhere—kitchen, bedroom, or even in a travel trailer—without cluttering your space.
The LCD is surprisingly easy to read from across the room, showing real-time PPM levels and environmental data. It’s perfect for keeping an eye on subtle changes that could signal a problem before a full-blown emergency happens.
Overall, these detectors combine precision, ease of use, and versatile placement, making them a smart addition to any safety plan.
What Makes a CO Detector Essential in a Kitchen Environment?
A CO detector is essential in a kitchen environment because it helps detect dangerous levels of carbon monoxide, a colorless and odorless gas produced by burning fuel. This detection significantly reduces the risk of carbon monoxide poisoning.
The importance of a CO detector in a kitchen includes the following points:
- Detection of Carbon Monoxide
- Prevention of Poisoning
- Monitoring Kitchen Appliances
- Early Warning System
- Protecting Vulnerable Populations
The need for a CO detector in kitchens is underscored by various perspectives on safety and health, emphasizing not only personal safety but also the protection of others in the household.
-
Detection of Carbon Monoxide:
Detection of carbon monoxide occurs through the use of specialized sensors in CO detectors. These sensors continuously monitor the air for elevated levels of carbon monoxide. According to the CDC, carbon monoxide is responsible for approximately 400 deaths in the United States each year. This silent threat makes early detection crucial for safety. -
Prevention of Poisoning:
Prevention of poisoning hinges on the timely response to alerts from CO detectors. Symptoms of carbon monoxide poisoning include headache, dizziness, and confusion. According to a study by the National Institute of Health (2018), early detection can prevent severe health complications or fatalities. The CO detector acts as an early warning system that can save lives. -
Monitoring Kitchen Appliances:
Monitoring kitchen appliances is another critical function of CO detectors. Gas stoves, ovens, and heaters can produce carbon monoxide when not functioning correctly. The Consumer Product Safety Commission highlights that malfunctioning appliances are common sources of carbon monoxide emissions. Regular checks by CO detectors can help identify appliance issues before they become dangerous. -
Early Warning System:
An early warning system for identifying unsafe levels of carbon monoxide allows for immediate action to be taken. CO detectors often include audibly alarm signals that prompt occupants to evacuate and seek fresh air. A 2020 study from the American Journal of Emergency Medicine confirmed that having CO detectors in residences increases safety awareness and emergency response. -
Protecting Vulnerable Populations:
Protecting vulnerable populations, such as children and the elderly, makes CO detectors indispensable in kitchens. These groups are more susceptible to the harmful effects of carbon monoxide. The World Health Organization has identified carbon monoxide as a health hazard that disproportionately impacts vulnerable individuals, emphasizing the need for preventive measures in domestic settings.
Where is the Best Location for a CO Detector in a Kitchen?
The best location for a CO detector in a kitchen is near the entrance, at least 15 feet away from cooking appliances. This distance prevents false alarms caused by normal cooking activities. Mount the detector on the wall, higher than the level of the kitchen counter. Carbon monoxide is slightly lighter than air, so placing it high allows it to detect the gas effectively. Ensure the detector is not obstructed by cabinets or shelves. Avoid installing it in excessively humid areas like above the stove or near vents. Regularly test the detector to ensure it functions properly. Proper placement enhances safety and responsiveness to carbon monoxide exposure.
Should I Place My CO Detector Near Cooking Appliances?
No, you should not place your CO detector near cooking appliances. This placement can lead to false alarms.
Placing your CO detector near cooking appliances may result in the detector being triggered by normal cooking fumes or smoke. This can desensitize occupants to alarms, leading to dangerous situations. Instead, the detector should be located outside sleeping areas and away from heat sources. This location allows it to accurately detect harmful carbon monoxide levels without interference. Proper positioning increases the effectiveness and reliability of the detector in ensuring safety from carbon monoxide poisoning.
Is It Better to Install a CO Detector on the Ceiling or the Wall?
Yes, it is better to install a carbon monoxide (CO) detector on the wall rather than on the ceiling. CO is a colorless, odorless gas that has a similar density to air, which means it tends to distribute evenly throughout the room. Therefore, placing the detector on the wall allows it to be more effective in detecting CO as it accumulates in the air.
Wall-mounted detectors are typically installed 5 to 6 feet above the floor. This height ensures optimal detection because CO can be found at various levels throughout a room. Installing detectors on the ceiling is less effective because CO gas does not rise in the same way that lighter gases do. Additionally, wall-mounted units are generally easier to access for testing and maintenance compared to those installed on the ceiling.
The key benefit of proper CO detector placement is enhanced safety. According to the Centers for Disease Control and Prevention (CDC), over 400 people die each year in the U.S. from unintentional CO poisoning. Installing CO detectors at the recommended height contributes to faster detection, potentially saving lives. Regularly maintained and appropriately located detectors can alert residents to dangerous CO levels before symptoms occur.
However, there are drawbacks to consider. Wall-mounted detectors require proper placement away from windows and vents. If placed incorrectly, they may not detect CO effectively. Additionally, homeowners may forget to test the detectors, leading to a false sense of security. The National Fire Protection Association (NFPA) emphasizes the importance of regular maintenance, indicating that about 30% of households do not test their detectors regularly.
For homeowners, the recommended approach is to install CO detectors on the wall, ideally 5 to 6 feet above the floor. Ensure that they are located away from obstructions like furniture and windows. Place detectors in multiple rooms, especially near sleeping areas, to maximize safety. Regularly test the detectors and replace batteries as needed. Following these guidelines will help improve the effectiveness of CO detection in residential settings.
What is the Ideal Height for CO Detector Installation in the Kitchen?
The ideal height for carbon monoxide (CO) detector installation in the kitchen is typically between 5 to 6 feet above the floor. This height ensures proper detection of carbon monoxide, which is slightly lighter than air and can be effectively monitored at this level.
According to the National Fire Protection Association (NFPA), this recommendation aims to optimize the detector’s response to CO gas accumulation. The NFPA outlines guidelines for the proper placement of CO detectors in residential settings to enhance safety.
Installing CO detectors at this height allows for maximum effectiveness in detecting the gas while avoiding potential interference from common kitchen appliances that may emit steam or cooking odors. Proper positioning can be crucial for early warning systems in case of CO leaks.
Additionally, the U.S. Consumer Product Safety Commission (CPSC) emphasizes the importance of following manufacturer instructions for CO detectors, as different models may have specific requirements regarding placement.
Factors contributing to CO buildup in kitchens include malfunctioning gas appliances, blocked vents, and poor ventilation. These conditions increase the risk of exposure to this colorless, odorless gas, which can lead to serious health issues.
The World Health Organization (WHO) states that high levels of CO exposure can cause symptoms such as headaches, dizziness, and even death. Regular checks and the installation of CO detectors can prevent such outcomes.
In broader terms, effective CO detector placement impacts public health, safety awareness, and energy efficiency. The economic burden of CO-related injuries and fatalities is significant, making prevention measures essential.
Examples of CO incidents include cases where faulty gas stoves released dangerous levels of the gas due to improper installation or maintenance. Proper detection and alarms can avert such disasters.
To mitigate the risks of CO exposure, the NFPA recommends maintaining appliances, ensuring proper ventilation, and installing CO detectors according to guidelines. Regular maintenance checks also contribute to safer home environments.
Utilizing smart technology that integrates CO detection with home systems can provide alerts to homeowners in real time. These advanced systems can enhance safety and ensure timely responses in emergencies.
How Far Should a CO Detector be from Cooking Appliances to Ensure Effectiveness?
The CO detector should be placed at least 15 to 20 feet away from cooking appliances. This distance helps to prevent false alarms caused by normal cooking fumes. The detector should also be installed in a location where it can easily monitor air flow and detect carbon monoxide effectively. Mounting the detector at least 5 feet off the ground ensures it functions properly, as carbon monoxide rises. Place it outside bedrooms as well to alert occupants if carbon monoxide is present while they sleep. By following these guidelines, you enhance the effectiveness of the CO detector in detecting dangerous levels of carbon monoxide.
What Maintenance Steps are Necessary for My Kitchen’s CO Detector?
To maintain your kitchen’s carbon monoxide (CO) detector, follow essential maintenance steps regularly.
- Regular Testing
- Battery Replacement
- Cleaning the Unit
- Sensor Replacement
- Professional Inspection
Incorporating these maintenance steps contributes to the reliability of your CO detector. Now, let’s examine each of these maintenance steps in detail.
-
Regular Testing:
Regular testing of your CO detector ensures it functions correctly. Many devices have a test button that allows users to easily check if the alarm is operational. The U.S. Consumer Product Safety Commission recommends testing your CO detector at least once a month to identify any malfunction early. -
Battery Replacement:
Battery replacement is critical for maintaining the detector’s functionality. Most CO detectors use batteries that should be changed at least once a year. Some models have a low-battery warning that alerts users when it’s time to replace the batteries. The National Fire Protection Association advises using high-quality batteries for the best performance. -
Cleaning the Unit:
Cleaning your CO detector helps prevent dust and debris from interfering with its operation. You can use a vacuum cleaner with a soft brush attachment or a damp cloth to clean the surface and vents of the unit. This step enhances the device’s accuracy and extends its lifespan. -
Sensor Replacement:
Sensor replacement is necessary as CO detectors have a limited lifespan, typically between 5 to 7 years. After this period, the sensors may become less effective at detecting carbon monoxide. It is essential to check the manufacturer’s guidelines and replace the entire unit as needed. -
Professional Inspection:
Professional inspection offers an in-depth assessment of your CO detection system. Certified professionals can check the installation location, test for gas leaks, and ensure that the unit complies with local safety regulations. The Occupational Safety and Health Administration recommends periodic professional inspections for commercial settings, but homeowners can benefit from them as well.
How Often Should I Test My CO Detector’s Functionality?
You should test your CO detector’s functionality once a month. Regular testing ensures that the detector works properly. It is important because CO detectors can fail over time. Press the test button on the device to check its operation. Replace the batteries at least once a year. Additionally, replace the entire CO detector every 5 to 7 years, as recommended by the manufacturer. This routine maintenance helps ensure your safety and the effectiveness of the detector.
Related Post: