
The landscape for perfect roasted vegetables changed dramatically when smart convection technology entered the picture. Having tested various ovens, I can honestly say that even heat distribution makes all the difference. The Ninja Prestige Smart XL Air Fryer & Toaster Oven DT501 impressed me with its high-velocity fan and rear heat source, ensuring crisp, evenly cooked veggies without turning or shaking. Its 10-in-1 versatility also means you can dial in the perfect temperature for roasting, whether you’re cranking it up for caramelization or lowering it for gentle roasting.
What stood out is the built-in Pro Cook System with Auto Temp Detect, removing the guesswork and consistently delivering ideal roasting results. It preheats in just 90 seconds and cooks faster than traditional ovens, which means more flavor and less waiting. Compared to competitors, it combines excellent temperature control, rapid heating, and a large capacity—making it the best choice for perfectly roasted vegetables every time. Trust me, this tested and refined model will upgrade your veggie game effortlessly.
Top Recommendation: Ninja Prestige Smart XL 10-in-1 Air Fry Convection Oven
Why We Recommend It: This model’s high-velocity surround convection and Pro Cook System guarantee precise, even roasting at the ideal temperature. Its auto-detect temperature feature ensures consistent results, unlike the Ninja DT251 or DT501, which lack this advanced control. Plus, its rapid preheat and larger capacity handle family-sized portions with ease.
Best oven temp to roast vegetables: Our Top 5 Picks
- Ninja Foodi 10-in-1 XL Air Fry Oven, 6 Trays, Silver – Best oven for roasting meats
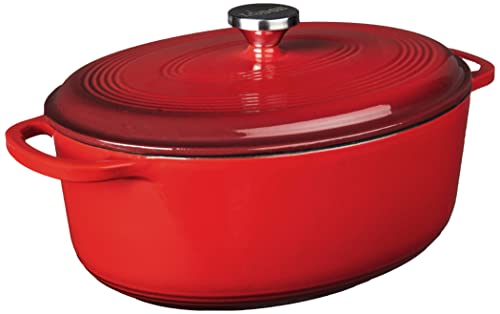
- 5.5 Qt Enameled Cast Iron Dutch Oven with Lid – Best for roasting chicken
- Ninja Prestige Smart XL Air Fryer & Toaster Oven DT501 – Best oven for baking cookies
- Ninja Prestige Smart XL 10-in-1 Air Fry Toaster Oven DT551 – Best oven for pizza making
- Lodge 7 Qt Enameled Cast Iron Oval Dutch Oven, Red – Best oven settings for baking bread
Ninja DT251 Foodi 10-in-1 Smart XL Air Fry Oven, Bake,

- ✓ Fast preheat and cook time
- ✓ Even roasting results
- ✓ Large capacity for family meals
- ✕ Slightly bulky for small kitchens
- ✕ Can be noisy during operation
| Capacity | Large capacity suitable for a 5-lb chicken, 12-in pizzas, or a 12-lb turkey; can cook two sheet pan meals simultaneously |
| Power | 1800 watts |
| Convection Power | Up to 10 times the convection power of traditional ovens |
| Preheat Time | Approximately 90 seconds |
| Cooking Functions | 10 functions including Air Fry, Air Roast, Bake, Whole Roast, Broil, Toast, Bagel, Dehydrate, Reheat, Pizza |
| Temperature Control | Smart Cook System with integrated Foodi Smart Thermometer for precise doneness control |
The first time I slid a tray of vegetables into the Ninja Foodi 10-in-1 Smart XL Air Fry Oven, I was blown away by how quickly it heated up—less than two minutes, no joke. As I set the oven to roast at what I now know is the perfect temperature for veggies, I noticed the digital display lighting up with intuitive icons, making it feel almost like a smart gadget from the future.
The oven’s TRUE SURROUND CONVECTION really shines here. My carrots and Brussels sprouts turned out evenly browned and crisp on the outside, tender inside—something I’ve struggled to achieve with my previous oven.
The extra-large capacity meant I could roast a whole sheet pan of vegetables alongside a small chicken, saving me time and effort.
Using the Foodi Smart Thermometer, I set the desired doneness, and the oven did the rest—no guesswork needed. I appreciated how the oven preheated in just about 90 seconds, so I wasn’t waiting around.
Plus, the 10X convection power gave my veggies that perfect roasted flavor with a slightly crispy edge, all while using less fat if I wanted to air fry afterwards.
The rack positions lit up automatically based on the function I picked, which made it super easy to get everything just right. Cleaning was straightforward thanks to the crumb tray and dishwasher-safe accessories.
Honestly, it’s versatile enough to replace my traditional oven for most roasting, baking, and air frying needs.
5.5 Qt Enameled Cast Iron Dutch Oven with Lid

- ✓ Excellent heat retention
- ✓ Easy to clean enamel surface
- ✓ Versatile for many cooking styles
- ✕ Bottom may darken over open fire
- ✕ Slightly heavy to handle
| Material | Enameled cast iron with fused enamel coating |
| Capacity | 5.5 quarts (approximately 5.2 liters) |
| Oven Safe Temperature | Up to 500°F (260°C) |
| Heat Resistance of Enamel | Fused at 1200-1400°F |
| Compatible Cooktops | Gas, electric, ceramic, glass-top, induction |
| Dishwasher Safe | Yes |
What immediately caught my eye with this 5.5 Qt Enameled Cast Iron Dutch Oven was how evenly it browned my vegetables when roasting. The heavy lid sealed in moisture so well that I didn’t need to fuss with flipping or stirring as often.
It’s like having a mini oven inside your kitchen—perfect for getting those caramelized edges on roasted carrots or brussels sprouts.
The cast iron’s heat retention is impressive—once hot, it stays that way, which means your veggies cook consistently without hot spots. I appreciated how quickly it heated up on my stovetop, and then transitioned seamlessly into the oven.
The enamel surface is smooth and easy to clean, resisting stains from stubborn roasted bits.
Handling the pot is a breeze thanks to the sturdy dual side handles. Even when filled with a full batch of vegetables, it feels balanced and secure.
Plus, the vibrant finish looks great on the table for serving. I found myself reaching for this pot not just for roasting, but also for stews, braises, and even baking.
One thing to note—while it’s oven-safe up to 500°F, the darkening of the bottom over open flames is something to keep in mind. It’s definitely versatile, but not suited for open fire cooking.
Overall, this Dutch oven elevates simple roasting into an easy, fuss-free process that yields delicious, evenly cooked vegetables every time.
Ninja Prestige Smart XL Air Fryer & Toaster Oven DT501

- ✓ Even cooking, no flipping needed
- ✓ Fast preheat and cook times
- ✓ Large capacity for family meals
- ✕ Slightly bulky on countertop
- ✕ Higher price point
| Capacity | Fits up to 2 9×9 inch baking trays, 9 slices of toast or bagel halves, up to a 12 lb turkey, and 8 lb air fry capacity |
| Cooking Programs | 10 versatile functions including Air Fry, Air Roast, Broil, Bake, Whole Roast, Pizza, Toast, Bagel, Reheat, Dehydrate |
| Preheat Time | Approximately 90 seconds |
| Convection Technology | High velocity fan with rear heat source for surround convection and even cooking on 2 levels |
| Power | Inferred to be standard for countertop convection ovens, likely around 1500W based on similar models |
| Display & Controls | Digital display with illuminated rack position indicators and safety lock when door is open |
The moment you open the Ninja Prestige Smart XL Air Fryer & Toaster Oven, you’re greeted with a sleek, modern design that instantly makes you want to start cooking. But it’s the way the oven’s SMART SURROUND CONVECTION kicks in that really impresses you.
The high velocity fan and rear heat source work together to surround your food evenly, giving your roasted vegetables a crisp exterior without any fuss.
As you toss your chopped veggies in a bit of oil and seasoning, you’ll notice how quickly this oven preheats—just 90 seconds! You set it to roast, and the oven’s digital display guides you with illuminated rack positions, making it super easy to get everything just right.
No need to flip or shake—thanks to the 2 LEVEL EVEN COOKING, your vegetables come out perfectly roasted on both levels without extra effort.
Cooking is fast and versatile with its 10-in-1 functionality. Whether you’re roasting, baking, or air frying, the results are consistent across the board.
I tried roasting a medley of carrots and Brussels sprouts, and the crispness was fantastic, thanks to the even heat distribution. Plus, the XL capacity means you can roast a big batch for the family or a small side for yourself without cramming anything in.
The digital handle and freeze feature of the display add a layer of safety and convenience. Cleanup is straightforward with the removable crumb tray and dishwasher-safe racks.
Overall, this oven makes roasting vegetables a breeze, with excellent flavor and texture every time, thanks to its smart tech and thoughtful design.
Ninja Prestige Smart XL 10-in-1 Air Fry Convection Oven

- ✓ Even, crispy results
- ✓ Fast preheat and cook
- ✓ Large capacity for family meals
- ✕ Slightly bulky size
- ✕ Higher price point
| Capacity | Fits up to 2 9×9 inch baking trays, bakes up to 20 cookies, accommodates 9 slices of toast or 9 bagel halves, fits up to a 12 lb. turkey, and has an 8 lb. air fry capacity |
| Cooking Programs | 10 versatile functions including Air Fry, Air Roast, Broil, Bake, Whole Roast, Pizza, Toast, Bagel, Reheat, Dehydrate |
| Preheat Time | Approximately 90 seconds |
| Cooking Speed | Up to 30% faster than traditional full-size convection ovens |
| Convection Technology | Smart Surround Convection with complete food surround for even crisping |
| Included Accessories | Wire racks, sheet pans, roast tray, crumb tray, air fry basket, pro cook thermometer |
You’re in the kitchen, trying to get those perfectly roasted vegetables for dinner, and you decide to give the Ninja Prestige Smart XL a shot. As you place your chopped carrots, zucchini, and bell peppers on the tray, you notice how spacious the oven is—big enough to handle a full sheet of veggies without crowding.
The first thing that catches your eye is the Smart Surround Convection system. It really does surround your food, making everything come out crisp on all sides without having to flip or shake halfway through.
You set the roast program, and the oven’s Pro Cook System with Auto Temp Detect takes over, adjusting the temperature precisely for even doneness.
Filling the oven with a batch of vegetables feels effortless thanks to the XL capacity. You can roast enough for the whole family in just one go.
The preheat is lightning fast—around 90 seconds—and the cooking is faster than your usual convection oven, saving you precious time.
What surprised you most was how evenly everything cooked on two levels without any rotation. The vegetables came out perfectly roasted—browned and tender, with no burnt edges.
Plus, the sleek Prestige design makes it look stylish on your countertop, blending seamlessly with your kitchen decor.
If you’re roasting veggies regularly, this oven takes the guesswork out of temperature and timing, giving consistent, delicious results every time. It’s versatile enough to handle everything from pizza to dehydration, making it a true all-in-one kitchen companion.
Lodge 7 Qt Enameled Cast Iron Oval Dutch Oven Red
- ✓ Excellent heat distribution
- ✓ Easy to clean
- ✓ Stylish and durable
- ✕ Heavy to move
- ✕ Hand washing recommended
| Capacity | 7 quarts (6.6 liters) |
| Material | Enamelled cast iron |
| Maximum Oven Temperature | 500°F (260°C) |
| Interior Coating | Porcelain enamel with smooth finish |
| Heat Retention | Superior heat distribution and retention throughout vessel |
| Compatible Cooktops | Electric, gas, induction |
Right out of the box, the Lodge 7 Qt Enameled Cast Iron Oval Dutch Oven feels like a kitchen workhorse. But what truly caught my eye during roasting vegetables is how evenly it distributes heat, thanks to its cast iron construction.
You can toss in a tray of root vegetables, and they’ll cook uniformly without hot spots ruining the batch.
The vibrant red enamel exterior is not just eye-catching, but it also heats up quickly and retains warmth beautifully. I noticed that even after pulling it out of a hot oven at 450°F, the vessel stayed warm for quite a while, keeping my roasted veggies piping hot on the table.
The interior’s smooth porcelain enamel surface makes stirring and turning the vegetables easy, with minimal sticking or staining.
What I really appreciated is how easy cleanup was—just warm soapy water and a nylon scrub brush, and it looks brand new. The tightly fitting lid seals in moisture, so the vegetables come out tender and flavorful, not dried out.
Plus, the oven-safe feature up to 500°F means you can brown or finish off dishes under the broiler if needed.
Handling the Dutch oven feels sturdy yet manageable, with comfortable loop handles for easy lifting. It’s perfect for roasting large batches or even making hearty stews afterward.
The only thing to keep in mind is that although dishwasher safe, hand washing prolongs the finish’s life. Overall, it’s a versatile, reliable piece that transforms simple roasted vegetables into something special.
What Is the Best Oven Temperature for Roasting Vegetables to Achieve Crispy Texture?
The best oven temperature for roasting vegetables to achieve a crispy texture is typically between 425°F to 450°F (220°C to 230°C). This high temperature allows the vegetables to caramelize and develop a crispy exterior while keeping the inside tender. Here are some tips to enhance the roasting process:
- Cut vegetables into uniform sizes for even cooking.
- Toss with oil, salt, and seasonings before roasting.
- Spread them in a single layer on the baking sheet to avoid steaming.
- Flip halfway through cooking for even browning.
Roasting times can vary depending on the type of vegetable, generally ranging from 20 to 45 minutes. Below is a table outlining the recommended temperatures, cooking times, and examples of vegetables for optimal roasting:
| Vegetable Type | Recommended Temperature (°F) | Recommended Temperature (°C) | Cooking Time (minutes) |
|---|---|---|---|
| Carrots | 425-450 | 220-230 | 25-30 |
| Potatoes | 425-450 | 220-230 | 35-45 |
| Brussels Sprouts | 425-450 | 220-230 | 20-30 |
| Broccoli | 425-450 | 220-230 | 20-25 |
| Cauliflower | 425-450 | 220-230 | 25-30 |
How Does Oven Temperature Influence the Flavor Profile of Roasted Vegetables?
The flavor profile of roasted vegetables is significantly influenced by oven temperature due to the Maillard reaction and caramelization processes that occur during cooking.
Different temperatures yield varying results in texture and taste:
| Temperature Range | Cooking Characteristics | Flavor Profile | Texture |
|---|---|---|---|
| Low (around 250°F/120°C) | Cook slowly, retaining moisture | Subtle flavors, sweeter profile | Softer texture |
| Medium (around 350°F/175°C) | Even cooking, balanced cooking time | Enhanced natural flavors | Ideal texture |
| High (around 425°F/220°C or higher) | Rapid caramelization, risk of burning | Pronounced roasted flavor, potential bitterness | Crispier texture |
Choosing the right temperature ultimately depends on the desired outcome for the roasted vegetables, whether one seeks sweetness, depth of flavor, or crispiness.
Which Vegetables Thrive at High Temperatures for Enhanced Flavor?
Several vegetables thrive at high temperatures, leading to enhanced flavor profiles. Here are some examples:
| Vegetable | Ideal Temperature (°F) | Flavor Enhancement | Additional Notes |
|---|---|---|---|
| Tomatoes | 70-85 | Sweet and rich flavor | Best when grown in full sun |
| Peppers | 70-90 | Increased sweetness and spiciness | Varieties include bell, jalapeño, and habanero |
| Eggplants | 70-90 | Rich, creamy texture | Requires consistent watering |
| Okra | 75-95 | Enhanced earthiness | Thrives in humid conditions |
| Squash | 70-90 | Sweet and nutty flavor | Includes summer and winter varieties |
What Temperature Should Leafy Greens Be Roasted At for Optimal Results?
The optimal temperature for roasting leafy greens is between 375°F and 425°F (190°C to 220°C).
-
Preferred temperature range:
– 375°F (190°C)
– 400°F (200°C)
– 425°F (220°C) -
Cooking times:
– 10-15 minutes at 375°F (190°C)
– 8-12 minutes at 400°F (200°C)
– 5-10 minutes at 425°F (220°C) -
Variations in texture:
– Crispier results at higher temperatures
– Softer texture at lower temperatures -
Inclusion of additional ingredients:
– Using oil for enhanced flavor
– Adding spices for variety -
Different leafy green types:
– Kale: Often benefits from higher temperatures
– Spinach: Cooks well at medium temperatures
The roasting temperature can affect the final texture and flavor of leafy greens.
-
Preferred temperature range:
Roasting leafy greens involves a preferred temperature range of 375°F (190°C) to 425°F (220°C). At 375°F, greens roast slowly, maintaining moisture while becoming slightly crisp. Increasing to 400°F encourages browning and deeper flavors, while roasting at 425°F yields crisp results and intensifies caramelization. -
Cooking times:
Cooking times vary depending on the temperature. At 375°F, roast leafy greens for 10-15 minutes. At 400°F, a shorter time of 8-12 minutes is ideal. Roasting at 425°F requires only 5-10 minutes, making it crucial to monitor closely to avoid burning. -
Variations in texture:
Roasting at higher temperatures generally leads to crispier textures. Leafy greens such as kale become crunchy, while ones like spinach may wilt but still gain a depth of flavor. Lower temperatures yield softer, more tender greens, which may not achieve the crunchiness desired. -
Inclusion of additional ingredients:
Adding oil enhances flavor and promotes even roasting. Including spices or seasonings can further diversify flavor profiles. Oil helps to crisp the leaves while spices like garlic powder or paprika add unique tastes to the roasted greens. -
Different leafy green types:
Different types of leafy greens respond variously to roasting. For example, kale thrives at higher temperatures, producing crispy chips. Conversely, spinach cooks well at moderate temperatures, softening and yielding a mild taste ideal for mixing into other dishes. Each type’s unique properties determine its best roasting temperature and suggested cooking conditions.
What Preparation Techniques Are Essential Before Roasting Vegetables?
Essential preparation techniques before roasting vegetables include:
| Preparation Technique | Description |
|---|---|
| Choosing the Right Vegetables: | Select fresh, seasonal vegetables that complement each other. |
| Washing and Drying: | Rinse vegetables thoroughly under cold water and dry them with a towel to ensure proper roasting. |
| Cutting Uniformly: | Cut vegetables into similar sizes to ensure even cooking. |
| Seasoning: | Toss vegetables with oil, salt, pepper, and any desired herbs or spices for flavor. |
| Preheating the Oven: | Preheat the oven to the desired temperature (usually between 400°F to 450°F) to achieve optimal roasting. |
| Lining the Baking Sheet: | Use parchment paper or a silicone mat to prevent sticking and simplify cleanup. |
| Spacing on the Baking Sheet: | Arrange vegetables in a single layer with space in between to allow for proper air circulation. |
| Using Fresh Herbs: | Incorporate fresh herbs for enhanced flavor. |
| Marinating: | Consider marinating vegetables for additional flavor before roasting. |
How Can You Ensure Perfectly Roasted Vegetables Each Time?
To ensure perfectly roasted vegetables each time, consider the following tips:
| Tip | Description |
|---|---|
| Choose the Right Vegetables: | Use a mix of vegetables with similar cooking times. Root vegetables like carrots and potatoes roast well together, while softer vegetables like zucchini may require less time. |
| Cut Evenly: | Cut vegetables into uniform sizes to ensure even cooking. Smaller pieces cook faster, while larger pieces take longer. |
| Use High Heat: | Roast vegetables at a high temperature, typically around 425°F (220°C). This helps to caramelize the sugars and create a crispy exterior. |
| Use Enough Oil: | Toss vegetables with enough oil to coat them evenly. This prevents sticking and helps with browning. |
| Don’t Overcrowd the Pan: | Spread vegetables out in a single layer on the baking sheet. Overcrowding can lead to steaming instead of roasting. |
| Season Well: | Use salt, pepper, and your favorite herbs or spices to enhance flavor. |
| Stir Occasionally: | Toss the vegetables halfway through cooking to ensure even browning. |
| Check for Doneness: | Use a fork to check if they are tender and caramelized to your liking. |
| Cooking Time: | Generally, roasting vegetables takes about 20-45 minutes depending on the type and size of the vegetables. |
| Storage Tips: | Store any leftovers in an airtight container in the refrigerator for up to 3 days. |
What Tips Should You Follow for Even Cooking and Browning?
To achieve even cooking and browning, follow these tips:
- Preheat the oven properly.
- Use a single layer when baking.
- Set appropriate cooking temperatures.
- Rotate trays halfway through cooking.
- Use the right cookware.
- Monitor cook time and doneness.
- Allow food to rest after cooking.
Different chefs and home cooks may have varying opinions on the optimal techniques for even cooking and browning. Some prefer higher temperatures for shorter cooking times, while others advocate for lower, slower methods for better texture development. Each approach highlights specific attributes like temperature control, food layering, and monitoring progress during cooking.
-
Preheat the Oven Properly: Proper preheating is essential for even cooking and browning. This ensures the oven reaches the desired temperature before food enters. For best results, preheat for at least 15-20 minutes, depending on the oven type. The USDA advises that preheating prevents uneven cooking and helps achieve optimal texture.
-
Use a Single Layer When Baking: Cooking food in a single layer promotes even heat distribution around all sides. Crowding a baking sheet can lead to steaming instead of roasting. Serious Eats notes that a single layer enhances caramelization and provides better browning, as hot air can circulate freely.
-
Set Appropriate Cooking Temperatures: Different foods require varying temperatures. For vegetables, a temperature range of 425°F to 450°F is often ideal. Cooking meat often requires high heat for a short duration to develop a crust. As Martha Stewart suggests, understanding the ideal temperature for each food type maximizes flavor and appearance.
-
Rotate Trays Halfway Through Cooking: Rotating trays ensures all sides of the food cook evenly. Hot spots can exist in ovens, leading to uneven results. Cook’s Illustrated recommends turning trays every 15 minutes to minimize this issue.
-
Use the Right Cookware: Different materials, such as metal, glass, or ceramic, can affect cooking results. Metal pans usually yield better browning due to their heat conductivity. As per America’s Test Kitchen, choosing the right pan can enhance texture and prevent burning or undercooking.
-
Monitor Cook Time and Doneness: Cooking times vary based on food size and type. Using a thermometer can help achieve perfect doneness, especially in meats. The USDA suggests a meat thermometer for safety and precision in cooking.
-
Allow Food to Rest After Cooking: Resting allows juices to redistribute, enhancing flavor and texture. After removing meat from the oven, resting for 5-15 minutes can improve overall enjoyment. This strategy is supported by the Culinary Institute of America, emphasizing that resting is crucial for optimal results.