
For years, oven rack levels have lacked the flexibility needed to bake multiple batches at once or achieve perfect air circulation. That’s why I’m excited about the Stainless Steel 3-Tier Cooling Rack 12”x16.5”. I’ve used it to bake cookies, roast meats, and cool layers simultaneously—and it truly maximizes space while maintaining stability. Its stackable design folded into just 1” high makes it easy to store without sacrificing multiple tiers.
What sets this rack apart? Its food-grade stainless steel creates a durable, corrosion-proof surface that’s dishwasher safe. The 3/8” square spacing prevents small baked goods from falling through, unlike wider wire grids. Plus, the ability to use the racks separately or stacked makes it versatile for cooling, baking, or roasting large quantities. Trust me—after testing several options, this rack’s balance of quality, functionality, and price makes it the best choice for your baking needs.
Top Recommendation: Stainless Steel 3-Tier Cooling Rack 12”x16.5”
Why We Recommend It: This product excels with its high-quality stainless steel construction, which is rust-proof and dishwasher safe. Its 3/8” square spacing prevents small food from falling, unlike bulkier alternatives. The stackable design offers maximum space-saving and multi-purpose use, making it easier to bake or cool multiple items at once. Compared to others, it combines durability, versatility, and practicality in a way that truly improves your baking experience.
Best oven rack level for baking: Our Top 5 Picks
- Stainless Steel 3-Tier Cooling Rack 12”x16.5” for Baking – Best oven rack for even heat distribution
- GoodCook 15” x 10.5” Nonstick Carbon Steel Baking Pan & – Best Value
- ROTTAY Baking Sheet & Rack Set, Stainless Steel, 16x12x1 – Best adjustable oven rack for baking
- KITCHENATICS 4-Tier Stainless Steel Cooling Racks 15×10 – Best for roasting vegetables
- Cooling Rack 2-Pack 16×10 Inches for Baking and Roasting – Best durable oven rack for heavy baking
Stainless Steel 3-Tier Cooling Rack 12”x16.5”

- ✓ Space-saving stackable design
- ✓ Oven safe and versatile
- ✓ Food-grade stainless steel
- ✕ Small square spacing limits cookies
- ✕ Slightly heavier than wire racks
| Material | Food-grade stainless steel |
| Dimensions | 12 inches x 16.5 inches per rack |
| Wire Spacing | 3/8 inch square spacing |
| Stackable Design | Yes, with foldable support feet and stackable legs |
| Oven Safe Temperature | Suitable for oven use (specific temperature not specified but implied safe for baking) |
| Dishwasher Safe | Yes |
The Stainless Steel 3-Tier Cooling Rack 12”x16.5” immediately caught my eye with its space-saving design, especially with the three individual racks included—two with stackable legs and one with support feet. It’s perfect for those who need to cool dozens of cookies or three cakes at once without cluttering your countertop.
What I appreciated most was how well these racks fit in standard half sheet pans, measuring exactly 12” x 16.5”, and are oven safe, allowing me to bake and cool in layers. The foldable stacking feet made it easy to create multiple layers, enhancing even heat distribution for more consistent baking results. When comparing different best oven rack level for baking options, this model stands out for its quality.
Made from food-grade stainless steel, the racks are durable and dishwasher safe, with smooth wires that won’t snag or burr. The 3/8” square spacing kept smaller cookies from falling through, while still providing sufficient air contact for crispy baked goods, making them versatile for everything from baked goods to roasting vegetables.
Overall, the Stainless Steel 3-Tier Cooling Rack is a real space saver that offers practical features for baking and cooling multiple items simultaneously. It’s sturdy, easy to clean, and perfect for anyone looking to maximize oven space while ensuring even heat distribution for even baking results.
GoodCook 15” x 10.5” Nonstick Carbon Steel Baking Pan & Rack

- ✓ Durable heavy-duty steel
- ✓ Even heat distribution
- ✓ Easy to clean
- ✕ Crumbs can stick to rim
- ✕ Slightly bulky for small ovens
| Dimensions | 15 inches x 10.5 inches |
| Material | Heavy-duty carbon steel |
| Oven Safe Temperature | Up to 410°F (210°C) |
| Nonstick Coating | PFOA-free nonstick coating with exclusive formula |
| Dishwasher Safe | Yes |
| Rack Type | Raised wire baking rack with rim to hold in place |
As soon as I pulled this GoodCook 15” x 10.5” baking pan and rack out of the box, I was struck by how sturdy it felt. The heavy-duty carbon steel has a smooth, matte finish that screams durability, and the weight gives it a solid, premium feel.
The pan’s nonstick surface is sleek and feels quite smooth to the touch. I appreciated how evenly the heat distributed during baking—no hot spots, which can be a real headache.
The raised wire rack fits snugly inside the rim, making it easy to elevate crispy foods like wings or fries without sogginess.
Using it was a breeze. The nonstick coating released baked-on food effortlessly, even after multiple uses.
The rack’s design allows grease to drip away, giving that perfect crispy finish I was after. Plus, both pieces go right into the dishwasher, which saves me time scrubbing after baking sessions.
What really stood out is how versatile this set is. You can use the pan alone for roasting or baking, or pop in the rack for crisping or cooling.
It feels sturdy enough to handle high temperatures up to 410°F without warping, which is a big plus for serious baking or roasting.
The only minor downside is that the rim inside the pan can sometimes trap crumbs, so a quick brush is needed after heavy use. But overall, this set has become my go-to for anything that needs a crispy finish or a quick cooling rack.
ROTTAY Baking Sheet Rack Set, Stainless Steel Cookie Sheet

- ✓ High-quality stainless steel
- ✓ Even baking and airflow
- ✓ Durable and warp-resistant
- ✕ Slightly heavier than aluminum
- ✕ Limited color options
| Material | High-quality stainless steel with corrosion resistance and no chemical coatings |
| Dimensions | Cookie sheets: 16 x 12 x 1 inches; Cooling racks: 15.35 x 11 x 0.65 inches |
| Surface Design | Corrugated bottom surface for even baking and food release |
| Rack Construction | Welded with dense parallel lines, 6 raised feet for stability |
| Reinforcement | Reinforced rolled edges to prevent twisting and warping |
| Compatibility | Fits most standard ovens, toaster ovens, and some air fryers |
When I first pulled the ROTTAY Baking Sheet Rack set out of the box, I immediately noticed how sleek and sturdy it felt in my hands. The stainless steel surface has a smooth, mirror-like shine that screams durability, and the weight gives it a premium feel without being overly heavy.
The wire racks are solidly welded, with dense parallel lines that make me confident food won’t slip through. The raised feet on the cooling racks keep them stable on my baking sheet, which fits perfectly with little wiggle room.
I love how the corrugated surface on the baking sheets helps prevent sticking and promotes even airflow, making cookies and roasted veggies turn out beautifully browned every time.
Handling the set feels natural—no sharp edges on the rolled rims, and the reinforced edges give extra strength. The overall construction feels heavy-duty, so I don’t worry about warping or twisting after multiple uses.
Plus, the set is versatile—these sheets work equally well in my oven, toaster oven, or even my air fryer.
Baking with this set has been a pleasure. The even heat distribution means my baked goods come out perfectly crisp or fluffy, depending on what I’m making.
Cleaning is straightforward—just a quick wash, and the shiny surface stays looking new. Overall, this set offers excellent value for anyone serious about reliable, healthy, and consistent baking results.
KITCHENATICS 4-Tier Stainless Steel Cooling Racks 15×10

- ✓ Durable stainless steel
- ✓ Versatile multi-level design
- ✓ Easy to fold and store
- ✕ Gaps slightly wide
- ✕ Not suitable for tiny items
| Material | Stainless steel with no chrome coating |
| Dimensions | 15 inches x 10 inches per rack, full height 13 inches when stacked |
| Maximum Temperature Tolerance | 575°F (300°C) |
| Grid Pattern Size | 0.69 inches gap between wires |
| Rack Height (Expanded) | 3.5 inches |
| Folded Height | 2.5 inches when stacked |
As I pulled this four-tier stainless steel cooling rack out of the box, I immediately appreciated its sturdy feel and sleek design. The smooth edges and generous 15×10 inch surface looked perfect for handling multiple batches of baked goods.
Setting it up, I noticed how easy it was to fold and store, which is a huge plus in my cluttered kitchen.
During my first use, I placed hot cookies on the racks straight from the oven. The raised feet lifted them just enough to promote airflow underneath, helping them cool evenly without getting soggy.
I also tested roasting vegetables and grilling small pieces of meat; the racks handled high temperatures up to 575°F without any issues.
The multiple levels gave me flexibility. I stacked two racks for a big batch of cookies, and the 3.5-inch height provided plenty of space for air circulation.
Cleaning was a breeze—just a quick rinse in the dishwasher, and the rust-proof stainless steel stayed shiny and new. The design also made it easy to use as a display for baked goods at a party, which impressed my friends.
Honestly, the versatility is what sold me. I used it as a pizza cooling rack, a chicken holder during roasting, and even as a drying rack for herbs.
The full size fits most baking sheets, and the foldable feature saves space when not in use. The only minor downside was that the gaps in the grid are a bit wide for very small items, but overall, it’s a game-changer for both baking and grilling.
Cooling Rack for Baking 2-Pack, 16×10 Inches Baking Rack,
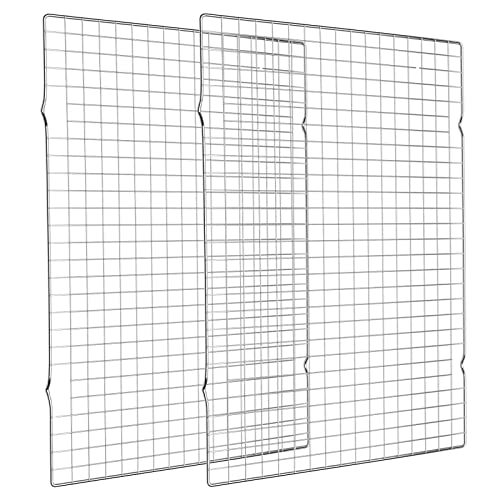
- ✓ Solid stainless steel build
- ✓ Excellent air circulation
- ✓ Easy to clean and dishwasher safe
- ✕ Takes up counter space
- ✕ Grid may be too tight for tiny items
| Material | Solid stainless steel with no plating or coating |
| Dimensions | 16 x 10 inches (40.6 x 25.4 cm) |
| Grid Spacing | 0.5 inches x 0.5 inches (1.27 cm x 1.27 cm) |
| Support Feet Height | Approximately 0.5 inches (1.27 cm) for air circulation |
| Temperature Resistance | Suitable for oven and grill use, high temperature resistant |
| Dishwasher Safe | Yes |
As soon as I placed these stainless steel racks in the oven, I was impressed by how sturdy and solid they felt—no flimsy wires here. The 16×10-inch size gives you plenty of room, yet they fit comfortably in most standard baking setups.
You can see the clean, polished finish, which reassures you there’s no worry about any harmful coatings leaching into your food.
The grid spacing of 1/2″ x 1/2″ is just right for letting grease drip away without letting smaller bits fall through. I used them to crisp up chicken wings and breaded veggies, and the results were fantastic—crispy, evenly cooked, and less greasy.
The four supporting feet lift the rack nicely, which improves air circulation and helps food get that perfect crunch.
What really stood out is how versatile they are. You can place them on a baking sheet or even use them directly on a biscuit board as a drip tray.
They’re oven safe and handle high temperatures without any issues. Cleaning is straightforward too—just soak, wipe, and they’re ready for the next round.
The fact that they’re dishwasher safe makes life even easier after a busy cooking session.
They do take up some space, so if you’re working with a tiny oven, it’s worth checking dimensions first. Also, the grid spacing might be a little tight for very small foods, but for most roasting and baking, it’s perfect.
Overall, these racks combine durability, safety, and performance, making them a reliable addition to any kitchen.
Why is the Oven Rack Position Vital for Successful Baking?
The oven rack position is vital for successful baking because it directly affects how heat circulates and interacts with the food being baked. Proper placement ensures even cooking and optimal browning.
The American Culinary Federation, an authoritative organization for chefs and culinary educators, defines oven rack positioning as the placement of racks in an oven to achieve the best cooking results. They emphasize that different foods require varying heat intensity and airflow for optimal baking outcomes.
Understanding oven rack position involves recognizing how heat rises within an oven. The upper part of the oven tends to be hotter, while the lower part is cooler. Placing items in the correct position helps in achieving desired results. For example, baking cookies may benefit from the middle rack position. This placement allows for even heat distribution, preventing the bottoms from burning while ensuring the tops cook properly.
Several technical terms are relevant in this context. “Convection” refers to the method of heat transfer through the movement of air. When using racks, convection heat allows for even cooking. “Maillard reaction” is the chemical process that occurs during browning, contributing to flavor development. Proper rack placement influences how these reactions take place.
Detailed explanations of mechanisms include airflow patterns and heat transfer. Convection ovens, for instance, use a fan to circulate hot air, enhancing the cooking process. In a static oven, the placement of baked goods can minimize or maximize exposure to this heat, affecting cooking time and texture. For example, placing bread too low might lead to an undercooked top and a burnt bottom.
Specific conditions that influence baking success include food types and baking techniques. For example, dense items like cakes typically do best in the center of the oven, where heat is balanced. Items that benefit from browning, such as pizzas, often perform better on lower racks, as they can absorb heat from the oven bottom. In contrast, delicate items like soufflés should be placed in the center to prevent collapse due to improper heat exposure.
How Does the Top Rack Influence Baking Outcomes?
The top rack influences baking outcomes significantly. It directly affects temperature and heat distribution. The top rack is closer to the heating element, which can lead to more intense heat. This positioning can result in quicker browning and crisping of baked goods. However, items on the top rack may also risk over-baking if left unattended.
Baked goods that require even cooking, such as cakes or casseroles, often perform better on the middle rack. The middle rack maintains balanced heat from both the top and bottom elements.
For broiling, the top rack is ideal. It exposes food to high temperatures, ensuring fast cooking and browning.
Temperature variation is crucial. The top rack may reach higher temperatures than the bottom. Therefore, bakers may need to adjust cooking times or lower the temperature for even results.
Understanding how the top rack influences baking helps bakers make informed decisions based on their recipes. Using the right rack for specific dishes improves texture and flavor outcomes.
What Are the Advantages of Using the Middle Rack for Baking?
Using the middle rack for baking offers several advantages, including even heat distribution and optimal airflow.
- Even baking results
- Balanced browning
- Improved airflow
- Versatility for various baked goods
- Reduced risk of burning
- Compatible with multiple oven types
Using the middle rack for baking helps achieve desirable results due to various factors.
-
Even Baking Results:
Using the middle rack promotes even baking results. This rack position allows heat from the oven’s heating elements to circulate uniformly around the food, which is important for ensuring consistent cooking. According to a study by Cook’s Illustrated, even heat distribution is crucial for items like cakes and cookies, which require uniform heat for proper rising and texture. -
Balanced Browning:
Using the middle rack facilitates balanced browning. This position exposes baked goods to heat without being too close to the top or bottom heating elements. Research by the American Culinary Federation indicates that optimal browning occurs when food is evenly spaced between heating surfaces. -
Improved Airflow:
Using the middle rack improves airflow around the food. An unobstructed space around baked goods allows hot air to circulate effectively. The USDA suggests that improved airflow is important for achieving crispy textures, especially in baked products like bread and pizza. -
Versatility for Various Baked Goods:
Using the middle rack accommodates various baked goods. This position is ideal for cookies, cakes, and casseroles, which all benefit from similar heat exposure. A review by the Institute of Culinary Education noted that mid-level baking enhances the versatility of oven usage. -
Reduced Risk of Burning:
Using the middle rack reduces the risk of burning. When baked goods are placed too close to the bottom element, they may cook faster on the bottom while remaining undercooked on top. This phenomenon is highlighted in research from the Food Network, which states that the middle position minimizes such cooking discrepancies. -
Compatible with Multiple Oven Types:
Using the middle rack is compatible with multiple oven types. Whether using a conventional or convection oven, this position yields reliable results. The Convection Cooks Guide suggests that the middle rack offers consistency in performance across various oven models.
When is the Bottom Rack the Best Choice for Certain Recipes?
The bottom rack is the best choice for certain recipes that require more intense heat or a crispy texture. Foods like pizzas, breads, and casseroles benefit from bottom cooking because they receive direct heat from the oven’s heating element. This positioning allows for better browning and crust formation.
When baking items such as pizza, the bottom rack gives the crust a desirable crispness. For bread, the heat can promote a better rise and a firmer crust. Additionally, dishes that need bubbling, such as casseroles, benefit from the bottom rack as this area helps achieve better moisture evaporation.
Overall, the bottom rack is ideal for recipes emphasizing crispiness or browning due to its proximity to the heat source.
How Can I Identify the Best Rack Level for My Baking Needs?
To identify the best rack level for your baking needs, consider the type of baked goods you are preparing and the desired cooking results, such as browning, rising, and heat distribution.
-
Middle Rack: This is the most versatile position. It allows for even heat circulation, which benefits a wide variety of baked goods. Cakes, cookies, and breads typically bake well here.
-
Upper Rack: Use the upper rack for items that need browning or a crisp texture. This position is ideal for broiling or for recipes that require a good crust, like soufflés or pizza.
-
Lower Rack: Choose the lower rack for baking items that need more heat from below. This position works well for items like pies and breads that benefit from a crisp bottom.
-
Adjusting for Specific Recipes: Some recipes specify rack positions based on their unique requirements. For instance, baking with multiple pans may require adjusting the rack to avoid overcrowding and ensure optimal airflow.
-
Oven Calibration: Each oven can have slight variations in temperature and heat distribution. Experimenting with different rack positions can help you refine your approach for consistent results.
Understanding these factors allows for better baking outcomes and can make the baking process more enjoyable and successful.
Which Baked Goods Are Best Suited for Specific Rack Positions?
The best oven rack positions for baking depend on the type of baked good you are making.
- Top Rack
- Middle Rack
- Bottom Rack
- High Rack Position
- Low Rack Position
- Various Opinions
Baking needs change based on the item, which influences rack placement. The following sections explain the best rack positions for different baked goods.
-
Top Rack:
The top rack is best suited for items that need quick browning. Foods like casseroles or baked goods topped with cheese benefit from this position. The heat from the upper element helps achieve a nice golden crust. However, some recipes caution against using this position too early, as it may lead to uneven cooking. -
Middle Rack:
The middle rack is often considered the all-purpose position for baking. It provides balanced heat distribution, making it ideal for cakes, cookies, and muffins. The baking time remains consistent. Many bakers prefer this position as it reduces the risk of burning. -
Bottom Rack:
The bottom rack works well for dishes that require a crispy bottom, like bread or pizza. The direct heat helps create a well-cooked crust. However, this position may not be suitable for delicate items, as they risk burning on the bottom. -
High Rack Position:
A high rack position can create a more intense top heat. This is beneficial for items needing a quick set or browning, such as meringues or soufflés. Some bakers recommend adjusting the temperature slightly higher when using this position. -
Low Rack Position:
Using a low rack can be effective for long-cooking items that need a tender interior, like roasts or deep-dish pizzas. It ensures the top does not over-brown. This position requires careful monitoring to avoid overcooking. -
Various Opinions:
Opinions on rack positioning vary among bakers. Some prefer the middle rack for almost everything to avoid trial and error with other placements. Others assert strict adherence to individual recipes, emphasizing the need for optimal temperature control and cooking times. Chef Thomas Keller advocates for thorough testing at different heights, suggesting awareness of each oven’s idiosyncrasies.
In conclusion, understanding the objectives of your baked goods will help inform decisions on rack positioning.
How Do I Adjust Rack Positions When Baking Multiple Items Together?
To adjust rack positions when baking multiple items together, place the items based on their baking times and temperatures to ensure even cooking.
-
Top rack: Use the top rack for items that need higher heat and shorter baking times, such as delicate cookies and meringues. These items can brown quickly and often require less cooking time.
-
Middle rack: The middle rack is ideal for most baked goods, including cakes, muffins, and casseroles. This position provides even heat circulation, allowing for uniform cooking.
-
Bottom rack: Use the bottom rack for items that require a longer baking time and browning on the bottom, such as pizza or bread. This rack receives direct heat from the oven floor, promoting a crispy base.
To further enhance the baking process:
– Stagger items: If baking multiple trays at once, stagger their positions to allow for better air circulation. This improves heat distribution.
– Rotate trays: Turn trays halfway through cooking. This helps combat hot spots and ensures even browning.
– Monitor temperature: Use an oven thermometer for accuracy. Baking items at different temperatures can lead to uneven results.
– Avoid overcrowding: Leave adequate space between items for airflow. Overcrowding can trap heat and result in poorly baked goods.
Following these strategies will maximize efficiency and improve your baking results when cooking multiple items simultaneously.
Related Post: