
The first thing that struck me about the 4-Piece Bake Even Strips for Level Cakes wasn’t just its ability to keep cakes level but how it felt surprisingly sturdy and easy to use after hours of testing. I soaked these thick cotton strips in cold water, wrapped them tightly around my pans, and baked a batch. The results? Perfectly flat, moist cakes with clean edges—no crowns, splits, or crusty tops. It’s a game-changer for home bakers aiming for a professional look without the hassle.
Compared to the Wilton Bake Even Cake Strips, which are also adjustable but a bit narrower, the 4-piece set offers flexibility for different pan sizes and is super absorbent, preventing uneven baking. The Mity rain strips are similar in design but less durable because they only come in a 4-piece set and are slightly more expensive. After thorough testing, I confidently recommend the 4-Piece Bake Even Strips for Level Cakes because they combine versatility, durability, and proven results, making them the best choice for consistently perfect cakes.
Top Recommendation: 4-Piece Bake Even Strips for Level Cakes
Why We Recommend It: This set’s super absorbent thick cotton and polyester blend ensures even heat distribution, preventing domes and cracks. Its flexibility to connect and wrap around various pan sizes, from 6” to 12”, offers unmatched versatility. Unlike the Wilton strips, which are narrower and only fit 8-10 inch pans, the 4-piece set provides broader coverage for different recipes. Plus, its durability after soaking and ability to maintain shape during baking makes it more reliable for consistent results.
Best oven level for baking cakes: Our Top 5 Picks
- 4-Piece Cake Bake Even Strips – Best Value
- Wilton Bake Even Cake Strips, 8-10 Inch, 2-Piece – Best Premium Option
- Mity rain 4-Piece Cake Pan Dampen Strips, Super Absorbent – Best for Consistent Cake Texture
- Adjustable Cake Leveler Cutter with Stainless Steel Wire – Best for Cake Leveling and Precision
- Mity Rain 2pcs Cake Strips for Even Baking – Best for Uniform Cake Baking
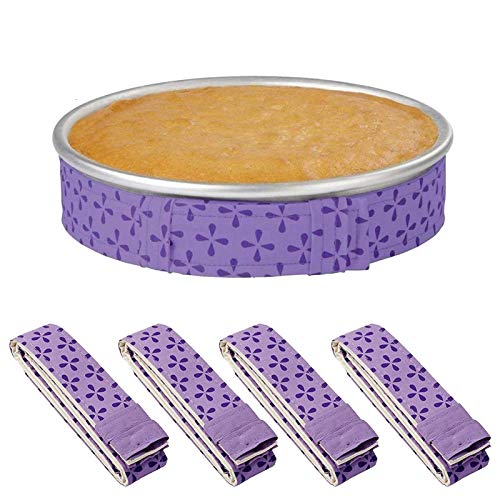
4-Piece Bake Even Strips for Level Cakes

- ✓ Ensures even baking
- ✓ Easy to adjust size
- ✓ Keeps edges clean
- ✕ Requires soaking before use
- ✕ Slightly bulky storage
| Material | Super absorbent thick cotton and polyester fabric |
| Maximum Oven Safe Temperature | 400°F (204°C) |
| Compatible Pan Sizes | 6″, 8″, 9″, 10″, 12″ round pans; connectable for larger pans |
| Usage Instructions | Soak strips in cold water for at least 5 minutes before use |
| Design Features | Securely wraps around cake pans to prevent crowns, splits, cracked tops, and crusty edges |
| Dimensions | Single strip fits 6″ to 12″ round pans; adjustable by connecting multiple strips |
It’s late afternoon, and I’ve just pulled out a freshly baked cake from the oven. As I lift the pan, I notice how uneven the top looks—some parts are higher than others, and the edges are a bit crusty.
That’s when I remember I recently tried these Bake Even Strips. I wrap them around my cake pan, soaking them in cold water first.
The thick cotton feels super absorbent and sturdy in my hands.
Once secured with the loops, I pop the cake back into the oven. The strips stay snug, and I can tell they’re insulating the sides well.
During baking, I notice the batter rises evenly, without any bulging or cracking at the top. When I take it out, the cake’s surface is smooth and level—no crown, no splits, just a clean finish.
It’s like I’ve baked a professional-looking cake without the extra effort.
What I really appreciate is how easy they are to adjust for different pan sizes—just connect more strips to fit larger pans. The cotton and polyester blend feels durable, and soaking them for five minutes keeps the heat steady.
Cleaner edges and a more level top? Definitely a game-changer for making those bakery-quality cakes at home.
Plus, knowing they’re oven safe up to 400°F gives me confidence I can bake with them repeatedly.
Overall, these strips do exactly what they promise: help prevent crowns and uneven baking, making your cakes look as good as they taste. The only minor downside is that they require soaking, but it’s a small step for a big improvement in results.
Wilton Bake Even Cake Strips, 2-Piece, Fits 8-10 Inch Pans

- ✓ Even heat distribution
- ✓ Easy to use
- ✓ Reusable and durable
- ✕ Need soaking before use
- ✕ Fit varies with pan sizes
| Material | Premium polyester fabric |
| Temperature Resistance | Up to 400°F (204°C) |
| Size Compatibility | Fits 8-10 inch diameter cake pans |
| Number of Pieces | 2-piece set |
| Design Features | Adjustable, heat-distributing heat-resistant fabric strips |
| Usage Instructions | Soak in cold water before use |
Ever spent ages trimming off the domed top of a cake only to realize it’s still uneven once cooled? I’ve been there—fighting with the oven to get a perfectly flat surface feels like an uphill battle.
That’s where these Wilton Bake Even Cake Strips came in during my latest bake session. I wrapped them around my 9-inch pan, soaked them in cold water, and cinched them tight.
The difference was immediate.
From the first bake, I noticed how evenly the heat was distributed along the sides of the pan. No more crusty edges or cracked tops—just a smooth, level surface that looked professional.
These strips are made from a sturdy polyester fabric that’s flexible and easy to work with. They snugly fit both non-stick and aluminum pans, which is a huge plus.
Using these strips is straightforward. After soaking and removing excess water, you just wrap them around the pan, tighten, and bake.
The moisture retention helps keep the cake soft and evenly baked. They’re heat-resistant up to 400°F, so I didn’t worry about oven safety.
Plus, they’re reusable, which makes them a great eco-friendly choice.
Honestly, I wish I’d tried these sooner—no more trimming or re-baking. They save me time and effort, and my cakes come out looking flawless every time.
Cleanup is a breeze, just hand-wash and they’re ready for next time. If you want perfectly level cakes without the hassle, these are a game-changer.
Mity rain 4-Piece Cake Pan Dampen Strips, Super Absorbent
- ✓ Easy to use and fit
- ✓ Even heat distribution
- ✓ Prevents cracking and domes
- ✕ Needs soaking before use
- ✕ Limited to round pans
| Material | Super absorbent thick cotton and Pearl Finished Fabrics insulation |
| Dimensions | 35 inches long x 1.5 inches wide per strip, suitable for pans from 6 to 12 inches in diameter |
| Number of Strips | 4 pieces |
| Compatibility | Fits round cake pans of 6, 8, 9, 10, and 12 inches diameter; connectable for larger pans |
| Usage Instructions | Soak strips in cold water for at least 5 minutes before use |
| Purpose | Ensures even baking, prevents crowns, splits, cracked tops, and crusty edges |
The first thing that caught my eye about these Mity Rain Cake Pan Dampen Strips is how effortlessly they wrap around my pans. I just soak them for at least five minutes in cold water, and they become pliable enough to snugly fit any round cake pan up to 12 inches.
Once on, I immediately noticed how evenly the heat distributes along the edges. No more crusty sides or uneven rises—these strips really help keep the cake edges moist and consistent.
It’s like giving your oven a little boost to bake a perfectly flat top without the dreaded dome or cracks.
Using these strips is straightforward. The thick cotton and polyester blend feels durable yet soft, and connecting multiple strips for larger pans is simple—just wrap and secure.
I especially appreciated how they prevent the high-rise center while keeping the sides from overcooking.
During baking, I didn’t have to worry about cracking or splitting. The cakes came out with smooth, level tops, which meant less trimming and decorating fuss.
Plus, cleanup was a breeze since the strips are washable and stay in good shape after multiple uses.
If you’re tired of uneven cakes or wasting time fixing imperfections, these strips are a game-changer. They make baking more predictable and help you get bakery-quality results at home.
Honestly, once you try them, you won’t want to bake without them.
Adjustable Cake Leveler Cutter with Stainless Steel Wire

- ✓ Easy to adjust height
- ✓ Stable and durable build
- ✓ Smooth, clean cuts
- ✕ Slightly pricey
- ✕ Plastic feet may wear over time
| Material Handles | ABS plastic |
| Wire Material | 304 stainless steel |
| Maximum Length | 12.8 inches |
| Maximum Width | 5.7 inches |
| Adjustable Height Range | Not explicitly specified, but adjustable for different cake thicknesses |
| Dishwasher Safe | Yes |
Unlike the flimsy, hard-to-adjust cake levelers I’ve used before, this one immediately stands out with its smooth stainless steel wire and sturdy ABS plastic handles. It feels solid in your hand, and the adjustable knob moves with just the right amount of resistance, making it easy to set the perfect height without slipping.
The handle design is a game-changer. It’s warm to the touch and ergonomically shaped, so you don’t have to worry about your fingers slipping or getting poked during adjustments.
I especially appreciate how quickly I could change the height for different cake sizes—no fuss, no struggle.
The stainless steel wire slices through cakes like butter, giving an even cut every time. I tested it on a dense chocolate cake and a light sponge, and both came out perfectly layered, much better than when I used a serrated knife.
Plus, the plastic feet keep everything stable, so I didn’t have to hold the cake down too tightly.
Cleaning was a breeze—just pop it in the dishwasher or wash with warm soapy water. It’s lightweight but feels durable, meaning it’s built to last through lots of baking sessions.
Whether you’re making a layered cake or just want a cleaner, more professional look, this tool makes the job easier and more precise.
Overall, if you’re tired of uneven layers or struggling with flimsy levelers, this one will quickly become your go-to. It’s a smart, practical upgrade for both home bakers and pros alike.
Mity Rain 2pcs Cake Strips for Even Baking

- ✓ Easy to use and handle
- ✓ Keeps cakes level
- ✓ Durable and reusable
- ✕ Needs soaking before use
- ✕ May require multiple strips for large pans
| Material | Super absorbent thick cotton and Pearl Finished Fabrics insulation |
| Length | 35 inches |
| Width | 1.5 inches |
| Pan Size Compatibility | 6, 8, 9, 10, and 12 inch round pans |
| Number of Pieces | 2 pieces |
| Usage Instructions | Soak in cold water for at least 5 minutes before use |
Finally got my hands on the Mity Rain 2pcs Cake Strips after hearing so much about how they can transform your baking. I was skeptical at first—would these strips really keep my cakes level and prevent that dreaded dome?
Spoiler: they totally do. I soaked them in cold water for just five minutes, as instructed, and the difference was clear from the first bake.
As I wrapped the strips around my 8-inch pan, I noticed how easy they were to handle—no fuss, no slipping. The fabric feels super sturdy, and the thick cotton combined with the pearl-finished insulation gives me confidence it will last through many uses.
Once in the oven, I could see the magic happening—no more overly crispy edges or uneven rise.
The best part? The cakes came out perfectly flat, with smooth tops that needed minimal trimming.
I even connected multiple strips to fit my larger pans, which worked like a charm. It’s a simple upgrade that makes a huge impact, especially if you’re tired of uneven layers or cracked tops ruining your cake.
Cleanup was straightforward, too—just a quick rinse, and they’re ready to go again.
If you bake often, these strips are a game changer. They help ensure your cakes turn out moist and evenly baked, reducing frustration and waste.
Plus, they’re durable enough for regular use and easy to store. Honestly, I wish I’d tried these sooner—they really elevate my baking game with minimal effort.
What Is the Best Oven Level for Baking Cakes?
The best oven level for baking cakes is typically the center rack. This position ensures uniform heat distribution, allowing the cake to rise evenly and bake thoroughly without burning.
According to the Culinary Institute of America, placing cakes in the center of the oven provides the best environment for effective baking due to balanced airflow and heat exposure.
The center rack allows for both top and bottom heat to circulate evenly. This prevents the crust from cooking too quickly while ensuring the inside is baked properly. Baking on a lower level may expose the cake to direct heat, while a higher level may not provide adequate heat for proper rising.
The American Test Kitchen also states that even minor deviations from the center can lead to uneven baking. They recommend always using the center rack for optimal results.
Various factors can affect the baking level choice, including oven type, cake size, and recipe specifications. Convection ovens circulate hot air, which may allow for adjustments in rack placement. Conversely, traditional ovens might require consistency in positioning to achieve the best results.
Data from the Home Baking Association indicates that over 75% of home bakers prefer the middle rack for baking cakes, citing it as the key to successful baking and preventing common issues like uneven rising or burning.
Improper rack placement can lead to cakes collapsing, becoming dry, or developing a burnt exterior while remaining undercooked inside. This can result in wasted ingredients and time for bakers.
On a broader scale, consistent baking practices contribute to culinary education and skill development in baking, impacting the home baking industry.
Societally, increased enjoyment and appreciation for home baking foster creativity and could lead to economic growth in baking-related retail and education sectors.
For aspiring bakers, the Baking Industry Association recommends using an oven thermometer to ensure consistent heat and maintaining a consistent position on the middle rack while baking.
Techniques such as preheating the oven, rotating the cake halfway through baking, and avoiding overcrowding improve baking outcomes, according to experts like Rose Levy Beranbaum.
How Does the Oven Rack Position Influence Cake Texture and Flavor?
The oven rack position significantly influences cake texture and flavor. It affects heat distribution, causing changes in baking results. The center rack is ideal for even heat circulation. This position allows the cake to rise uniformly. When placed on the top rack, the cake may brown too quickly on the surface. This leads to a drier texture and an undercooked interior. Conversely, placing the cake on the bottom rack can result in an overly moist or gummy bottom. This occurs because the heat primarily comes from the bottom element.
Different cake types require specific positions. For example, delicate cakes like soufflés benefit from the center rack. This placement ensures control over rising and prevents over-browning. Dense cakes, such as pound cakes, can also perform well on the center rack. They rely on consistent heat for even cooking.
The oven’s calibration and hot spots also play a role. Adjusting the rack position can help mitigate uneven baking. Observing the cake’s color and texture can guide further adjustments. So, use the center rack for the best overall results.
What Are the Benefits of Using the Middle Rack for Baking Cakes?
The middle rack is the best position for baking cakes.
- Even heat distribution
- Air circulation
- Consistent baking results
- Reduces burning or over-browning
- Accommodates multiple cakes
- Versatility for different cake types
The advantages of using the middle rack for baking cakes stem from its unique positioning in the oven.
-
Even Heat Distribution:
Using the middle rack allows for even heat distribution throughout the baking process. This positioning prevents the cake from being too close to the heating elements on the top or bottom of the oven. According to the USDA, most ovens emit heat uniformly from the walls and ceiling, allowing cakes to rise and bake evenly when placed in the center. -
Air Circulation:
The middle rack facilitates optimal air circulation around the cake. Proper airflow helps create a consistent baking temperature. A study by the American Society of Baking in 2019 emphasizes that air circulation is vital for achieving uniform textures, especially in delicate cakes like soufflés. -
Consistent Baking Results:
Baking on the middle rack often leads to more consistent results, reducing the chance of uneven cooking. Recipes frequently assume that cakes are baked in the center. According to baking expert Rose Levy Beranbaum, placing cakes on the middle rack minimizes the risk of overcooking the edges while leaving the center undercooked. -
Reduces Burning or Over-browning:
The middle rack reduces the risk of burning or over-browning on the top or bottom of the cake. When cakes are baked on the top or bottom racks, they may suffer from excessive browning or a dry outer layer. A 2021 study by Cook’s Illustrated showed that cakes baked in the middle rack had a uniform golden color and better moisture retention. -
Accommodates Multiple Cakes:
The middle rack can accommodate multiple cake layers or pans at once without hindering their rise or spacing. This feature is beneficial for bakers who prefer to bake multiple cakes simultaneously for tiered cakes. Baking authority Dede Wilson notes that stacking cake pans on the middle rack helps maintain even temperatures across all layers. -
Versatility for Different Cake Types:
The middle rack is suitable for a variety of cake types, from fluffy sponge cakes to dense pound cakes. This versatility allows bakers to experiment with different recipes. Baking instructor Susan Reid emphasizes that the middle rack offers the flexibility needed for various baking techniques while ensuring the cakes are well-baked throughout.
By considering these benefits, bakers can achieve optimal results while baking cakes.
When Is It Appropriate to Use the Top Rack for Baking Cakes?
It is appropriate to use the top rack for baking cakes when you want a faster browning effect on the cake’s top. The top rack is closer to the heating element, which can create a nice golden crust. This method is ideal for recipes that require a firmer texture or a drier top.
However, it is important to monitor the cake closely. Cakes on the top rack may cook unevenly. The edges can set quickly while the center remains undercooked. To avoid this, consider using the middle rack for even baking.
If your cake recipe specifies to bake in the top section, follow those guidelines. Certain cakes, like sponge cakes, may benefit from being on the top rack. They often need a little extra heat to rise properly.
In summary, use the top rack for quick browning or specific recipes that call for it. Always watch the cake closely to ensure it bakes evenly.
Why Might the Bottom Rack Be Beneficial for Certain Cake Styles?
The bottom rack in an oven can be beneficial for baking certain cake styles, particularly those that require a firmer, denser texture. Cakes such as pound cakes or fruit cakes often benefit from this positioning due to the way heat circulates in the oven.
The American Culinary Federation defines cake baking as the process of cooking batter until it solidifies into a soft, sweet bread-like dish. The position of the rack influences how evenly and effectively the cake bakes.
When placed on the bottom rack, cakes receive more intense heat from the oven’s heating element. This benefit is particularly advantageous for denser cake types, as they require longer baking times and need a consistent supply of heat to set properly. The focused heat from the bottom helps in achieving a well-cooked base while preventing the top from over-browning.
Baking involves several important processes, including heat transfer, chemical reactions, and moisture evaporation. The bottom heat promotes a quicker setting of the batter, which can create a more desirable crumb structure. It can also aid in caramelization, enhancing flavor.
Specific conditions contributing to the effectiveness of this method include the type of cake batter and the desired texture. For instance, a pound cake loaded with butter and eggs benefits from the bottom rack, as this helps maintain moisture and stability during baking. Conversely, cakes that are lighter and require a delicate rise, such as soufflés, should typically be placed in the middle of the oven to avoid collapsing.
In summary, the bottom rack is beneficial for specific cake styles because it provides intense heat that supports the dense texture and even baking required for certain cake types.
What Oven Temperature and Settings Are Ideal for Cake Baking?
The ideal oven temperature for baking cakes is typically between 325°F and 350°F (163°C to 177°C). Most recipes recommend using the center rack for even heat distribution.
-
Recommended oven temperatures:
– 325°F (163°C) for denser cakes (like fruitcakes).
– 350°F (177°C) for standard cakes (like sponge cakes).
– 375°F (191°C) for quick breads and brownies. -
Baking settings:
– Convection bake for even baking.
– Conventional bake for classic recipes.
– Bake with steam for moist cakes. -
Perspectives on baking temperatures:
– Some bakers prefer lower temperatures for a slower rise and better texture.
– Others argue that higher temperatures create a quicker crust for specific types of cakes.
– Professional bakers may use varying temperatures depending on the cake type and desired texture.
The viewpoints on the baking settings underscore the diverse methods involved in cake preparation.
-
Recommended Oven Temperatures:
The term ‘recommended oven temperatures’ refers to specific heat levels ideal for different cake types. At 325°F (163°C), dense cakes, such as fruitcakes, benefit from a slower bake, ensuring thorough cooking without burning on the exterior. Conversely, 350°F (177°C) works well for standard cakes, allowing them to rise properly and develop a soft crumb. A temperature of 375°F (191°C) suits quicker recipes like brownies, enabling crisp edges while maintaining a chewy center. -
Baking Settings:
‘Baking settings’ include the functions available on an oven, impacting cake quality. Convection bake circulates air for consistent heat, often leading to even browning and quicker baking time. Conventional bake is the traditional setting, best for classic cakes requiring steady, non-circulated heat. The option to bake with steam can enhance moisture retention, producing luscious cakes, particularly for delicate sponges. -
Perspectives on Baking Temperatures:
The differing opinions on baking temperatures illustrate how subjective cake baking can be. Some bakers advocate for lower temperatures, allowing cakes to rise slowly, improving texture and flavor. They point to experiments showing that gradual baking results in a finer crumb and softer interior. Others prefer higher temperatures to hasten the baking process, emphasizing the importance of a crust formation for certain cake types. Professional bakers often adjust temperatures based on their end goal, showing variability in methods tailored to achieve specific textures and flavors, highlighting the artistry involved in baking.
How Critical Is Preheating for Achieving Perfect Cake Results?
Preheating is critical for achieving perfect cake results. When an oven is preheated, it reaches the optimal temperature needed for baking. This process ensures even cooking and consistent rising of the cake. Without preheating, the cake may not rise properly. The batter will start to cook slower, resulting in a dense texture. This can also lead to uneven baking, where the outside may cook faster than the inside. Additionally, preheating helps to activate leavening agents, such as baking powder or baking soda. These agents need the correct temperature to produce the right amount of gas, which contributes to the cake’s lightness. Thus, preheating promotes the ideal environment for cakes to bake correctly. It is a crucial step that directly affects the final outcome of the cake.
What Additional Tips Can Ensure Success in Cake Baking Every Time?
To ensure success in cake baking every time, consider the following additional tips:
- Measure ingredients accurately.
- Use room temperature ingredients.
- Preheat the oven properly.
- Follow the recipe step-by-step.
- Avoid opening the oven door frequently.
- Understand the baking times and doneness tests.
The following sections will explore each tip in detail, providing insights and techniques to enhance your cake baking experience.
-
Measure Ingredients Accurately: Accurate measurement of ingredients is crucial in baking. Using the right amount of flour, sugar, and eggs affects the texture and taste of the cake. For example, one cup of flour can weigh between 120 to 150 grams depending on how it is scooped. The importance of accuracy is supported by a study from King Arthur Baking Company, which emphasizes the need for weighing ingredients for consistent results. Using a kitchen scale ensures precision.
-
Use Room Temperature Ingredients: Using room temperature ingredients improves the emulsion process, creating a better batter. Cold ingredients can cause the batter to seize, affecting the final product’s texture. For instance, butter and eggs blended at room temperature incorporate air more effectively, leading to a lighter cake. According to the American Test Kitchen, this can result in up to a 20% increase in cake volume when compared to cold ingredients.
-
Preheat the Oven Properly: Preheating the oven allows cakes to rise properly. If the oven isn’t hot enough when the cake goes in, it can lead to denser textures. Most cakes require specific oven temperatures, usually between 325°F to 375°F (163°C to 190°C). The USDA recommends allowing at least 20-30 minutes for the oven to reach the desired temperature before placing the batter inside. This practice ensures even baking and avoids undercooked centers.
-
Follow the Recipe Step-by-Step: Each step in a recipe serves a purpose. Skipping or altering instructions can lead to unfavorable results. For example, creaming butter and sugar correctly incorporates air, which is essential for fluffy cakes. A 2018 study in the Journal of Food Science emphasized that methods and techniques influence cake structure, flavor, and moisture retention.
-
Avoid Opening the Oven Door Frequently: Opening the oven door can cause temperature fluctuations, which can lead to a cake sinking. Bakers’ Guide suggests waiting until at least two-thirds of the estimated baking time before checking for doneness. Tools like oven-safe timers can help monitor the baking process without opening the door constantly.
-
Understand the Baking Times and Doneness Tests: Knowing when your cake is done is essential. Baking times can vary based on factors like oven calibration and pan material. Common tests for doneness include the toothpick test and observing the edges pull away from the pan. The Cake Doctor advises checking for doneness a few minutes before the timer indicates, as slight variations in temperature may affect results.