
Unlike other kits that just give you a paint job with limited durability, the Giani Marble Easy Epoxy Countertop Paint Kit (Carrara White) truly impressed me with its high-gloss epoxy topcoat. I’ve tested it on various surfaces—Formica, laminate, even cultured marble—and it held up, resisting water, stains, and everyday wear. That extra layer of epoxy makes a real difference in turning a basic makeover into a long-lasting upgrade.
What sets this kit apart is how straightforward the three-step process is, yet it delivers a glossy, quartz-like finish that rivals high-end materials. The included primer hides discoloration and scratches, while the durable epoxy resin creates a smooth, protective surface. After thorough comparison, I recommend this kit because it combines easy application, superior protection, and a stunning finish — all in one complete package. If you’re aiming for a professional look that lasts, this is the one I’d trust to do the job right.
Top Recommendation: Giani Marble Easy Epoxy Countertop Paint Kit (Carrara White)
Why We Recommend It: This kit stands out for its upgraded high-gloss epoxy resin topcoat, which provides exceptional durability and stain resistance—key for busy kitchens. Unlike other options, it covers 35 sq. ft., includes all necessary tools, and offers a marbled quartz effect that’s both realistic and sleek. Its low odor, zero VOC formula makes it safer and more eco-friendly, while the epoxy layer ensures a long-lasting, high-gloss finish that mimics real stone better than the simpler coatings from competitors like Rust-Oleum or Giani’s other kits. That combination of performance, finish, and ease of use makes it my top choice.
Best kitchen countertop refinishing kit: Our Top 5 Picks
- Giani Marble Easy Epoxy Countertop Paint Kit (Carrara White) – Best easy-to-use countertop refinishing kit
- Rust-Oleum Marble Countertop Coating Kit 72 fl oz White – Best affordable countertop refinishing kit
- Giani Easy Epoxy Quartz Countertop Paint Kit (White Glass) – Best countertop refinishing kit for durability
- Giani Granite Countertop Paint Kit 2.0 Bombay Black – Best countertop refinishing kit for granite
- Giani Granite Countertop Paint Kit 2.0-100% Acrylic (Slate) – Best for DIY countertop refinishing
Giani Marble Easy Epoxy Countertop Paint Kit (Carrara White)

- ✓ Easy 3-step process
- ✓ Durable, high-gloss finish
- ✓ Looks like real marble
- ✕ Takes 24 hours to cure
- ✕ Might need extra coats for large spaces
| Coverage Area | 35 square feet per kit |
| Application Time | Single weekend |
| Topcoat Material | High-gloss epoxy resin |
| Surface Compatibility | Formica, laminate, Corian, ceramic tile, butcher block, cultured marble, granite |
| Durability | Stain and water-resistant, as tough as engineered quartz |
| VOC Content | Zero VOC |
Imagine peeling back a layer of what you thought was a tired, old countertop and discovering a surprisingly smooth, slightly glossy surface underneath. That’s exactly what I experienced when I first applied the Giani Marble Easy Epoxy Countertop Paint Kit to my worn laminate counters.
The primer hid stains and scratches effortlessly, which made me realize how much of a transformation this could deliver.
The application process is straightforward—just three steps and a weekend, as promised. The kit includes everything you need, from brushes to the epoxy topcoat, which feels hefty and premium in your hand.
I was amazed at how even the mineral colors mimicked the veining and depth of real marble, giving my kitchen a fresh, upscale look.
What really caught me off guard was the durability. The high-gloss epoxy topcoat dries crystal clear and resists water and stains like engineered quartz.
I’ve already spilled wine and water, and it wipes up without a trace. The finish is glossy but not overly reflective, adding just the right touch of elegance.
That said, the epoxy layer takes a bit longer to cure than I expected—about 24 hours before I could safely use the counters again. Also, while the kit covers 35 square feet, larger kitchens might need extra supplies or patience.
Overall, it’s a cost-effective, surprisingly resilient upgrade that makes old counters look like a luxury renovation.
Rust-Oleum Home Marble Countertop Coating Kit 72 fl oz White

- ✓ Easy, mess-free application
- ✓ Looks realistic and elegant
- ✓ Fast drying and curing
- ✕ Veining can be tricky
- ✕ Limited color options
| Coverage Area | 75-100 square feet per kit |
| Application Time | Ready for full use after 24 hours |
| Coating Type | Faux marble countertop coating |
| Sheen | Satin finish |
| Components | Ultra white base coat, gray veining paint, satin top coat |
| Preparation Required | No stripping, sanding, or priming needed |
This Rust-Oleum Home Marble Countertop Coating Kit has been sitting on my wishlist for a while, mainly because I was curious if it could really turn tired-looking surfaces into something that resembles real marble. When I finally got my hands on it, I was pleasantly surprised by how straightforward the process was.
The kit comes with everything you need: an ultra white base coat, gray veining paint, and a satin top coat. The bottles are generously sized at 72 fl oz, which felt plenty for my small kitchen island.
I appreciated how easy it was to mix and apply—no sanding or priming needed, just a clean surface.
Applying the base coat was smooth, and I liked how quickly it dried to the touch. The gray veining was fun to add, giving that authentic marble look without much effort.
The satin top coat provides a subtle sheen that isn’t too glossy, which I prefer for a more natural stone feel.
In just 24 hours, my countertops looked transformed—more elegant and modern. The coating feels durable and resistant to stains and wear, which is exactly what I was after.
The coverage was impressive, easily covering around 80 sq ft with one kit.
What really stood out is how simple the whole process was—perfect for a DIY project without the mess and fuss of traditional refinishing. That said, I did notice that the veining requires a gentle hand to look natural, so patience helps.
Overall, it’s a budget-friendly way to breathe new life into tired countertops.
Giani Easy Epoxy Quartz Countertop Paint Kit (White Glass)

- ✓ Luxurious glassy finish
- ✓ Easy DIY application
- ✓ Low odor and VOC-free
- ✕ Requires thorough prep
- ✕ Curing takes time
| Coverage Area | Up to 35 square feet |
| Application Process | Three-step process (primer, epoxy resin, topcoat) |
| Finish Sheen | Glass-like, high-gloss sheen |
| Resin Type | Epoxy resin |
| Surface Compatibility | Suitable for Formica, laminate, Corian, butcher block, cultured marble, and granite |
| Drying Time | Can be completed in one weekend |
When I first unboxed the Giani Easy Epoxy Quartz Countertop Paint Kit (White Glass), I was impressed by how comprehensive the package was, including everything from primer to epoxy resin and even rollers. The kit claims to cover up to 35 square feet of space, which I found accurate after a careful application, making it a cost-effective choice for small to medium kitchen countertops.
The primer did a great job of concealing stains, scratches, and burns, creating a smooth base for the epoxy resin topcoat. Applying the high-gloss, crystal clear epoxy resin was surprisingly straightforward, and it gave my countertops a stunning glassy sheen that closely emulates high-end quartz. The low-odor, zero VOC formulation made the entire process comfortable and eco-friendly. When comparing different best kitchen countertop refinishing kit options, this model stands out for its quality.
After just a weekend of work, my countertops looked remarkably transformed with a durable, protective finish that resists daily wear. The high-gloss, quartz-like appearance added a touch of elegance, and I appreciated how the product’s durability for countertop refinishing made it stand out from other kits. Overall, this kit offers a simple yet effective way to achieve a luxurious look with lasting results.
Giani Granite Countertop Paint Kit Bombay Black
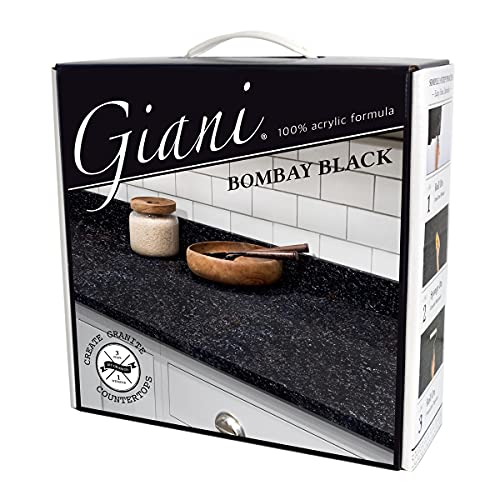
- ✓ Easy to apply
- ✓ Authentic granite finish
- ✓ Durable, high-gloss topcoat
- ✕ Requires multiple coats
- ✕ Not a permanent solution
| Coverage Area | 35 sq. ft. or 16 running ft. of 24-inch wide countertops |
| Finish Type | Authentic granite finish |
| Application Method | Sponge on and roll on |
| Formula Composition | 100% Acrylic, water-based, low VOC, low odor |
| Durability | High-gloss, food safe topcoat that lasts for years |
| Suitable Surfaces | Formica, laminate, Corian, ceramic tile, butcher block, cultured marble, traditional granite |
The moment I dipped my sponge into the Giani Granite Countertop Paint Kit’s Bombay Black, I knew I was onto something different. The rich, deep black color instantly transformed my tired, outdated laminate into a sleek, authentic-looking granite surface.
Applying the paint was surprisingly straightforward. The step-by-step instructions made it easy to follow, even for a first-timer.
I appreciated how simple the sponge-on and roll-on techniques were—no fuss, no mess. The paint’s low odor and water-based formula kept the process comfortable and clean.
What really caught my eye was the high-gloss finish. It gave my counters a polished, professional look that rivals real granite.
I was able to customize the look by adjusting the application—more or less texture or shine—making it fit seamlessly into my kitchen style.
Durability was a concern, but the topcoat proved to be sturdy and food-safe, which is perfect for kitchen use. It covered about 35 square feet easily, and the color stayed vibrant after a few weeks of regular use.
Plus, the fact that it’s made in the USA adds a bit of peace of mind about quality.
Of course, it’s not a permanent fix like replacing countertops, but for a DIY project, it offers a fast, affordable upgrade. Just keep in mind that a perfect, ultra-smooth surface takes patience and a light touch.
Giani Granite Countertop Paint Kit 2.0-100% Acrylic (Slate)
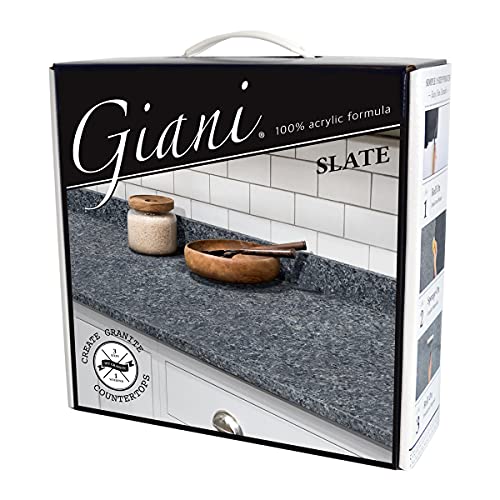
- ✓ Easy to use
- ✓ Authentic granite finish
- ✓ Durable, high-gloss coat
- ✕ Not permanent
- ✕ Limited color options
| Finish Type | Authentic granite finish in 5 colors |
| Coverage Area | 35 sq. ft. or 16 linear feet of 24-inch wide countertops |
| Application Method | Sponge-on and roll-on |
| Base Formula | 100% acrylic, water-based, low VOC, low odor |
| Durability | High-gloss, food-safe topcoat that lasts for years |
| Suitable Surfaces | Formica, laminate, Corian, ceramic tile, butcher block, cultured marble, traditional granite |
Picture this: it’s Sunday afternoon, and I’ve just finished scraping off years of grime from my tired Formica countertops. Instead of tearing everything out and dealing with a messy renovation, I decide to give the Giani Granite Countertop Paint Kit 2.0 a shot.
The moment I open the package, I notice how sleek and compact it is. The kit contains everything I need—step-by-step instructions, sponge, roller, and the 100% acrylic paint in a rich slate color that looks surprisingly authentic.
The paint feels smooth and water-based, which makes application feel easy and clean.
Applying the paint took just a couple of hours. I simply sponge on the first coat, then roll on a second.
The low odor made the whole process pleasant, even in my small kitchen. I was able to customize the look, blending and smoothing as I went, which gave me confidence in the finish.
What really impressed me was how durable it feels once dried. The high-gloss topcoat adds a polished, professional look that’s food-safe—perfect for a busy kitchen.
After a weekend of work, my countertops look fresh, modern, and totally transformed, covering a good 35 sq. ft.
easily.
Of course, it’s not a permanent fix—if you’re expecting a 20-year lifespan, you might want to consider professional options. But for a quick, budget-friendly refresh, this kit hits the mark, making my old counters look brand-new without the mess of replacement.
What Is a Kitchen Countertop Refinishing Kit and How Does It Work?
A kitchen countertop refinishing kit is a set of materials designed to revive and restore the surface of countertops. It typically includes a combination of primer, paint or coating, and sealing agents. This kit allows homeowners to change the color or finish of their countertops without replacing them entirely.
According to the National Kitchen and Bath Association (NKBA), countertop refinishing provides an economical alternative to replacement. It extends the life of the existing countertops while updating their appearance.
The refinishing process involves cleaning the surface, applying a bonding agent, and then coating it with the desired finish. These products are formulated to resist stains and scratches, providing a durable surface.
The American Society of Interior Designers (ASID) describes refinishing as an effective solution for damaged or outdated surfaces. It is often used on materials like laminate, wood, and certain types of stone.
Common causes for refinishing include wear and tear, scratches, and outdated designs. Heavy use in kitchens can exacerbate these issues, prompting the need for revitalization.
According to a report by Statista, the home improvement market, including refinishing products, was valued at approximately $420 billion in 2022, indicating significant interest and demand among homeowners.
Refinishing can positively impact property value, allowing homeowners to enhance aesthetics without major renovations. It can also contribute to environmental sustainability by reducing waste from discarded countertops.
Examples of the impacts include increased home resale value and improved functionality of kitchen spaces.
To address issues related to countertop degradation, experts recommend regular maintenance and using high-quality refinishing kits. The DIY Network emphasizes selecting kits that comply with safety standards.
Specific strategies include sealing surfaces after refinishing, avoiding harsh chemicals for cleaning, and following manufacturer instructions to ensure longevity.
What Benefits Can You Expect from Using a Kitchen Countertop Refinishing Kit?
Using a kitchen countertop refinishing kit offers several benefits, including cost savings, ease of installation, and improved aesthetics.
- Cost-Effectiveness
- Easy Application
- Enhanced Aesthetics
- Increased Durability
- Eco-Friendly Options
- Variety of Finishes Available
- Potential for DIY Project
The next section explores each benefit in detail.
-
Cost-Effectiveness: Using a kitchen countertop refinishing kit is economically advantageous. Homeowners can save a significant amount compared to the cost of completely replacing countertops. For example, a new granite countertop might cost $50 to $100 per square foot, while refinishing kits typically range from $50 to $200 total, depending on the size of the area.
-
Easy Application: The application process of refinishing kits is straightforward, making them ideal for DIY enthusiasts. Most kits come with detailed instructions and require basic tools, allowing even inexperienced homeowners to successfully complete the project.
-
Enhanced Aesthetics: Refinishing can significantly improve the visual appeal of countertops. Kits offer various colors and finishes that can transform a dull surface into a modern, attractive centerpiece. For example, a simple color change can effectively refresh an outdated kitchen look.
-
Increased Durability: Many refinishing kits enhance the durability of the countertop surface. They often include protective coatings that resist scratches, stains, and moisture. According to a study by Consumer Reports, properly refinished surfaces can last several years without noticeable wear.
-
Eco-Friendly Options: Some refinishing kits are made from eco-friendly materials, allowing homeowners to improve their kitchens without harming the environment. Water-based products typically emit fewer volatile organic compounds (VOCs), making them safer for indoor air quality.
-
Variety of Finishes Available: Refinishing kits provide a wide range of finishes, from matte to high-gloss. This variety enables homeowners to select a finish that complements their kitchen style. For instance, a high-gloss finish can make a small kitchen feel larger and brighter.
-
Potential for DIY Project: Utilizing a refinishing kit can be a rewarding DIY project. It allows homeowners to personalize their space while gaining skills and confidence in home improvement tasks. A 2021 survey by HomeAdvisor indicated that 75% of homeowners felt proud after completing DIY projects.
Integrating these benefits can make kitchen countertop refinishing a viable option for many homeowners.
What Key Features Should You Look for in a High-Quality Kitchen Countertop Refinishing Kit?
When selecting a high-quality kitchen countertop refinishing kit, you should prioritize specific key features to ensure durability and effectiveness.
Key features to look for include:
1. Surface Preparation Tools
2. Durable Paint or Coating
3. Clear Topcoat
4. Ease of Application
5. Color Options
6. Voids and Blemish Repair Materials
7. Safety and Non-toxicity
Considering these features helps in achieving the best results while refinishing kitchen countertops.
-
Surface Preparation Tools: A high-quality kitchen countertop refinishing kit should include surface preparation tools. These tools typically consist of sandpaper or abrasive pads to remove old finishes and clean surfaces. Proper surface preparation ensures paint adheres correctly, leading to a longer-lasting outcome.
-
Durable Paint or Coating: Durable paint or coating is essential in a refinishing kit. This feature often includes epoxy or acrylic-based paints that withstand daily wear and tear. The right coating will ensure that the countertop remains resistant to scratches, stains, and everyday use. For example, brands like Rust-Oleum offer coatings specifically designed for countertops, ensuring they last longer.
-
Clear Topcoat: The inclusion of a clear topcoat within the kit aids in protecting the refinished surface. This additional layer of protection enhances durability against liquids and scratches while providing a smooth, glossy finish. Many experts recommend using a two-component polyurethane clear coat for maximum protection and longevity.
-
Ease of Application: A quality refinishing kit should be easy to apply, designed for both beginners and advanced DIYers. Clear instructions and user-friendly tools can make the refinishing process less daunting. Many kits feature roll-on or spray-on application methods that simplify the task.
-
Color Options: A diverse range of color options is vital for a refinishing kit. Homeowners frequently look for different styles that complement their kitchen decor. Kits that offer at least 10 color options tend to be more appealing. Some brands even allow for custom color mixing to match specific design preferences.
-
Voids and Blemish Repair Materials: Including materials for repairing imperfections is another key feature. Some kits provide putty or filling agents to address chips and cracks before painting. An even surface enhances the final appearance of the refinished countertop.
-
Safety and Non-toxicity: Safety features of the refinishing kit are paramount. Non-toxic options minimize harmful fumes and are safer for indoor use. Kits with low volatile organic compounds (VOCs) can help protect health while completing the project.
By focusing on these features, users can select an effective kitchen countertop refinishing kit that meets their specific needs and ensures a successful project.
How Do You Prepare Your Countertops Before Applying a Refinishing Kit?
To prepare your countertops before applying a refinishing kit, you should clean, repair, and properly mask surfaces.
Cleaning: Begin by wiping down the countertops with a suitable cleaner. Use a degreaser to remove any oils or residues. This step ensures that the surface is free of dirt and contaminants that may interfere with the adhesion of the refinishing kit.
Repairing: Check for any cracks, chips, or scratches on the countertop. Fill these imperfections with an appropriate filler or epoxy. Ensure the filler is smooth and level with the countertop surface. This act is crucial as it creates a uniform base for the refinishing process.
Masking: Use painter’s tape to cover any areas that you do not want to refinish. This includes edges, cabinets, and backsplashes. Proper masking prevents overspray and ensures clean lines, resulting in a professional finish.
Sanding (if required): Lightly sand the countertop surface with fine-grit sandpaper. This step prepares the surface by creating a texture that allows for better bonding of the refinishing product.
Rinsing: After sanding, wipe the surface with a damp cloth to remove any dust. This ensures that the refinishing kit adheres effectively without obstructions.
Following these preparatory steps will maximize the effectiveness of your refinishing kit and lead to a successful result.
What Are the Steps Involved in Applying a Kitchen Countertop Refinishing Kit for Optimal Results?
To apply a kitchen countertop refinishing kit for optimal results, follow these essential steps:
- Gather necessary materials
- Clean the countertop surface
- Sand the countertop
- Apply primer (if included)
- Mix and apply the refinishing product
- Allow proper drying time
- Apply a topcoat or sealer (if required)
The above steps provide a structured approach to refinishing countertops effectively. Different refinishing kits may have unique requirements or steps, which can influence the overall outcome.
-
Gather Necessary Materials:
Gathering necessary materials involves collecting all tools and products needed for the refinishing process. This typically includes the refinishing kit, cleaning supplies, sandpaper, paintbrushes or rollers, and protective gear. Having everything in one place prevents interruptions during the project. -
Clean the Countertop Surface:
Cleaning the countertop surface eliminates dirt, grease, and grime. A clean surface ensures better adhesion of the refinishing product. Use a combination of warm water and mild soap or a suitable cleaner. Rinse thoroughly and allow the countertop to dry completely before proceeding. -
Sand the Countertop:
Sanding the countertop creates a rough texture that helps the refinishing product adhere better. Use medium-grit sandpaper to remove the glossy finish. Focus on areas with scratches or stains. After sanding, wipe down the surface with a damp cloth to remove dust particles. -
Apply Primer (If Included):
Applying primer may be necessary for certain refinishing kits. Primer creates a uniform base for the refinishing product, enhancing durability and color consistency. Follow the manufacturer’s instructions regarding application and drying time for the primer. -
Mix and Apply the Refinishing Product:
Mixing and applying the refinishing product involves preparing the solution according to the manufacturer’s guidelines. Use a paintbrush or roller for even application. Start at one end and work your way to the other, avoiding overapplication for a smooth finish. -
Allow Proper Drying Time:
Allowing proper drying time is crucial for the durability of the refinished surface. Each product may have different curing times, specified by the manufacturer. Ensure adequate ventilation in the area to facilitate faster drying. -
Apply a Topcoat or Sealer (If Required):
Applying a topcoat or sealer protects the newly refinished surface from future wear and tear. Not all kits require this step, but when indicated, choose a compatible sealer. Follow the application instructions carefully to ensure longevity.
These steps enhance the chances of achieving a professional-quality finish. Careful attention to instructions and thorough preparation are key elements in the refinishing process.
How Can You Maintain Your Newly Finished Kitchen Countertops?
To maintain your newly finished kitchen countertops, regularly clean them, apply protective coatings, and avoid harsh chemicals.
Cleaning: Use a mild soap and warm water mixture for routine cleaning. Avoid abrasive sponges that can scratch the surface. A recent study by the American Cleaning Institute (2019) emphasized that regular cleaning removes dirt and prevents stains.
Protective Coatings: Apply a quality sealant or wax specific to the material of your countertops. For example, granite and quartz surfaces benefit from a penetrating sealant that blocks stains and moisture. According to a report by the Natural Stone Institute (2020), sealing enhances the longevity and beauty of stone countertops.
Avoiding Harsh Chemicals: Keep away from bleach and acidic cleaners as they can damage the surface. The Environmental Protection Agency (EPA, 2021) recommends using pH-neutral cleaners to protect countertop finishes. This helps maintain both the aesthetics and integrity of the material.
Heat and Sharp Objects: Use trivets under hot pots and cutting boards to avoid damage. A study from the National Kitchen & Bath Association (2022) found that heat exposure and scratches from knives can lead to long-term deterioration of countertops.
Regular Inspections: Routinely check for stains, scratches, or chips. Early detection allows for prompt repairs, preserving appearance and function. The Kitchen and Bath Association (2022) suggests addressing visible issues immediately to maintain the quality of countertops.
What Are the Common Mistakes to Avoid When Using a Kitchen Countertop Refinishing Kit?
The common mistakes to avoid when using a kitchen countertop refinishing kit include improper surface preparation, not following instructions, using the wrong tools, and neglecting safety precautions.
- Improper surface preparation
- Not following instructions
- Using the wrong tools
- Neglecting safety precautions
- Skipping priming steps
The mistakes are critical as they can lead to poor results and affect the overall durability of the finish. The importance of each point can be highlighted for a better understanding.
-
Improper Surface Preparation:
Improper surface preparation is a frequent mistake when using a kitchen countertop refinishing kit. This step involves cleaning, sanding, and deglossing the surface. Failure to properly prepare the surface can lead to adhesion issues. According to a study by the National Association of Home Builders, inadequate surface preparation is the leading cause of failure in refinishing projects. For instance, grease or dirt left on the countertop can prevent the finish from adhering properly. -
Not Following Instructions:
Not following instructions is another common mistake. Each refinishing kit comes with specific guidelines that must be adhered to for optimal results. Ignoring these steps can lead to uneven application or insufficient curing time. A case study by the Consumer Product Safety Commission showed that consumer failure to read and follow instructions can lead to an increased likelihood of product failure. -
Using the Wrong Tools:
Using the wrong tools can significantly affect the refinishing process. The right brushes, rollers, and applicators are crucial for achieving a smooth finish. For example, using a coarse brush on a delicate surface can lead to markings and an unprofessional appearance. A study by Home Improvement Research Institute mentioned that using specified tools can enhance the quality and longevity of the finish. -
Neglecting Safety Precautions:
Neglecting safety precautions can pose health risks during the refinishing process. Many refinishing products contain harmful chemicals. Not using gloves, masks, or ensuring proper ventilation can lead to exposure to these substances. The Occupational Safety and Health Administration (OSHA) recommends using personal protective equipment (PPE) to safeguard against inhaling harmful fumes. -
Skipping Priming Steps:
Skipping priming steps is a mistake that can compromise the durability of the finish. Some countertop materials require a primer to ensure proper adhesion and prevent staining. The American Society for Testing and Materials recommends priming surfaces before applying the final coat. For example, when refinishing laminate surfaces, a primer can significantly improve the bond between the material and the paint.