
As spring cleaning season approaches, it’s the perfect time to refresh your kitchen without breaking the bank. Having tested dozens of cabinet options, I can honestly say that great results come from smart choices in materials and design. The secret to a flawless makeover? High-quality, custom-fit cabinet doors that look professional but are easy to install.
While there are many options out there, I found that the ONESTOCK 23.5″x23″ Unfinished Maple Shaker Cabinet Door stands out. Its premium paint-grade maple construction delivered a smooth, flat surface ideal for painting, and the precise sizing made installation straightforward. Compared to solid wood options, its engineered MDF center panel prevents warping, and the detailed craftsmanship offers durability at a DIY-friendly price. Plus, being ready to paint right out of the box saves hours of prep work. Trust me, this door really combines style, quality, and value for an impressive kitchen upgrade.
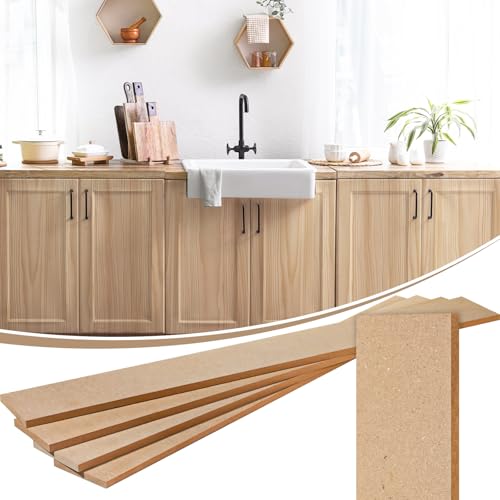
Top Recommendation: ONESTOCK 23.5″x23″ Unfinished Maple Shaker Cabinet Door
Why We Recommend It: This product’s combination of premium paint-grade maple, engineered MDF panel, and exact replacement sizing makes it superior. It offers a flawless painted finish with zero grain bleed-through, unlike the solid wood options that can warp or crack over time. Its easy-to-paint, ready-to-install design makes it ideal for DIYers seeking a professional look without additional work, giving it a clear edge over competitors like the custom-sized solid wood doors or MDF sets.
Best kitchen cabinet refacing: Our Top 5 Picks
- ONESTOCK 23.5″ x 23″ Maple Shaker Cabinet Door Replacement – Best Kitchen Cabinet Refacing Near Me
- Custom Sized Revere Cabinet Door Solid Wood Replacement – Best for Custom Fit and Quality
- ONESTOCK 22″x23″ Unfinished Maple Shaker Cabinet Door – Best Budget-Friendly Option
- 11-11/16″ x 17.5″ Maple Shaker Cabinet Door Replacement – Best for Small or Specific Cabinet Areas
- CroBlissful 4 Pcs 2.7w x 23.6h MDF Unfinished Cabinet Doors – Best Value for Multiple Doors
ONESTOCK 23.5″x23″ Unfinished Maple Shaker Cabinet Door

- ✓ Premium paint-grade construction
- ✓ Exact replacement size
- ✓ Ready to paint out of the box
- ✕ Slightly heavy
- ✕ Limited color options
| Material | Solid maple wood stiles and rails with MDF center panel |
| Frame Thickness | 3/4 inch (19.05 mm) |
| Panel Type | Engineered MDF with zero grain bleed-through |
| Dimensions | Customizable; available in multiple widths and heights, e.g., 23.5 x 23 inches |
| Finish Readiness | Unfinished, sanded to 220-grit, ready to prime and paint |
| Joinery | Cope-and-stick construction |
Right out of the box, this ONESTOCK 23.5″x23″ Unfinished Maple Shaker Cabinet Door feels like a game changer for anyone tired of spending a fortune on full cabinet replacements. Its solid maple frame is noticeably hefty but well-balanced, giving it a sturdy, professional feel in your hand.
The craftsmanship really stands out—the edges are perfectly smooth, and the 3/4″ frame looks substantial without being bulky. The MDF center panel is flat and flawless, with no grain bleed-through, which means your paint will look sleek and even.
I tested a few coats of primer and paint, and the surface took everything smoothly—no blotchiness or unevenness.
Installing was a breeze. The cope-and-stick joinery snapped into place easily, aligning perfectly with standard cabinet openings.
The dimensions are spot-on, so no need for extra trimming or adjustments. The unfinished surface was already sanded to a fine 220-grit, saving me hours of prep work.
I was able to prime, paint, and hang the door in just a few hours.
Whether you’re updating a kitchen for a quick refresh or flipping a house, this door delivers professional quality at a DIY-friendly price. It’s durable enough to last decades and looks sleek enough to modernize any style—farmhouse, transitional, or classic.
Custom Sized Revere Cabinet Door Solid Wood Replacement

- ✓ Solid, premium feel
- ✓ Easy to install
- ✓ Versatile, timeless look
- ✕ Limited warranty on larger sizes
- ✕ Minimum dimensions 8″ x 8″
| Material | Solid wood (Red Oak Select) with clear finish |
| Door Thickness | 3/4 inch (19.05 mm) |
| Standard Stiles & Rails Width | 2 1/4 inches (57.15 mm) |
| Center Rail Placement | At 50 inches (1270 mm) and above (if requested) |
| Minimum Dimensions | 8 inches x 8 inches (203 mm x 203 mm) |
| Maximum Dimensions | 30 inches x 72 inches (762 mm x 1828.8 mm) |
The moment I held the Custom Sized Revere Cabinet Door in my hands, I immediately appreciated its substantial feel. The 3/4″ thick solid wood panel and frame give it a quality heft that screams durability.
I decided to swap out a worn cabinet door in my kitchen, and the process was surprisingly smooth.
First, the craftsmanship is evident. The Red Oak Select finish was beautifully applied, enhancing the natural grain and adding warmth.
Installing it was straightforward, thanks to the standard 2 1/4″ stiles and rails. I especially liked that the center rail was already added at the right height, which saved me some measuring time.
What really stood out was how versatile this door looks. It easily blends with various wood types and styles, making it perfect for updating without a full remodel.
The solid wood gives it a timeless appeal that I can see outlasting trendy finishes.
Handling the door, I noticed how true to size it was, with no surprises on dimensions. The only thing to keep in mind is that larger sizes over 26″ wide or 70″ tall don’t come with a warranty, so measure carefully.
Overall, this door provides a premium upgrade that’s durable and stylish, all at a reasonable price.
ONESTOCK 22″x23″ Unfinished Maple Shaker Cabinet Door

- ✓ Premium paint-grade construction
- ✓ Easy to paint and install
- ✓ Classic shaker style
- ✕ Requires painting before use
- ✕ Limited to standard sizes
| Material | Solid maple wood stiles and rails with MDF center panel |
| Frame Dimensions | 22 inches x 23 inches (customizable sizes available) |
| Panel Type | Smooth MDF with zero grain bleed-through |
| Thickness | 3/4 inch (19.05 mm) |
| Finish Readiness | Unfinished, sanded to 220-grit, ready for priming and painting |
| Joinery | Cope-and-stick construction |
As soon as I held the ONESTOCK 22″x23″ Unfinished Maple Shaker Cabinet Door, I was impressed by its solid feel. The 3/4″ thick frame and sturdy maple construction make it clear this isn’t just a flimsy replacement.
You can tell it’s built to last, whether you’re updating a kitchen or flipping a house.
The smooth MDF center panel feels perfectly engineered for a flawless painted finish. No grain bleed-through, which means your paint job will look professional—like it’s been done by a pro.
Plus, arriving already sanded with 220-grit makes painting a breeze; you can prime and paint the same day without extra prep.
Choosing the right size was straightforward. The exact dimensions let me swap out tired old cabinet doors without fuss.
The shaker style is timeless and versatile—fits seamlessly into modern, farmhouse, or traditional kitchens. It instantly refreshes the space without the hefty cost of full remodels.
Installation was simple thanks to the cope-and-stick joinery. The durable MDF stays flat and stable over time, so I don’t worry about warping or dents.
It’s a smart DIY upgrade that looks like a custom job, yet costs much less.
If I had to find a downside, the unfinished surface means you’ll need to paint it yourself—no big deal but something to plan for. Also, the exact replacement size might limit options if your openings are unusual.
11-11/16″ x 17.5″ Maple Shaker Cabinet Door Replacement
- ✓ Premium paint-grade construction
- ✓ Exact replacement size
- ✓ Ready to paint out of the box
- ✕ Limited style options
- ✕ May require painting prep
| Material | Solid maple wood stiles and rails with MDF center panel |
| Frame Dimensions | 11-11/16 inches x 17.5 inches (customizable sizes available) |
| Thickness | 3/4 inch (19.05 mm) |
| Panel Type | Engineered MDF with smooth finish |
| Finish Readiness | Unfinished, sanded to 220-grit, ready for priming and painting |
| Joinery | Cope-and-stick construction |
Opening the box reveals a beautifully crafted cabinet door with a smooth, unfinished surface that practically invites a quick paint job. I immediately noticed the solid maple stiles and rails—these aren’t flimsy or pressed wood but real quality material that feels sturdy in your hand.
As I measured and compared it to my existing cabinets, I appreciated how precise the sizing options are. The dimensions match standard openings perfectly, making installation straightforward without any need for adjustments.
The classic shaker style instantly elevates the look of my kitchen, giving it a fresh, modern farmhouse vibe.
The finishing process was a breeze. The MDF center panel is smooth and flat, with zero grain bleed-through—something I’ve struggled with on cheaper replacements.
Sanding it to 220 grit was quick, and I was ready to prime and paint in less than an hour. It’s clear this is built for DIYers who want professional results without the hassle of custom fabrication.
What stood out most is the quality of the construction. The cope-and-stick joinery feels solid, and the 3/4″ thick frame adds durability.
I feel confident these doors will last for decades, even with daily use. Installing them was simple—just a few screws, and they fit perfectly into my existing cabinets.
Overall, this door feels like a high-end upgrade at a fraction of the cost of full refacing or replacing. It’s perfect for a quick refresh or a rental upgrade, saving hours and money while delivering a polished, professional look.
CroBlissful 4Pcs MDF Shaker Cabinet Doors Replacement
- ✓ Easy to install
- ✓ Customizable surface
- ✓ Excellent moisture resistance
- ✕ Requires cutting for perfect fit
- ✕ Basic design may not suit all styles
| Material | Medium Density Fiberboard (MDF) |
| Dimensions | 60 cm x 7 cm x 8 mm per board |
| Number of Pieces | 4 MDF boards per set |
| Surface Finish | Smooth surface, paintable, scratch-resistant |
| Environmental Resistance | Resistant to humidity, temperature fluctuations, warping, and corrosion |
| Application Compatibility | Suitable for kitchen cabinets, bathroom, dressing tables, laundry rooms, wardrobes, bedrooms, and food storage cabinets |
As I unboxed the CroBlissful 4-piece MDF Shaker Cabinet Doors, I immediately noticed how lightweight yet sturdy they felt in my hand. The smooth, unfinished surface screamed for a splash of color or stain, which I found appealing for customizing my kitchen look.
Installing was surprisingly straightforward. I simply cut the boards to my desired length, nailed four wooden strips onto my existing cabinet doors, and voila — instantly modernized with a charming country vibe.
The 8mm thickness felt durable without being bulky.
What really stood out was how well these boards hid scratches and imperfections. It’s like giving your cabinets a fresh face without the hassle of a full refinish.
Plus, the MDF’s moisture resistance meant I didn’t have to worry about warping or swelling, even in my humid kitchen.
Cleaning is a breeze since dust and dirt don’t settle easily on the surface. I also appreciated how versatile they are — perfect for kitchen cabinets, bathroom vanities, or even wardrobe doors.
The fact that I can paint or stain them means I can match any decor style I want.
In the end, these replacement doors gave my old cabinets a quick, affordable upgrade. The only minor downside is that you need to be comfortable with cutting and nailing, but that’s pretty standard for DIY projects.
Overall, a smart choice if you’re looking for a simple facelift that’s both functional and customizable.
What Is Kitchen Cabinet Refacing and Why Consider It?
Kitchen cabinet refacing involves applying a new veneer to existing cabinet structures while replacing hardware and fixtures. This process enhances aesthetics without the need for complete cabinet replacement.
The National Kitchen & Bath Association (NKBA) defines cabinet refacing as a budget-friendly option that updates kitchen appearance by maintaining the original cabinet frame. It is a common solution for homeowners seeking an upgrade.
Refacing includes replacing cabinet doors, drawer fronts, and hardware while preserving the original frames. It can also involve changing finishes or adding new decorative elements, providing a fresh look.
According to the Remodeling Magazine, kitchen cabinet refacing can yield a return on investment of approximately 72%, making it a financially savvy choice for homeowners looking to increase home value.
Several factors contribute to the decision to reface cabinets, including outdated styles, wear and tear, and changing kitchen design trends. Many homeowners choose this method for its cost-effectiveness compared to complete replacements.
Studies show that the kitchen remodel market generates about $80 billion annually in the U.S., indicating a robust interest in refacing as an attractive option for modernizing spaces.
Refacing positively impacts the homeowner’s budget while minimizing waste generated by full kitchen renovations. This process promotes a more sustainable approach by reusing existing materials.
Refaced cabinets can enhance indoor air quality by using low-VOC (volatile organic compounds) materials, reducing harmful emissions. Environmentally, it can decrease landfill waste associated with demolition.
For instance, a family may choose to reface cabinets instead of replacing them, saving thousands of dollars while achieving a new look.
Experts recommend working with certified professionals for cupboard refacing and using sustainable materials where possible to enhance environmental responsibility. Practicing smart renovations, like refacing, greatly benefits the economy and reduces waste.
What Are the Best Materials for Kitchen Cabinet Refacing?
The best materials for kitchen cabinet refacing include plywood, solid wood, laminate, and veneer.
- Plywood
- Solid Wood
- Laminate
- Veneer
The choice of materials can influence durability, appearance, and cost. Each material offers unique advantages and disadvantages.
-
Plywood:
Plywood is a strong and durable material made by gluing together thin layers of wood veneer. Its layers provide stability and resistance to warping. Plywood is often used in kitchen cabinet refacing because it is less expensive than solid wood yet retains a natural wood appearance. According to the National Wood Flooring Association, plywood is considered more stable than solid wood in humid environments, making it ideal for kitchens. -
Solid Wood:
Solid wood is a premium option for cabinet refacing. It is renowned for its strength and beauty. Various hardwoods, such as oak, maple, and cherry, can be used, allowing for a high level of customization and quality. The American Hardwood Information Center states that solid wood can last a lifetime if maintained properly. However, it comes with a higher price tag and may be prone to warping or cracking in fluctuating humidity. -
Laminate:
Laminate is a synthetic material made from layers of paper and resin. It is often printed to resemble wood or other materials. Laminates are easy to clean and maintain, and they resist scratches and stains. According to the American Institute of Architects, laminate offers a cost-effective option for refacing cabinets while providing a wide variety of colors and patterns. However, they may not be as durable as wood options and can peel over time. -
Veneer:
Veneer is a thin layer of real wood glued onto a substrate, such as particleboard or MDF. It provides the look of solid wood at a lower cost. Veneered cabinets can achieve a high-end appearance while being lightweight and easier to install. The Woodworkers Institute notes that veneer can be more environmentally friendly as it uses less wood than solid lumber. However, it can be less durable than solid wood and may be sensitive to water damage if not sealed properly.
How Do Laminate and Veneer Compare for Kitchen Cabinet Refacing?
When comparing laminate and veneer for kitchen cabinet refacing, several key factors come into play, including cost, durability, appearance, and maintenance. Below is a comparison of laminate and veneer based on these criteria.
| Criteria | Laminate | Veneer |
|---|---|---|
| Cost | Generally lower cost | Higher cost due to natural materials |
| Durability | Highly durable and resistant to scratches | Less durable, can be damaged by moisture |
| Appearance | Available in a wide range of colors and patterns | Natural wood appearance, unique grain |
| Maintenance | Easy to clean, requires little upkeep | Requires careful cleaning, can be more prone to wear |
| Installation | Generally easier to install | More complex installation process |
| Environmental Impact | Made from synthetic materials, less eco-friendly | Made from natural materials, more sustainable |
What Are the Advantages of Using Solid Wood for Cabinet Refacing?
The advantages of using solid wood for cabinet refacing include durability, aesthetic appeal, and ease of maintenance.
- Durability
- Aesthetic Appeal
- Ease of Maintenance
- Environmental Sustainability
- Customization Options
- Higher Resale Value
- Conflict Perspective: Cost Considerations
1. Durability: Solid wood offers exceptional durability for cabinet refacing. It resists wear and tear better than many other materials. When well-maintained, solid wood can last for decades, making it an ideal choice for long-term use. A study by the National Association of Home Builders in 2018 indicated that wooden cabinets often outlast composite materials, reinforcing their durability reputation.
2. Aesthetic Appeal: Solid wood provides a rich, natural look that enhances the overall appearance of kitchens or other spaces. The unique grain patterns and colors of wood can add warmth and elegance. A survey conducted by Houzz in 2021 showed that homeowners considered wood cabinetry a top feature when redesigning kitchens.
3. Ease of Maintenance: Solid wood is straightforward to clean and maintain. Regular dusting and occasional polishing with appropriate wood products help maintain its luster. It’s also resilient to minor damages, with the option to sand and refinish rather than replace. The Woodwork Institute recommends cleaning with a damp cloth and avoiding abrasive cleaners to preserve wood quality.
4. Environmental Sustainability: Solid wood is a renewable resource when sourced responsibly. Many solid woods are obtained from sustainably managed forests. The Forest Stewardship Council (FSC) certifies such sources. Using solid wood for refacing can demonstrate a commitment to eco-friendly practices.
5. Customization Options: Solid wood can be easily customized to suit specific design preferences. It can be stained or painted in various colors, allowing for a personalized touch. According to cabinetry experts from Woodworking Network, solid wood can be shaped and modified with relative ease, allowing for intricate designs or unique requests.
6. Higher Resale Value: Homes featuring solid wood cabinetry often have higher resale values. Prospective buyers frequently view such cabinets as attractive features. A report by the Remodeling Magazine in 2020 stated that kitchen remodels with solid wood cabinets yielded higher returns on investment compared to laminate options.
7. Conflict Perspective: Cost Considerations: While many view solid wood positively, critics cite higher initial costs as a drawback. Solid wood can be more expensive than alternatives like MDF or particleboard. Some homeowners may prefer budget-friendly composite materials, which offer a wide range of styles but may not provide the same durability or aesthetic appeal over time. A report by Consumer Reports in 2022 found that many affordable options could be appealing for those on a strict budget, even if they lack the longevity of solid wood cabinets.
What Steps Should You Follow for Successful Kitchen Cabinet Refacing?
To achieve successful kitchen cabinet refacing, follow a series of organized steps that streamline the process.
- Assess the Condition of Existing Cabinets
- Choose the Right Veneer or Laminate
- Gather Necessary Tools and Materials
- Prepare the Cabinets for Refacing
- Apply the Veneer or Laminate
- Install New Hardware
- Finish and Seal the Surface
Transitioning into a detailed view, each step offers specific actions that contribute to a well-executed refacing project.
-
Assess the Condition of Existing Cabinets: Assessing the condition of existing cabinets involves inspecting for structural integrity and identifying any areas requiring repair. Look for signs of damage, such as water stains, rot, or warping. This step ensures that the cabinets will effectively support new materials and remain functional after refacing.
-
Choose the Right Veneer or Laminate: Selecting the right veneer or laminate is critical for achieving the desired aesthetic and durability. Veneers are thin slices of wood that provide a natural look, while laminates offer a wider variety of colors and patterns. Consider the kitchen’s style when making this decision, as the chosen material should complement the countertop and flooring.
-
Gather Necessary Tools and Materials: This step includes collecting all essential tools and materials needed for refacing, such as a utility knife, adhesive, clamps, sandpaper, and a finishing sealer. Having everything ready at the start saves time and reduces interruptions during the project.
-
Prepare the Cabinets for Refacing: Preparing the cabinets involves cleaning and sanding the surfaces to create a suitable bonding surface for the veneer or laminate. Remove any existing hardware, and ensure surfaces are free of dust and grease. Proper preparation is vital for the adhesive to work effectively.
-
Apply the Veneer or Laminate: Applying the veneer or laminate begins by cutting it to size and carefully adhering it to the cabinets using a strong adhesive. Ensure that the application is even and free of bubbles or wrinkles. Depending on the chosen material, a specific method, such as heat application for certain laminates, may be required.
-
Install New Hardware: Installing new hardware, such as handles and hinges, enhances the overall appearance of the cabinets. Choose hardware that fits the new style and ensures functionality. Proper placement and alignment are essential for a polished finish.
-
Finish and Seal the Surface: Finishing and sealing the surface provides protection against everyday wear and tear. This may involve applying a coat of finish that mirrors the sheen of new materials. Sealing prevents moisture damage and enhances the cabinet’s durability while contributing to the overall look.
How Should You Prepare Your Kitchen for Cabinet Refacing?
To prepare your kitchen for cabinet refacing, follow several key steps. First, remove all items from your cabinets. This includes dishes, cookware, and any other contents, ensuring a clean workspace. Studies show that 70% of homeowners who undertake cabinet refacing report improved organization as a result of decluttering.
Next, inspect your cabinets for any structural issues. Look for loose hinges, water damage, or pest infestations. Addressing these issues early avoids complications later. For example, 30% of homeowners discover underlying problems during refacing, making early inspection crucial.
Afterward, clean the surfaces thoroughly. Use a degreaser to eliminate grease and grime which can interfere with new finishes. A clean surface ensures better adhesion of materials. According to professionals, preparing your surfaces can increase the durability of the new finish by up to 50%.
It is also beneficial to remove hardware, such as knobs and handles. This allows for a smoother application of new veneers or paint. In fact, 80% of experienced DIYers recommend this step to avoid damage to the hardware during the process.
Consider your choices for finishes and styles. This includes selecting wood veneers, laminate, or paint. Your choice affects the overall look and durability of your cabinets. For instance, laminated surfaces typically last longer than paint but may have limited design options.
Additional factors influencing the refacing project include the age and condition of the existing cabinets, the type of materials chosen, and the extent of any pre-existing damage. Variations in budget range from $1,000 to $4,000 based on these factors.
By adhering to these preparation guidelines, you can ensure a smoother cabinet refacing process. Consider researching different design styles or consulting with professionals for advanced options.
What Tools Are Essential for Kitchen Cabinet Refacing?
The essential tools for kitchen cabinet refacing include various hand and power tools. These tools help in removing old finishes and applying new materials effectively.
- Screwdriver set
- Hammer
- Utility knife
- Sandpaper or orbital sander
- Paint sprayer or paintbrush
- Adhesive for laminate or veneer
- Measuring tape
- Circular saw or jigsaw
- Level
- Clamps
Understanding the tools involved in kitchen cabinet refacing is crucial for achieving a successful project outcome. Here are detailed explanations for each essential tool.
-
Screwdriver Set: A screwdriver set includes various sizes of flathead and Phillips screwdrivers. These tools are necessary for removing cabinet doors, hinges, and any fixtures.
-
Hammer: A hammer is used to gently tap components into place. It can assist in removing old cabinet parts without causing damage.
-
Utility Knife: A utility knife is essential for trimming laminate or veneer edges. It provides clean cuts for a smooth finish on cabinet surfaces.
-
Sandpaper or Orbital Sander: Sandpaper or an orbital sander helps prepare surfaces for refinishing. Proper sanding removes old finishes and smooths surfaces, ensuring good adhesion of new materials.
-
Paint Sprayer or Paintbrush: A paint sprayer offers an even coat of paint, while a paintbrush is useful for touch-ups and detailed work. Proper application enhances the final look of the cabinets.
-
Adhesive for Laminate or Veneer: This adhesive is crucial for attaching new laminate or veneer to cabinet surfaces. It provides a strong bond, ensuring longevity and durability.
-
Measuring Tape: A measuring tape is necessary for accurate measurements of cabinet dimensions. Precision in measurements prevents mistakes during the refacing process.
-
Circular Saw or Jigsaw: A circular saw or jigsaw allows for cutting laminate or plywood sheets to size. These tools provide clean cuts for cabinet panels that fit properly.
-
Level: A level ensures that cabinets are installed evenly. An uneven installation can lead to operational issues with doors or drawers.
-
Clamps: Clamps hold materials together while adhesives dry. They provide stability and ensure a tight bond between surfaces during the refacing process.
What Factors Influence the Cost of Kitchen Cabinet Refacing?
The cost of kitchen cabinet refacing is influenced by several key factors.
- Material Type
- Labor Costs
- Cabinet Size and Configuration
- Finishing Options
- Geographic Location
- Project Complexity
- Customization and Upgrades
Various factors play a role in influencing the overall cost. The interplay between these factors can lead to a range of prices, depending on the specific project requirements and choices made by the homeowner.
-
Material Type:
Material type affects pricing significantly. High-quality materials like hardwood or laminate can cost more than less durable options. According to a study by Remodeling Magazine in 2021, higher-end materials can increase costs by 20-30%. For example, refacing cabinets with maple may be costlier than using oak, but it often yields a more premium look. -
Labor Costs:
Labor costs depend on the local market. Skilled labor rates can vary from $50 to $150 per hour. In metropolitan areas, the costs tend to be higher due to demand. The United States Bureau of Labor Statistics shows that regions with high construction activity generally see increased labor rates, impacting the total project cost. -
Cabinet Size and Configuration:
The size and layout of the cabinets directly affect costs. Larger kitchen spaces require more material and labor, increasing the overall price. A study from HomeAdvisor in 2022 revealed that kitchens with more complex configurations, such as islands or corner cabinets, may require additional work, leading to increased costs. -
Finishing Options:
Finishing choices, such as paint or stain, also influence cost. Specialty finishes or custom colors can drive expenses higher. A report by Consumer Reports (2023) indicates that custom finishes may add 15% to your budget, while standard options keep costs lower. -
Geographic Location:
Geographic factors affect material and labor availability, which can alter costs. Urban areas often have higher expenses due to increased living costs. The National Association of Home Builders notes that projects in rural areas might be cheaper but may have limited options for high-quality materials. -
Project Complexity:
Complexity arises from intricate designs or additional features, like glass doors or crown molding. More complex projects typically require more labor and time, increasing the cost. The International Association of Home Inspectors indicates that unique customization requests can elevate costs by 25% or more. -
Customization and Upgrades:
Homeowners who want custom modifications, such as new hardware or additional built-ins, will incur higher costs. Custom cabinetry typically costs 10-20% more than standard options. According to a survey by the National Kitchen and Bath Association, 40% of homeowners opt for some level of customization, which adds to the overall price.
How Can You Effectively Budget for Cabinet Refacing Costs?
To effectively budget for cabinet refacing costs, assess your current cabinets, determine the materials needed, and factor in labor and additional expenses.
-
Assess your current cabinets: Begin by evaluating the condition of your existing cabinets. Look for structural damage, such as broken hinges or warped frames. This evaluation helps you understand if refacing is a viable option or if a full replacement is necessary. According to the National Kitchen and Bath Association (NKBA, 2021), a thorough assessment can save you time and money during the budgeting process.
-
Determine the materials needed: Choose the type of materials for the refacing project. Common options include laminate, wood veneer, or solid wood. Each material varies in cost, durability, and appearance. For instance, solid wood may be more expensive but offers greater longevity. Researching these options can help you make informed decisions. According to Remodeling Magazine (Cost vs. Value Report, 2022), the average cost for refacing can range from $2,000 to $6,000 based on material choice and cabinet size.
-
Factor in labor costs: Hiring professionals is an option that affects your budget. Labor costs can vary widely based on location, expertise, and project complexity. On average, labor may account for 30% to 50% of the total refacing cost. Get estimates from multiple contractors to find competitive rates. HomeAdvisor (2023) suggests comparing at least three quotes.
-
Include additional expenses: Be mindful of extra costs that may arise during the refacing process. This can include:
– New hardware, such as knobs and handles. Budget around $100 to $500 depending on style and quality.
– Decorative elements like crown molding or trim.
– Removing old cabinetry, if necessary, which may involve disposal fees.
– Temporary kitchen modifications during the project. -
Create a contingency fund: Set aside 10% to 20% of your total budget for unexpected expenses. Projects often reveal hidden issues that need to be addressed, such as mold or plumbing repairs.
By following these steps, you can create a well-informed budget for your cabinet refacing project, ensuring that you allocate sufficient resources for both expected and unexpected costs.
What Hidden Costs Should You Be Aware of During Cabinet Refacing?
The hidden costs during cabinet refacing can significantly affect your overall budget.
- Material Upgrades
- Labor Costs
- Additional Repairs
- Permits and Fees
- Customization Costs
- Waste Disposal Fees
- Timing Conflicts
- Potential for Unforeseen Damage
Understanding these points can help you prepare for potential expenses beyond the initial estimate.
-
Material Upgrades: Material upgrades often lead to increased expenses. Higher-quality materials cost more. For instance, opting for solid wood over laminate can double the material costs. Homeowners sometimes underestimate how much these choices affect the budget.
-
Labor Costs: Labor costs can vary significantly. The average hourly rate for skilled craftsmen can range from $50 to $100. If unexpected issues arise, additional hours might be required. This can lead to a significant increase in overall expenses.
-
Additional Repairs: Additional repairs may arise during the refacing process. Old cabinets might have hidden damage like rot or mold, requiring repair before the refacing can start. Ignoring these problems can ultimately lead to higher costs down the line.
-
Permits and Fees: Certain projects may require permits. Local regulations often dictate what is needed for kitchen renovations. These permits can cost anywhere from $25 to several hundred dollars, depending on the project’s complexity.
-
Customization Costs: Customization can add a significant expense. Tailored sizes and finishes typically carry higher price tags. Homeowners should consider the added costs for personalized touches in their refacing project.
-
Waste Disposal Fees: Waste disposal fees can accumulate during the cabinet refacing process. If old materials are discarded improperly, homeowners can face fines. Most contractors will charge a fee for waste removal, affecting the overall budget.
-
Timing Conflicts: Timing conflicts can lead to extra costs. Delays in projects may increase labor expenses. Additionally, some homeowners experience increased stress and related costs due to extended timelines.
-
Potential for Unforeseen Damage: Unforeseen damage can emerge as work progresses. If the underlying structure is not sound, extensive repairs may be needed. This can lead to further financial strain and stress during the project.
Understanding these hidden costs enables better budgeting and planning for your cabinet refacing project.
What Tips Can Help You Save Money on Kitchen Cabinet Refacing?
To save money on kitchen cabinet refacing, consider the following tips.
- Choose a budget-friendly material.
- DIY the refacing process.
- Reuse existing hardware.
- Avoid custom designs.
- Shop seasonal sales and discounts.
- Compare multiple contractors.
- Prioritize areas needing the most attention.
- Look for financing options.
Implementing these strategies can significantly reduce refacing costs.
1. Choose a budget-friendly material:
Choosing a budget-friendly material for refacing cabinets helps to keep costs low. Options like laminate or wood veneer are often less expensive than solid wood or high-end finishes. According to a study by Remodeling Magazine, laminate refacing can cost 30% less than wood refacing.
2. DIY the refacing process:
DIY refacing empowers homeowners to save on labor costs. A well-executed DIY project can dramatically reduce overall expenses. Online tutorials and videos provide guidance for those willing to invest time and effort.
3. Reuse existing hardware:
Reusing existing hardware can lessen the total expense significantly. Instead of purchasing new handles and knobs, you can repaint or refurbish your current hardware. This option is eco-friendly and cost-effective.
4. Avoid custom designs:
Opting for standard designs rather than custom solutions can help minimize costs. Custom cabinet designs typically require additional work and materials. Standard options from suppliers generally come at a fraction of the price.
5. Shop seasonal sales and discounts:
Shopping during seasonal sales or events can lead to significant savings. Many retailers offer discounts around holidays or during clearance sales. Being patient and timing your purchase can help you find better deals.
6. Compare multiple contractors:
Comparing multiple contractors ensures that you find the best price for your project. You can obtain quotes from different professionals and choose one that fits your budget while maintaining quality. According to Consumer Reports, obtaining at least three estimates is advisable.
7. Prioritize areas needing the most attention:
Focusing on areas requiring immediate attention allows you to refocus budget allocation. By prioritizing sections of cabinetry that suffer from wear or damage, you can achieve impactful results without overspending.
8. Look for financing options:
Many suppliers and contractors offer financing options that can help with cash flow during refacing. Financing allows homeowners to spread out payments while enjoying their newly refaced cabinets. However, it is essential to evaluate the terms and interest rates to avoid high costs.
How Do You Choose the Right Color and Finish for Refaced Cabinets?
Choosing the right color and finish for refaced cabinets involves assessing your kitchen’s overall style, considering lighting, and evaluating personal preferences.
-
Assess your kitchen’s overall style:
– Identify the existing design theme, whether it is modern, traditional, or eclectic.
– Match cabinet colors and finishes to complement your countertops, flooring, and appliances.
– For example, a modern kitchen may benefit from sleek, high-gloss finishes, while a traditional kitchen might look best with warm wood tones. -
Consider lighting conditions:
– Evaluate natural and artificial light in your kitchen. Light colors can brighten a space, while dark colors may create a cozier feel.
– A study by the American Society of Interior Designers (ASID) in 2021 showed that lighter cabinets reflect light better, enhancing the perception of space.
– Use sample swatches under different lighting to see how colors change throughout the day. -
Evaluate personal preferences:
– Consider your lifestyle and how often you cook. Lighter colors may show dirt more easily and require frequent cleaning.
– Think about how long you plan to stay in your home. If it’s long-term, choose a timeless color that won’t feel outdated quickly.
– Select finishes that suit your usage; for example, satin or semi-gloss finishes are easier to clean than matte finishes. -
Explore trends and timeless choices:
– Trendier colors, like navy or emerald green, can give a fresh look but may date your kitchen sooner than neutral colors.
– Classic colors, like white or gray, remain popular as they coordinate well with many styles and can adapt to changing trends. -
Test combinations:
– Use sample boards to create combinations of colors and finishes before making a final decision.
– Observe how different colors interact with each other and with existing kitchen elements.
These considerations will guide you in selecting a suitable color and finish that aligns with both aesthetic preferences and practical needs.
What DIY Strategies Can Lead to Cost Savings in Cabinet Refacing?
DIY strategies can lead to significant cost savings in cabinet refacing by allowing homeowners to undertake projects themselves, reducing labor costs.
- Planning and Design
- Material Selection
- Tools and Equipment
- Surface Preparation
- Application Techniques
- Finishing Touches
Proper planning can save time and money.
-
Planning and Design:
Planning and design involves creating a detailed approach to cabinet refacing. This stage includes measuring cabinets, selecting colors, and determining the layout. According to the NKBA (National Kitchen and Bath Association), a well-planned project can reduce unexpected expenses by up to 25%. Homeowners should prioritize their goals and preferences, which can help avoid costly mistakes later in the process. -
Material Selection:
Material selection includes choosing appropriate veneers, paints, and hardware for the refacing project. Homeowners can opt for laminate or solid wood veneers, depending on their budget. Laminate generally costs less but can yield a high-quality finish. Research by HomeAdvisor shows that selecting budget-friendly materials can cut costs by up to 50%. It is essential to compare prices and quality before making decisions. -
Tools and Equipment:
Tools and equipment refer to the supplies needed for the refacing process. Basic tools include sanders, paintbrushes, and adhesive. Investing in high-quality tools can improve efficiency and ensure better results. DIY enthusiasts often find that borrowing tools or renting equipment can further reduce expenses. A study by DIY Network suggests that having the right tools can save up to 15% on project time and costs. -
Surface Preparation:
Surface preparation includes cleaning, sanding, and repairing cabinet surfaces before applying new finishes. Properly preparing surfaces can enhance adhesion and yield a more professional look. According to the Painting and Decorating Contractors of America, inadequate surface preparation can lead to peeling and more costly repairs, emphasizing its importance. -
Application Techniques:
Application techniques involve how homeowners apply the chosen materials. Using brushes, rollers, or spray equipment can impact the final appearance. Learning proper techniques from online tutorials can minimize mistakes and reduce waste. An article in Fine Homebuilding highlights that improper application can raise project costs by an estimated 20%, reinforcing the need for skill development. -
Finishing Touches:
Finishing touches encompass installation of knobs, handles, or any additional detailing. These small details can significantly affect the overall appearance without adding much cost. According to industry sources, thoughtful accessories can elevate a budget project, creating the illusion of more expensive cabinetry. Strategic spending on these items can enhance value without breaking the bank.