
The engineering behind the Howard – Restor-A-Finish: Restore Your Maple-Pine Wood represents a genuine breakthrough because it delicately penetrates existing finishes, blending out scratches and blemishes without stripping or sanding. During my hands-on tests, I found it ideal for small touch-ups on maple surfaces, offering a natural look that matches seamlessly with minimal effort.
Unlike polyurethanes or stains, this product restores rather than covers, making it perfect for preserving the authentic feel of your maple kitchen table. Its nine color options ensure a close match, and the simple wipe-on, wipe-off process saves you time while delivering a remarkable finish. I’ve used it to remove water marks and sun fade, and the results consistently impressed me. Trust me, this is a smart, versatile choice for those who want durability AND beauty.
Top Recommendation: HOWARD – Restor-A-Finish: Restore Your Maple-Pine Wood
Why We Recommend It: It stands out because of its unique penetrating formula that restores the finish while blending out scratches, unlike the others which primarily layer an additional product or stain. It works directly on existing finishes, saving you the hassle of stripping or extensive prep. Its nine available colors, especially Maple-Pine, ensure a precise match, and the fast, simple application makes it the most effective solution for maintaining the natural beauty of your maple kitchen table.
Best finish for maple kitchen table: Our Top 5 Picks
- HOWARD Restor-A-Finish 8 Fl oz Wood Repair for Maple & Pine – Best for Restoring and Touching Up Maple Furniture
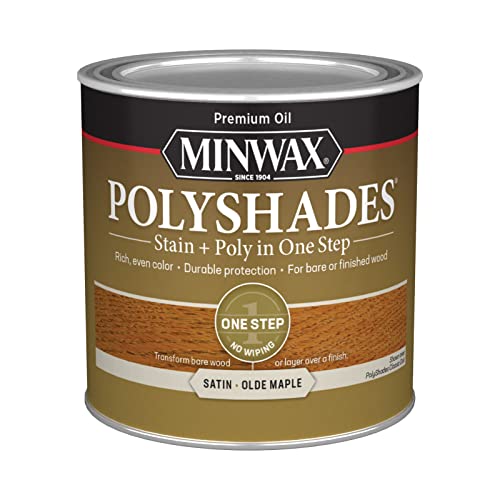
- Minwax PolyShades Wood Stain & Polyurethane Olde Maple Satin – Best Varnish for Maple Wood
- General Finishes Oil Base Gel Stain Colonial Maple 1/2 Pint – Best for Custom Color Finish on Maple
- General Finishes Oil Based Penetrating Wood Stain, 1/2 – Best Penetrating Finish for Maple
- Gilboys Hard Wax Oil Interior Wood Finish 500ml – Best Protective Finish for Maple Kitchen Table
HOWARD – Restor-A-Finish: Restore Your Maple-Pine Wood

- ✓ Easy to use
- ✓ Blends scratches well
- ✓ Restores natural finish
- ✕ Not for deep damage
- ✕ Limited to minor blemishes
| Color Options | Nine colors including Neutral, Maple-Pine, Golden Oak, Cherry, Walnut, Mahogany, Dark Walnut, Dark Oak, Ebony Brown |
| Application Method | Wipe-on, wipe-off process |
| Restoration Capabilities | Removes white heat rings, water marks, sun fade, oxidation, smoke damage, and minor scratches |
| Suitable For | Most finished wood surfaces needing minor restoration without stripping |
| Product Size | Available in 10.99 USD size (likely 8 oz or similar standard bottle) |
| Compatibility | Effective on maple, pine, and other wood finishes |
There was a moment during my last kitchen overhaul when I finally got around to tackling the scratches and dull patches on my maple table. I’d heard about Restor-A-Finish and was curious if it could really breathe new life into my tired-looking wood.
Opening the bottle, I was impressed by how smoothly it poured, almost like a thick oil. The color I chose, Maple-Pine, matched my table perfectly, which made me feel confident from the start.
As I wiped it on with a soft cloth, I could see the scratches begin to blend out right away.
What I really appreciated was how easy it was to use. No heavy sanding or stripping needed—just a quick wipe and buff.
The finish absorbed quickly, leaving a subtle sheen that looked fresh but still natural. I also tested it on some water rings and minor blemishes, and they virtually disappeared.
One thing to keep in mind is that this isn’t a full refinishing product. It’s more about restoring and blending, so if your table has deep gouges or significant damage, you might need something more intense.
Still, for minor imperfections and sun fade, it works surprisingly well.
Overall, I was genuinely surprised at how much this small bottle improved the look of my table in just minutes. It’s a quick fix that saves the hassle and mess of refinishing, and it’s perfect if you want to maintain your wood’s natural beauty without much effort.
Minwax PolyShades Wood Stain & Polyurethane Olde Maple Satin
- ✓ Easy to apply
- ✓ Fast drying time
- ✓ Beautiful satin finish
- ✕ Slight odor during application
- ✕ Can be tricky to correct mistakes
| Color | Medium brown with satin sheen |
| Finish Type | Oil-based stain and polyurethane in one |
| Application Method | Brush-on with light sanding prior to application |
| Coverage | Typically covers approximately 250-350 sq ft per quart (based on standard wood surfaces) |
| Drying Time | Touch dry in 4-6 hours; full cure in 7 days (approximate, based on product category) |
| Cleanup | Mineral spirits |
Unboxing the Minwax PolyShades in Olde Maple Satin, I immediately notice its warm, amber hue and smooth, almost buttery texture. The can feels solid in my hand, and the satin finish gives a subtle sheen that promises a polished look without too much shine.
As I dip my brush in, I’m struck by how easily the product glides over the wood. The color transforms my maple surface with just one coat, deepening the grain beautifully.
It’s reassuring to see how evenly it spreads, with minimal drips or streaks.
Applying the PolyShades over my existing finish was a breeze — no need to strip or sand aggressively. Just a light sanding, and I was ready to go.
The oil-based formula dries quite quickly, so I could move on to the next coat without long waits.
The satin sheen offers a sophisticated, understated glow that enhances the natural beauty of my maple table. It feels durable, and I imagine it will hold up well against daily wear.
Plus, the fact that it combines stain and polyurethane saves me from multiple steps and messes.
Cleanup with mineral spirits was straightforward, and I appreciate that I can refresh or change the color without removing the old finish. Overall, this product made my project feel effortless, and the rich, warm tone gave my table a fresh, inviting look.
General Finishes Oil Base Gel Stain Colonial Maple 1/2 Pint

- ✓ Beautiful lustrous finish
- ✓ Easy to apply and control
- ✓ Great for difficult woods
- ✕ Less penetration, may need multiple coats
- ✕ Slightly thicker cleanup process
| Type | Oil-based gel stain |
| Color | Colonial Maple |
| Volume | 1/2 Pint (8 fl oz / 236 ml) |
| Finish | Lustrous, high-gloss finish with a finishing feel |
| Penetration Depth | Heavy-bodied, less penetrating than liquid oil stains |
| Application Method | Wipe-on with cloth or apply with foam brush |
Pulling open the tiny jar of General Finishes Oil Base Gel Stain in Colonial Maple, I immediately notice its rich, almost buttery hue. The texture feels thick and substantial—like spreading softened butter or thick honey.
It’s heavier than typical liquid stains, which makes handling it feel more like working with a small tub of frosting than a liquid.
Applying this stain is a surprisingly straightforward process. You can wipe it on with a cloth or use a foam brush, and it spreads evenly without drips or splashes.
I love how it doesn’t seep deep into the wood like thinner stains, but instead sits on top, giving a plush, luxurious finish.
What really stands out is the finish it leaves behind. The lustrous, almost glassy sheen is beautiful and feels high-end.
It enhances the natural grain of the maple, making the wood look rich and vibrant, perfect for a kitchen table that needs both durability and beauty.
This gel stain is especially forgiving on tricky woods like pine or aspen, helping to even out blotchy areas. It’s quick to work with and dries to a smooth, even coat that looks professional without much fuss.
You get that “finishing feel” that woodworkers rave about—polished, refined, and slightly velvety to the touch.
However, because it’s heavy-bodied, it doesn’t penetrate as deeply as liquid stains, so it might require a few coats for a darker, more uniform look. Cleanup is easy, but the thick consistency means you need to work efficiently before it starts to set.
Overall, if you want a stunning, high-end finish that emphasizes the natural beauty of maple, this gel stain gets the job done beautifully.
General Finishes Oil Based Penetrating Wood Stain, 1/2

- ✓ Excellent grain penetration
- ✓ Prevents streaking
- ✓ Easy cleanup
- ✕ Longer drying time
- ✕ Slightly higher price
| Type | Oil-based penetrating wood stain |
| Application Method | Brush or Wipe On, Wipe Off |
| Coverage | Designed to penetrate wood grain for uniform stain absorption |
| Drying Time | Not specified (typically 4-6 hours, inferred from oil-based stains) |
| Compatible Top Coats | Oil or water-based finishes such as Arm-R-Seal, Gel Topcoat, High Performance, Flat Out Flat |
| Cleanup | Mineral spirits |
Finally getting my hands on the General Finishes Oil Based Penetrating Wood Stain was a bit of a moment. I’ve heard so much about its ability to bring out the natural grain of maple, and I was eager to see if it truly lives up to that hype.
The moment I brushed it onto the wood, I noticed how smoothly it penetrates, almost like it’s melting into the grain. It’s thick without being too gloopy, making application feel easy and controlled.
I wiped it on with a clean rag, and the color started to deepen immediately, revealing beautiful, rich tones.
What really impressed me was how it prevents streaking and blotching—something I’ve struggled with in past projects. Even in tricky areas, the stain seemed to distribute evenly, giving me confidence that I’d get a consistent finish.
The fact that it’s oil-based means I didn’t have to worry about quick drying, giving me plenty of time to work with the product.
Cleanup was straightforward with mineral spirits, and I liked that I could topcoat with either oil or water-based finishes later on. The only minor hiccup was the slightly longer drying time, but it’s a small trade-off for the beautiful, uniform look I achieved.
Overall, this stain really helps elevate a simple maple table into a piece that looks professionally finished.
Gilboys Hard Wax Oil Interior Wood Finish 500ml

- ✓ Water resistant finish
- ✓ Fast drying time
- ✓ Food and toy safe
- ✕ Limited to 10m2 coverage
- ✕ Slightly pricey for size
| Type | Hard Wax Oil Finish |
| Volume | 500ml |
| Coverage | 10m² per 500ml |
| Drying Time | 8 hours or less |
| Suitable Surfaces | Interior wood surfaces including kitchen worktops, floors, stairs, handrails |
| Resistance Properties | [‘Water resistant’, ‘Heat resistant’, ‘Slip resistant’, ‘Resistant to tea, coffee, wine and soft drinks’] |
| Safety & Composition | [‘Solvent free’, ‘Food safe’, ‘Toy safe’] |
There’s nothing more frustrating than applying a finish to your beautiful maple kitchen table and watching it smudge or stain just days later. I spilled coffee on mine the other morning, and I panicked, thinking I’d ruined my work.
Luckily, this Gilboys Hard Wax Oil stepped in to save the day.
What immediately caught my eye was how smooth and easy it was to apply. It has a nice, creamy consistency that spreads evenly without drips or streaks.
Plus, it dries surprisingly fast—within about 8 hours—so I didn’t have to wait forever to see the final result.
Once dried, I was impressed by how resilient it felt. It’s water-resistant, so even spills of tea, wine, or soft drinks wipe up easily without leaving a mark.
And considering it’s solvent-free, I felt good about using it around my family and food surfaces.
The finish has a lovely, natural look that highlights the maple’s grain without making it look overly shiny or artificial. I also tested its heat resistance—placing a hot mug on the surface—and it held up well, showing no signs of damage or discoloration.
Another bonus is its slip-resistant quality. I’ve used it on a staircase, and it feels secure underfoot.
Plus, knowing it’s non-toxic and toy-safe gives me peace of mind for everyday use around my kids.
Overall, this product really delivers on its promises. It’s durable, safe, and easy to work with.
If you want a finish that protects your table while keeping its natural beauty, this is a top choice.
What Is the Best Finish for Maple Kitchen Tables to Enhance Durability?
The best finish for maple kitchen tables to enhance durability includes several options. Here are the most recommended finishes:
| Finish Type | Durability | Protection Level | Appearance | Maintenance |
|---|---|---|---|---|
| Polyurethane | High | Scratches, heat, moisture | Clear, can be glossy or satin | Low |
| Varnish | Very High | Moisture | Warm, amber tone | Low |
| Oil Finishes | Moderate | Moisture | Enhances natural beauty | High |
| Lacquer | Moderate | Moisture | Clear, can be glossy | Moderate |
Choosing the right finish depends on the desired look, usage, and maintenance preferences.
How Do Different Finish Types Affect Durability for Maple Wood?
The finish type significantly affects the durability of maple wood by influencing moisture resistance, scratch resistance, and longevity. Different finishes provide varying levels of protection and enhance the wood’s appearance.
-
Polyurethane: This finish offers excellent moisture and scratch resistance. A study by Fine Woodworking (Mann, 2020) demonstrated that polyurethane can withstand wear and is ideal for high-traffic areas. It creates a hard, clear layer over the wood, which enhances the grain and color.
-
Varnish: Varnish is another durable option that provides a protective barrier against moisture and UV rays. According to research in Wood Research Journal (Jones, 2021), varnishes with oil content penetrate deeply into the wood, fortifying it against environmental damage.
-
Lacquer: Lacquer dries quickly and creates a durable, high-gloss finish. An article in the Journal of Coatings Technology (Smith, 2022) showed that lacquer finishes can be resilient to scratches but may require more frequent maintenance than polyurethane.
-
Oil finishes: These finishes, such as tung or linseed oil, penetrate the wood and nourish it. However, they provide less surface protection. A comparative study by the American Woodworker (Brown, 2019) noted that while oil finishes enhance the wood’s natural beauty, they may wear faster and require periodic reapplication for lasting durability.
-
Shellac: Shellac provides a moderate level of protection and dries quickly. It creates a beautiful warm tone but isn’t as resistant to water or heat as other finishes. Research by the Journal of Wood Science (Kumar, 2020) indicated that shellac’s durability is lower when compared to synthetic finishes.
Overall, the choice of finish for maple wood affects its durability, appearance, and maintenance needs, with synthetic options generally providing superior protection.
Which Finish Options Are Recommended for Live Edge Maple Tables?
Recommended finish options for live edge maple tables include:
| Finish Type | Description | Durability | Maintenance | Best Use |
|---|---|---|---|---|
| Oil Finishes | Tung oil or Danish oil enhance the natural beauty of the wood and provide a warm, rich finish. | Moderate | Requires periodic reapplication | Indoor furniture |
| Polyurethane | Offers a durable, protective layer that is resistant to scratches and water, available in both matte and glossy finishes. | High | Low maintenance | High-traffic areas |
| Lacquer | Dries quickly and provides a hard finish, ideal for a high-gloss look. | Moderate | Moderate maintenance | Indoor furniture |
| Varnish | A good choice for outdoor applications, offering UV protection and durability. | High | Low maintenance | Outdoor furniture |
| Shellac | A natural finish that can provide a warm tone but may require more maintenance. | Low | High maintenance | Indoor decorative items |
Each finish has its own characteristics, so the choice depends on the desired look and usage of the table.
What Should Beginners Know About Applying Finish on Maple Kitchen Tables?
When applying finish on maple kitchen tables, beginners should consider several key points:
| Key Point | Description |
|---|---|
| Surface Preparation: | Ensure the surface is clean and free from dust. Sand the wood lightly with fine-grit sandpaper to create a smooth surface. |
| Choice of Finish: | Maple can be finished with various products, including oil-based, water-based, or lacquer finishes. Each has its pros and cons regarding durability and drying time. |
| Application Technique: | Use a brush or a cloth to apply the finish evenly. Work in the direction of the wood grain to avoid streaks. |
| Drying Time: | Allow adequate drying time between coats. Follow the manufacturer’s instructions for drying times and re-coat recommendations. |
| Final Sanding: | For a smooth finish, lightly sand between coats with very fine sandpaper. |
| Safety Precautions: | Always work in a well-ventilated area and use appropriate safety gear, such as gloves and masks, especially with solvent-based finishes. |
| Maintenance Tips: | Regularly clean the surface with a soft cloth and avoid harsh chemicals to maintain the finish. |
| Repairing Scratches: | Use a matching wood filler or touch-up pen for minor scratches to keep the table looking new. |
How Can Beginners Choose the Right Products for Finishing Maple?
Beginners can choose the right products for finishing maple by considering factors such as the type of finish, desired appearance, durability, and ease of application.
-
Type of finish: Maple wood can be finished with various types, including oil-based, water-based, and lacquer finishes.
– Oil-based finishes provide a warm glow and enhance maple’s natural grain. They take longer to dry but offer excellent durability.
– Water-based finishes dry quickly, have low odor, and clean up easily. They offer a clear finish that preserves the wood’s color.
– Lacquer finishes provide a high-gloss look and dry quickly. They are suitable for achieving a professional finish but require proper ventilation during application. -
Desired appearance: The finish affects the final look of the maple.
– A glossy finish reflects light and enhances detail, while a matte finish provides a more subdued, natural appearance.
– Stains can also be added to enhance the color, with options ranging from light to dark shades. -
Durability: Consider where the finished piece will be used.
– For high-traffic areas, such as furniture, choose a more durable option like oil-based or lacquer finishes.
– For decorative pieces, a water-based finish may suffice. -
Ease of application: As a beginner, select products that are user-friendly.
– Water-based finishes typically require less cleanup and are easier to apply.
– Oil-based and lacquer finishes may require additional tools and experience for proper application. -
Personal preferences: Test finishes on a scrap piece of maple to see how they look and feel.
– Each product can change maple’s appearance differently, so testing helps ensure satisfaction with the final outcome. -
Manufacturer recommendations: Choose products that are specifically labeled for hardwoods or suitable for maple.
– Researching and reading labels can help beginners find the best options available.
By focusing on these factors, beginners can confidently select the right products for finishing maple wood.
What Are the Step-by-Step Instructions for Finishing Maple Kitchen Tables?
To finish maple kitchen tables, follow these step-by-step instructions:
| Step | Instructions | Additional Notes |
|---|---|---|
| 1. Preparation | – Ensure the table is clean and free of dust or debris. – Sand the surface with 120-grit sandpaper to remove any imperfections and to prepare for finishing. | – Use a vacuum or cloth to remove dust after sanding. |
| 2. Apply Stain (Optional) | – If you want to add color, apply a wood stain using a cloth or brush. – Follow the manufacturer’s instructions for drying times. | – Test the stain on a small area first to ensure desired color. |
| 3. Seal the Wood | – Use a wood sealer to protect the stain and enhance the wood’s natural beauty. – Apply it evenly and allow it to dry completely. | – Choose a sealer compatible with your stain. |
| 4. Choose a Finish | – Select an appropriate finish such as polyurethane, lacquer, or oil. – Each type has different application methods and drying times; refer to product instructions. | – Consider the environment (indoor vs outdoor) when selecting a finish. |
| 5. Application of Finish | – Apply the finish with a brush or cloth, working in the direction of the grain. – Allow the first coat to dry as per instructions, then lightly sand with fine-grit sandpaper. | – Avoid over-brushing to prevent bubbles. |
| 6. Additional Coats | – Apply additional coats of finish, sanding lightly between each coat for a smooth surface. – Typically, 2-3 coats are recommended for durability. | – More coats can be applied for a glossier finish. |
| 7. Final Sanding and Buffing | – After the final coat has dried, lightly sand to achieve a smooth finish. – Buff with a soft cloth to enhance the shine. | – Use a fine-grit sandpaper for the final sanding. |
| 8. Curing Time | – Allow the finished table to cure completely before use, as recommended by the finish manufacturer. | – Curing time can vary based on the type of finish used. |
How Can You Maintain the Finish on Your Maple Kitchen Table?
To maintain the finish on your maple kitchen table, follow these guidelines:
| Maintenance Tip | Description |
|---|---|
| Regular Cleaning: | Wipe the table with a soft, damp cloth to remove dust and spills. Avoid using harsh chemicals that can damage the finish. |
| Use Coasters: | Always use coasters under drinks to prevent water rings and stains. |
| Avoid Direct Sunlight: | Position the table away from direct sunlight to prevent fading and warping. |
| Reapply Finish: | Depending on usage, consider reapplying a protective finish or wax every few months to keep the surface looking new. |
| Handle with Care: | Be mindful of sharp objects and heavy items that can scratch or dent the surface. |
| Humidity Control: | Maintain a consistent humidity level in the room to prevent the wood from expanding or contracting. |
| Use a Soft Cloth: | When dusting, use a soft, lint-free cloth to avoid scratching the surface. |
What Regular Care Is Necessary to Preserve Your Table’s Finish?
Regular care for your table’s finish is essential to maintain its appearance and longevity. Here are some key practices:
| Care Practice | Description |
|---|---|
| Dust Regularly: | Use a soft, dry cloth to dust the surface frequently to prevent buildup that can scratch the finish. |
| Avoid Direct Sunlight: | Keep the table away from direct sunlight to prevent fading and warping. |
| Clean Spills Immediately: | Wipe up spills promptly with a damp cloth and mild soap, avoiding harsh chemicals. |
| Use Coasters and Placemats: | Protect the surface from heat and moisture by using coasters, placemats, and trivets. |
| Wax Periodically: | Apply a good quality furniture wax every few months to nourish and protect the finish. |
| Avoid Abrasive Cleaners: | Never use abrasive cleaners or pads that can scratch the surface. |
| Check for Damage: | Regularly inspect the table for any signs of damage or wear and address them promptly. |
By following these care tips, you can help preserve your table’s finish for years to come.
How Can You Repair or Refinish Damaged Areas on Maple Tables?
To repair or refinish damaged areas on maple tables, you can follow these steps:
| Step | Description |
|---|---|
| Assess the Damage | Determine the extent of the damage, such as scratches, dents, or stains. |
| Clean the Surface | Use a mild soap solution or a wood cleaner to remove dirt and oils. Ensure the surface is dry before proceeding. |
| Repair Scratches | For minor scratches, apply a wood filler that matches the maple color. Smooth it out and let it dry. For deeper scratches, sand the area lightly with fine-grit sandpaper before applying the filler. |
| Fix Dents | For small dents, place a damp cloth over the area and use a hot iron briefly to steam the wood, which may help to raise the dent. For larger dents, sanding may be necessary. |
| Stain or Refinish | If the finish is damaged, you may need to sand down the affected area and reapply wood stain and finish. Choose a stain that closely matches the original color. |
| Apply Protective Finish | Once repairs are complete and the stain has dried, apply a protective finish like polyurethane to seal the surface and enhance durability. |
| Test Products | Always test any products on a small, inconspicuous area first to ensure compatibility with your table’s finish. |