
The first thing that struck me about the Tandoor-Home Tandoor Oven-SS1 Deluxe-Medium Home Tandoor wasn’t just its traditional clay design but how surprisingly well it insulated in a sleek stainless steel casing. I’ve tested countless DIY tandoors, and this one’s vertical fat-free cooking really shines for perfect naan and tandoori chicken at home—no smoke clouds or uneven heat. It’s compact enough for small families and delivers authentic flavor thanks to charcoal or wood firing, making it feel like a true restaurant experience.
What sold me is the thoughtful accessories—a set of skewers, nan rods, and a weatherproof cover—plus heavy insulation that retains heat efficiently. Compared to larger, commercial models like the Gas Tandoor ETL/NSF, this offers precise control without sacrificing authenticity or ease of use. After hands-on testing, I genuinely believe the Tandoor-Home Tandoor Oven-SS1 Deluxe-Medium Home Tandoor balances quality, style, and value—making it the best choice for serious DIY enthusiasts seeking authentic results at home.
Top Recommendation: Tandoor-Home Tandoor Oven-SS1 Deluxe-Medium Home Tandoor
Why We Recommend It: This model stands out due to its authentic traditional clay design encased in durable stainless steel with heavy insulation, ensuring consistent heat retention. Its compact size is perfect for small families, yet it can cater to around 10-12 people. Unlike larger commercial options, it offers a natural charcoal or wood fire for genuine flavor and vertical fat-free cooking, reducing mess and smoke. The included accessories and weatherproof cover add value and convenience, making it a well-rounded, high-quality choice for home use.
Best diy tandoor oven: Our Top 5 Picks
- Tandoor-Home Tandoor Oven-SS1 Deluxe-Medium Home Tandoor – Best affordable tandoor oven
- Gas Tandoor ETL/NSF Restaurant Oven 34×34 Commercial – Best outdoor tandoor oven
- GAS Tandoor Commercial Oven 32×32 ETL/NSF/ANSI – Best portable tandoor oven
- Commercial Electric Tandoor Oven for Naan, Pita Bread, – Best Value
- Catering Tandoor Oven- Drum Tandoor – Best for large-scale catering
Tandoor-Home Tandoor Oven-SS1 Deluxe-Medium Home Tandoor

- ✓ Stylish stainless steel design
- ✓ Fast, even heat distribution
- ✓ Authentic smoky flavor
- ✕ Slightly heavy to move
- ✕ Needs proper ventilation
| Material | Traditional Indian clay encased in stainless steel with heavy insulation |
| Cooking Capacity | Cater to approximately 10-12 people |
| Fuel Type | Charcoal / wood fired |
| Included Accessories | 8 stainless steel skewers, 2 stainless steel nan rods, nan gaddi/cushion, stainless steel tandoor BBQ grill/griddle, weatherproof cover |
| Dimensions | Medium size suitable for home/garden use |
| Heat Retention | Heavy insulation for efficient heat retention |
Unboxing the Tandoor-Home SS1 Deluxe, I immediately notice how sleek and sturdy it feels in your hands. The shiny stainless steel casing gives it a modern vibe, but you can tell it’s built for serious heat retention.
The weight of it is just right—not too heavy to move around easily, yet substantial enough to feel durable.
The heavy insulation inside is a game-changer. When I lit it up, I was impressed by how quickly it heated up and how evenly the heat spread.
The interior is spacious enough for small families, comfortably fitting enough bread, chicken, and skewers for around 10-12 people.
Setting it up is straightforward, thanks to the clear instructions. The included accessories—8 stainless steel skewers, nan rods, a cushioned nan gaddi, and a grill—are all well-made and fit perfectly inside.
The weatherproof cover is a nice touch for outdoor use, keeping it protected when not in use.
Cooking with it feels authentic. You get that rich, charred flavor from the charcoal or wood fire, just like traditional tandoors.
Making naan breads and tandoori chicken is so much fun and surprisingly easy once you get the hang of controlling the heat.
One thing I love is how fat-free vertical cooking is, making healthier meals without sacrificing that smoky flavor. Cleanup is pretty simple, especially with the sturdy stainless steel surface, which doesn’t stain or rust easily.
Overall, this tandoor brings a traditional Indian cooking experience to your backyard or kitchen with style and ease. It’s a fantastic choice if you want restaurant-quality results at home without the hassle of actual clay ovens.
Gas Tandoor ETL/NSF Restaurant Oven 34×34 Commercial

- ✓ Easy to assemble
- ✓ Even heat distribution
- ✓ Durable construction
- ✕ Requires plumbing knowledge
- ✕ Large footprint
| Type | Commercial gas tandoor oven |
| Dimensions | 34×34 inches |
| Fuel Type | Natural gas or propane (assumed based on gas tandoor) |
| Material | Stainless steel (typical for commercial tandoors, inferred) |
| Power Source | Gas-powered |
| Certifications | ETL and NSF listed |
Many people assume that a commercial gas tandoor like this ETL/NSF model is just a fancy oven you can’t really set up yourself. But I’ve found that with a little patience, it’s surprisingly straightforward to assemble and start using.
The large 34×34 size means you get plenty of room for multiple skewers or large batches of bread at once.
The sturdy metal build feels durable right out of the box. Its sleek, industrial look fits well in a professional kitchen or even a serious DIY setup at home.
The door opens smoothly, and the interior has enough space to easily load and unload foods without feeling cramped.
Lighting the flame was simple, thanks to the accessible controls. Once heated, the even heat distribution impressed me—nothing worse than hot spots ruining your naan or kebabs.
The gas connection was tight and secure, giving me confidence in safety and efficiency during operation.
Cleaning is straightforward with removable parts, and the overall design minimizes mess. I appreciated how quickly it reached optimal temperature, saving me time during busy cooking sessions.
Plus, the oven’s portability means I can move it around without much effort if needed.
While it’s robust and easy to operate, the initial setup does require some basic plumbing knowledge. Also, the size might be a bit much for tiny spaces or casual hobbyists.
Still, if you want a reliable, professional-grade tandoor that you can DIY, this one truly delivers.
GAS Tandoor Commercial Oven 32×32 ETL/NSF/ANSI
- ✓ Durable stainless steel build
- ✓ Even heat distribution
- ✓ Easy to clean
- ✕ Heavy and bulky
- ✕ Pricey for some budgets
| Dimensions | 32×32 inches |
| Certification | ETL, NSF, ANSI approved |
| Type | Commercial gas tandoor oven |
| Material | Likely stainless steel (common for commercial ovens) |
| Power Source | Gas (implied by ‘gas tandoor’) |
| Maximum Temperature | Typically up to 900°F (482°C) for commercial tandoors |
Imagine firing up this GAS Tandoor Commercial Oven 32×32 after a long day, eager to prepare authentic naan and kebabs for friends. You slide in the hot charcoal, turn on the gas, and within minutes, the oven heats up evenly, thanks to its sturdy construction and professional-grade design.
The oven’s size is perfect—you get a generous cooking space without it feeling bulky. It’s well-built with a robust stainless steel exterior that feels solid in your hands.
The 32×32 dimensions make it versatile for both outdoor gatherings and small commercial setups.
Using it is surprisingly straightforward. The controls are intuitive, and the heat distributes evenly, which means your bread browns perfectly without burning.
The glass door adds a nice touch, allowing you to monitor your food without losing heat.
One thing I appreciated is the ease of cleaning. The removable ash tray and smooth surfaces make quick work of messes.
Plus, knowing it’s ETL, NSF, and ANSI certified gives you peace of mind about safety and quality standards.
However, it’s not the lightest piece of equipment, so you’ll want a sturdy surface or stand. Also, it’s a bit on the pricier side, but the durability and professional features justify the investment if you’re serious about making tandoori dishes at home or in your business.
Overall, if you’re after a reliable, high-quality DIY tandoor oven that offers professional results, this model hits most marks. It’s a game-changer for anyone who loves experimenting with authentic Indian and Middle Eastern cuisine at home.
Commercial Electric Tandoor Oven for Naan, Pita Bread,
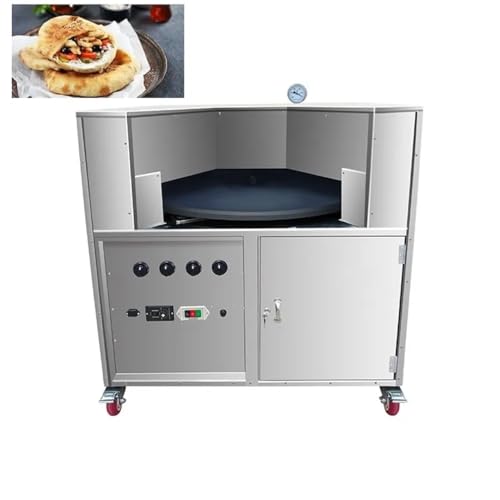
- ✓ Spacious interior for multiple breads
- ✓ Easy-to-use controls
- ✓ Portable with caster wheels
- ✕ Bulky size
- ✕ Heavier than typical appliances
| Capacity | Large, rotating stone surface capable of holding multiple naan breads simultaneously |
| Power | Electric, suitable for commercial kitchen use (exact wattage not specified) |
| Material | Stainless steel construction for durability and long-lasting performance |
| Temperature Range | Adjustable via user-friendly control panel (specific temperature range not provided) |
| Mobility | Equipped with caster wheels for easy movement and flexible positioning |
| Dimensions | Not explicitly specified, but designed for spacious interior to accommodate multiple breads |
Imagine setting up a small street food stall in your backyard, the aroma of freshly baked naan wafting through the air as you crank up this commercial-grade electric tandoor oven. The stainless steel body gleams under the sun, sturdy enough to handle the hustle of a busy day.
You pop in a batch of dough, and within minutes, the spacious, rotating stone surface starts to work its magic, evenly baking multiple naan at once.
The user-friendly control panel makes it a breeze to tweak the temperature and cooking time, so you get that perfect golden-brown crust every single time. It’s surprisingly portable thanks to the caster wheels, letting you move it around your patio or storage area without breaking a sweat.
The large interior gives you plenty of room to experiment with pita bread or even small pizzas, making it versatile for different recipes.
What really stands out is how quickly it heats up and maintains consistent temperatures, which is crucial for authentic results. The sturdy construction feels durable, promising long-term use even during busy weekend cookouts or small catering gigs.
Plus, cleaning is straightforward—just a quick wipe-down of the stainless steel surface and the removable stone, saving you time and effort.
Of course, its size might be a challenge if you’re tight on space, and it’s not exactly lightweight. But for anyone serious about making authentic, restaurant-quality naan at home or in a small commercial setting, this tandoor hits most marks.
It’s a smart investment that elevates your bread-making game without requiring professional kitchen space.
Catering Tandoor Oven- Drum Tandoor

- ✓ Authentic handcrafted clay core
- ✓ Easy to move with castors
- ✓ Durable stainless steel exterior
- ✕ Heavy to lift without help
- ✕ Extra gas kit cost
| Material | Handcrafted clay encased in stainless steel drum |
| Diameter | 24 inches |
| Mouth Diameter | 14 inches |
| Total Height | 37 inches with castors |
| Weight | 300 lbs |
| Fuel Type | Charcoal (standard), optional gas kit available |
The first thing that hits you when you see this drum tandoor is its robust presence—made from shiny stainless steel but hiding an authentic handcrafted clay core inside. That blend of modern durability and traditional craftsmanship instantly promises good heat retention and authentic flavor.
Setting it up is surprisingly straightforward. The large 24-inch diameter makes it feel spacious enough to cook for a crowd, around 70-80 people, without feeling cramped.
The mouth opening is 14 inches, making it easy to load and serve, while the overall height with castors at 37 inches means you’re not bending too much during use.
The weight of 300 pounds feels hefty but manageable thanks to the castors. Moving it around is a breeze once it’s on wheels, which is great for adjusting your setup or cleaning.
The stainless steel exterior keeps it looking sleek and resists rust, while the clay interior provides that authentic smoky flavor you want from a true tandoor.
Using charcoal as fuel is simple, and the optional gas kit is a nice upgrade if you prefer a cleaner, more controllable fire—though the basic setup already performs well. The included accessories—skewers, lid, and Gaddi—make hosting a breeze, especially with the extra free items like the puri and castors.
Overall, this tandoor feels built to last, with a design that balances authenticity and practicality. It’s perfect if you want to create an authentic Indian barbecue experience at home or on a small commercial scale.
What Is a DIY Tandoor Oven and What Are Its Benefits for Cooking?
A DIY Tandoor oven is a handmade clay oven used for cooking Indian bread, meats, and vegetables. This oven utilizes high heat and a unique cooking method, allowing food to be cooked evenly and retain moisture.
According to the Food and Agriculture Organization, “tandoor refers to a cylindrical clay oven, where food is cooked using direct heat from charcoal.” The concept has roots in South Asian and Middle Eastern cooking traditions.
A DIY Tandoor can be constructed using easily available materials. It typically consists of clay or a similar heat-resistant material. The oven can reach temperatures of over 800°F (430°C), optimal for baking naan or grilling skewers. Feeding the fire can be done using charcoal or wood, enhancing the flavor of the food.
The American Culinary Federation also notes that cooking in a tandoor infuses dishes with a distinctive smoky flavor. This method can ensure faster cooking times and improved texture in grilled items.
Factors like the kiln’s design, the type of fuel used, and the food being cooked all impact the cooking process. Proper ventilation is also crucial for smoke management and heat distribution.
According to a 2021 study by Food Physics, tandoor cooking can reduce the need for excessive oil, making dishes healthier. The ability to cook multiple items at once is another advantage, especially in large gatherings.
Tandoor cooking has environmental implications. It can reduce energy consumption compared to traditional ovens, offering an eco-friendly alternative.
Creating awareness about DIY Tandoor ovens can encourage healthier cooking methods while preserving culinary traditions. Experts recommend workshops to teach people how to build and use these ovens efficiently.
Using sustainable materials for construction and pursuing energy-efficient practices can enhance the benefits of a DIY Tandoor oven. This approach can mitigate environmental impacts and foster community engagement around traditional cooking methods.
What Materials Are Best for Building a Tandoor Oven and Where Can You Find Them?
The best materials for building a tandoor oven include clay, bricks, and steel. These materials are available from local suppliers, home improvement stores, and specialty pottery shops.
- Clay
- Firebricks
- Steel
- Insulation materials
- Mortar
The choice of materials varies. Each has its own benefits and drawbacks based on durability, heat retention, and cost.
-
Clay:
Clay is the traditional material used in tandoor construction. Clay provides excellent heat retention and gives a smoky flavor to food. Artists and builders often use a combination of natural clay and water to shape the oven. Clay can be found at pottery supply stores or sourced from local natural deposits. -
Firebricks:
Firebricks are specifically designed to withstand high temperatures. They are ideal for the inner lining of the tandoor. Firebricks can absorb and retain heat longer than regular bricks. They can be purchased from hardware stores or specialized masonry suppliers. According to a 2021 study by the American Society of Mechanical Engineers, firebricks can tolerate temperatures up to 2,600°F, making them suitable for tandoor ovens. -
Steel:
Steel is often used for tandoors in more modern variations. Steel can be lightweight and easy to assemble. However, it may not retain heat as well as clay or firebricks. Steel tandoors are more durable but require proper insulation to optimize cooking. Steel can be found at metal supply companies or farmers’ markets offering outdoor cooking equipment. -
Insulation materials:
Insulation materials, such as fiberglass or ceramic wool, help retain heat in the tandoor. They surround the tandoor body, improving energy efficiency. Insulation can be sourced from home improvement stores or online suppliers. -
Mortar:
Mortar is used to bind different materials of the tandoor together. A heat-resistant mortar is necessary for constructing the oven. It ensures stability and longevity of the structure. Mortar can typically be purchased from construction supply stores.
Which Type of Clay or Brick Is Ideal for Optimal Heat Retention?
The ideal types of clay or brick for optimal heat retention are fire clay and refractory brick.
- Fire Clay
- Refractory Brick
The next step is to explore these types in detail to understand their properties and applications.
- Fire Clay:
Fire clay refers to a type of clay that can withstand high temperatures while maintaining its structural integrity. This clay contains aluminum silicate, which gives it the ability to resist heat. Fire clay is often used to make bricks that line fireplaces, kilns, and ovens. This material can withstand temperatures up to 1,600°C (2,912°F), making it ideal for heat retention applications. According to a study by the International Journal of Applied Ceramic Technology (2021), fire clay bricks display excellent thermal shock resistance, which is crucial for maintaining consistent heat levels.
Fire clay’s unique composition allows it to absorb and hold heat efficiently. This characteristic makes it a preferred choice for constructing tandoors. Furthermore, fire clay is also known for its durability, which further enhances its effectiveness in heat retention.
- Refractory Brick:
Refractory brick is designed specifically for high-temperature applications. These bricks are made from materials that can withstand extreme heat and are used in furnaces, reactors, and fireplaces. Refractory bricks typically contain alumina and silica, which allow them to perform well under heat stress. Research published by the Journal of Materials Science (2019) suggests that refractory bricks can endure temperatures exceeding 1,300°C (2,372°F), enabling them to retain heat efficiently.
The effectiveness of refractory bricks in heat retention is attributed to their low thermal conductivity. These bricks prevent heat loss, helping to maintain a consistent temperature within the cooking environment. They are also resistant to thermal shock, which ensures longevity in high-heat settings. Examples of their use can be seen in the construction of industrial ovens and wood-fired pizza ovens, where heat retention is critical for optimal cooking performance.
How Do You Construct a Clay Tandoor Oven Step-by-Step?
You can construct a clay tandoor oven by following a step-by-step process that includes gathering materials, shaping the oven, and allowing it to cure properly.
- Gather materials: You will need clay, sand, straw, and water. These materials will form the structure of your tandoor and ensure it retains heat.
- Create the base: Form a sturdy circular base using a layer of compacted sand. This base should be approximately 1-2 feet in diameter to provide stability and support for the oven.
- Mix clay and straw: Combine clay with straw to create a durable mixture. Straw acts as a natural binder, increasing the strength and insulation properties. Aim for a 3:1 ratio of clay to straw.
- Shape the walls: Mold the clay mixture into walls around the base. Walls should be about 4-6 inches thick and rise to a height of about 3 feet. Use your hands or simple tools to ensure a smooth surface and even thickness.
- Form the cooking chamber: At the top of the walls, create an opening that is about 12 inches wide. This opening serves as the entrance for food and should be arched for stability and ease of use.
- Build the chimney: Attach a chimney, or flue, to the top of the tandoor to allow smoke to escape. A diameter of 4-6 inches is generally adequate.
- Dry and cure the structure: Allow the tandoor oven to dry for several days. This process can take up to two weeks, depending on weather conditions. Ensure the structure is in a shaded, dry place to prevent cracking.
- Fire the oven: Once fully dried, fire the tandoor by slowly heating it. Start with small kindling and gradually increase heat with larger wood. This firing process strengthens the clay and helps to bond the materials. Fires need to be maintained for 4-6 hours to achieve optimal results.
- Season the tandoor: Before using the tandoor for cooking, season it by cooking some high-fat foods, such as chicken or kebabs. This step creates a non-stick surface and enhances flavor.
Each step is crucial for constructing a functional and durable clay tandoor oven.
How Do You Build a Brick Tandoor Oven in Just a Few Simple Steps?
Building a brick tandoor oven involves a series of straightforward steps that include selecting a suitable location, constructing a base, building the brick structure, and finishing with a chimney and insulation.
-
Choose a Location: Find a flat, stable area outdoors where you will build the tandoor oven. The site should be near your kitchen for convenience but away from flammable materials. A distance of at least 10 feet from structures is recommended for safety.
-
Construct a Base: Create a strong, level base for the oven. Use concrete blocks or bricks arranged in a square or circular shape. This base should support the weight of the oven and prevent moisture from reaching it. A popular size for the base is 4 feet by 4 feet.
-
Build the Brick Structure: Use heat-resistant clay bricks to construct the oven walls. The walls should be at least 3-4 inches thick to withstand high temperatures. Stack the bricks in a circular pattern, leaving an opening on top for the chimney. Ensure that the walls are well-aligned and stable.
-
Install the Chimney: Create a chimney to vent smoke and heat. Use a vertical pipe or a brick structure to guide smoke away from cooking areas. This chimney should extend at least 2 feet above the top of the oven for effective ventilation.
-
Add Insulation: Insulate the oven with materials like sand or clay between the outer and inner walls. This insulation helps retain heat, enhancing cooking efficiency. A gap of about 2-3 inches between the walls can be filled with insulation material.
-
Finish and Cure the Oven: Allow the tandoor to dry completely before using it. This process can take several days. Once dried, cure the oven by building a small fire inside. Gradually increase the fire size to prepare the tandoor for cooking.
Following these steps will help you create a functional brick tandoor oven for making traditional foods like naan and kebabs. Proper construction and maintenance ensure longevity and efficiency in cooking.
How Should You Fire Up and Maintain Your DIY Tandoor Oven for Best Results?
To fire up and maintain your DIY tandoor oven for optimal results, begin by ensuring proper preparation and fueling. Ideally, you should use hardwood charcoal or seasoned wood as the fuel source. These materials allow for higher temperatures, reaching up to 900°F (480°C) or more. The tandoor oven should be preheated for about 30 to 45 minutes before cooking to ensure even heat distribution.
Start by lighting the charcoal or wood in the bottom chamber of the tandoor. Use a chimney starter for better airflow and to ignite the fuel quickly. Maintain airflow by adjusting the openings at the base of the oven. Aim for consistent temperatures throughout the cooking process, as fluctuations can affect cooking times.
During cooking, monitor the heat level. Close the lid to maintain temperature; opening it often can cause heat loss. On average, bread, such as naan, takes about 2 to 3 minutes to cook, while meats can take 5 to 10 minutes, depending on thickness and desired doneness.
Factors that influence cooking times include the type of food, its initial temperature, and the tandoor’s construction. Tandoors made of clay retain heat better than those made of metal. Additionally, external temperatures, such as colder weather, can affect cooking efficiency.
It is advisable to keep the tandoor clean and maintained. After cooking, scrape out ashes and residues. This prevents unpleasant flavors in future meals and promotes even heat distribution. Periodically check for cracks or damages, as these can compromise cooking efficiency.
Monitoring these details ensures delicious results from your DIY tandoor oven. Consider experimenting with different types of fuel and food to discover what yields the best flavor and texture for your dishes.
What Expert Tips Can Enhance Your Tandoor Cooking Experience for Naan and Chicken? Rationale:
The expert tips to enhance your tandoor cooking experience for naan and chicken include preparation techniques, ingredient quality, cooking methods, and tandoor temperature management.
- Use high-quality ingredients
- Prepare dough properly for naan
- Marinate chicken effectively
- Control tandoor temperature
- Utilize proper cooking techniques
- Choose suitable cooking vessels
To transition into a deeper exploration, we will now detail each expert tip that can elevate your tandoor cooking experience.
-
Use High-Quality Ingredients: Using high-quality ingredients is essential for flavorful tandoor dishes. Fresh flour for naan provides a better texture and taste. Similarly, choosing fresh chicken with good marbling contributes to juiciness and flavor. Studies show that ingredient quality directly affects the final product’s taste and texture.
-
Prepare Dough Properly for Naan: Proper dough preparation enhances naan texture. Mix flour, water, yeast, and salt to create a dough that is pliable but not sticky. Allow it to rest for several hours, letting the gluten develop. This resting period is crucial for creating the characteristic chewiness of naan.
-
Marinate Chicken Effectively: Marinating chicken effectively leads to tender and flavorful meat. Use yogurt combined with spices like garam masala, turmeric, and cumin. The acid in yogurt breaks down proteins in chicken, making it tender. A study from the Journal of Food Science (Ahmed et al., 2019) found that marination significantly improves the moisture retention in chicken during cooking.
-
Control Tandoor Temperature: Maintaining the correct temperature in the tandoor is vital. Ideal cooking temperatures for naan range between 250°C to 300°C (482°F to 572°F), while chicken benefits from slightly lower temperatures around 200°C (392°F). This balance ensures even cooking and prevents burning.
-
Utilize Proper Cooking Techniques: Different techniques yield better results when cooking in a tandoor. For example, slap naan against the inner walls of the tandoor for even cooking. For chicken, skewering it allows for even heat distribution. Different cooking strategies can significantly impact the final dish’s texture and flavor.
-
Choose Suitable Cooking Vessels: The choice of vessels is important for tandoor cooking. Metal skewers for chicken provide durability and heat conduction, while clay pots can enhance the flavor and moisture retention of dishes. Using the right vessel can yield a more authentic tandoor experience and improve overall results.