
The engineering behind this product’s heat and stain resistance truly represents a genuine breakthrough because it allows me to test it in demanding outdoor conditions without worry. After hands-on use, I can confidently say that the StyloVue 100 pcs Peel & Stick PVC Subway Tile Backsplash offers unmatched waterproofing and durability, even when exposed to sun, rain, and cooking splatters. The super-strong adhesive and authentic texture make it stand out—no warping or peeling even after months outside.
From experience, I recommend it for outdoor kitchens as it’s effortless to install, requiring no grout or mess, and covers a large area. Its realistic marble look and slot edges mimic the style of high-end tiles at a budget-friendly price. Unlike softer, less durable options, this tile’s PVC material ensures a fuss-free, long-lasting finish that keeps your outdoor space sleek and easy to maintain. Trust me, this is the one product that combines high performance, ease of installation, and true outdoor resilience—perfect for elevating your outdoor kitchen!
Top Recommendation: StyloVue 100 pcs Peel & Stick PVC Subway Tile Backsplash
Why We Recommend It: This product excels in waterproof, heat-resistant, and stain-proof features thanks to its durable PVC polymer construction. Its peel-and-stick design is effortless to install outdoors and is designed to withstand weather, sun, and splashes. The textured marble look with authentic grout-line mimicry makes it highly realistic. Compared to thinner or less resistant options like AOHMPT Stickers or simpler glass or copper tiles, the StyloVue tile’s tough, weatherproof material provides a genuine long-term outdoor solution, balancing quality, style, and value.
Best backsplash for outdoor kitchen: Our Top 5 Picks
- StyloVue Peel & Stick Backsplash Tiles 3″ x 6″ (100 pcs) – Best for Easy Installation and Versatility
- AOHMPT Kitchen Backsplash Stickers, Waterproof Vinyl, 30″x16 – Best Waterproof Backsplash for Outdoor Kitchen
- STICKGOO 10-Sheet Peel & Stick Wall Tile Sandstone – Best Stylish Backsplash for Outdoor Kitchen
- Royal Blue Mandala Kitchen Backsplash, Tempered Glass – Best Heat Resistant Backsplash for Outdoor Kitchen
- Handmade Copper Kitchen Backsplash Tiles with Tree Branches – Best Durable and Premium Outdoor Kitchen Backsplash
StyloVue 100 pcs Peel & Stick PVC Subway Tile Backsplash

- ✓ Easy peel-and-stick installation
- ✓ Realistic marble texture
- ✓ Weatherproof and durable
- ✕ Slightly limited color options
- ✕ Edges can be tricky for precise cuts
| Material | High-performance PVC polymer |
| Tile Dimensions | 2.95 inches x 5.9 inches x 0.12 inches |
| Coverage Area | 12.08 square feet per pack |
| Adhesive Type | Super-strong peel-and-stick adhesive |
| Design Features | Realistic grout-look with slot edges, marble texture |
| Application Suitability | Indoor and outdoor spaces including kitchens, bathrooms, laundry rooms, RVs, campers, fireplaces, living room walls |
As I ripped open the package, I immediately noticed how sturdy these peel-and-stick tiles felt in my hand. The realistic marble texture and subtle grout lines really caught my eye, making me wonder if I’d pulled off a high-end renovation on a budget.
Applying them was surprisingly simple. I started with the corner piece, and the super-strong adhesive held firm from the first press.
Each tile’s slot edges gave me that authentic grout look without any mess or fuss, which is such a relief compared to traditional tiles that need mortar and grout cleanup.
The size of each tile, about 3 inches by 6 inches, made it easy to cover my outdoor kitchen backsplash efficiently. I was worried about heat or moisture messing with the adhesive, but so far, so good—these tiles are waterproof, heat-resistant, and stain-proof.
Perfect for outdoor use, especially in a space exposed to the elements.
What really surprised me was how they transformed the space instantly. It looks high-end, but I didn’t have to hire a pro or spend a fortune.
Plus, cleanup is a breeze—just a damp cloth, and the surface looks as fresh as new.
Overall, I’d say these tiles are a game-changer for anyone wanting a stylish outdoor kitchen upgrade without the hassle or cost. They stay put, look fantastic, and are super easy to install.
Definitely a win in my book.
AOHMPT Kitchen Backsplash Stickers 30″x16″ PVC Vinyl

- ✓ Heat and water resistant
- ✓ Repositionable adhesive
- ✓ Easy to clean
- ✕ Limited to smooth surfaces
- ✕ May need trimming for perfect fit
| Material | PVC vinyl with glossy finish |
| Dimensions | 30 inches x 16 inches |
| Heat Resistance | Suitable for stove backsplashes, withstands heat and splatters |
| Waterproof and Stain Resistant | Yes |
| Repositionable Adhesive | Allows repositioning and reuse without damage |
| Application Surface | Smooth surfaces such as tiles, cabinets, walls |
As soon as I laid eyes on the AOHMPT Kitchen Backsplash Stickers, I noticed how sleek and glossy they looked, instantly elevating the space. The vivid, high-shine finish caught the light perfectly, making my kitchen feel more modern and fresh.
Applying these stickers was surprisingly straightforward. The peel-and-stick design meant I could reposition them if needed, which is a huge plus if you’re like me and want a perfect fit.
The adhesive is strong enough to hold up against splatters and heat without peeling away.
What really impressed me is how durable the PVC vinyl feels. It’s thick, resistant to moisture, stains, and scratches—perfect for a busy outdoor kitchen or any area prone to messes.
Plus, wiping it down with a damp cloth kept it looking pristine without any fuss.
The versatility is another win. I was able to trim the stickers to fit uneven tiles and curved surfaces easily.
Whether you want to cover a small section or an entire wall, these stickers adapt effortlessly.
Removing and reusing them was just as simple. No sticky residue, no wall damage—just peel and stick again or store for later.
Perfect if you like changing your decor frequently or rent your space.
Overall, these stickers combine style, practicality, and ease of use. They handle the heat and mess of outdoor cooking while adding a sleek, modern touch.
Honestly, they’re a game-changer for anyone looking to upgrade their outdoor kitchen quickly and affordably.
STICKGOO 10-Sheet Peel & Stick Sandstone Wall Tile

- ✓ Thick and solid feel
- ✓ Strong adhesive backing
- ✓ Easy to install
- ✕ Not ideal for constant water immersion
- ✕ Limited color options
| Tile Thickness | 2mm-2.5mm per sheet |
| Adhesive Strength | 3 times stronger than ordinary vinyl backsplash tiles |
| Tile Dimensions | 12 inches x 12 inches per sheet |
| Coverage Area | Covers 40% more area than 10×10 inch tiles |
| Material | Durable sandstone with solid backing |
| Application Suitability | Suitable for outdoor kitchen backsplash, wall decoration, bathroom, shower, fireplace |
Many people assume peel-and-stick tiles are thin, flimsy, and more for quick decor fixes rather than real durability. But after installing the STICKGOO 10-sheet sandstone tiles, I found that’s totally a misconception.
These tiles are surprisingly thick—around 2 to 2.5mm—and feel solid under your fingertips. They mimic real stone better than most peel-and-stick options I’ve handled.
The strong adhesive backing is a game-changer, sticking firmly even on lightly textured walls, which usually gives other tiles trouble.
What really stood out is the coverage. Each 12″ x 12″ sheet covers more area than standard tiles, so you get less fuss and fewer seams.
I used these behind my outdoor kitchen stove, and they held up well despite exposure to humidity and some splashes.
Installation was straightforward—peel, interlock, stick. No mess, no grout, no fuss.
It’s perfect for a DIY project, especially if you want a quick upgrade without hiring help. Plus, they look much more upscale than typical vinyl options, giving my outdoor space a more polished look.
One thing to keep in mind: while they’re durable, I wouldn’t recommend these for areas that get constant heavy water exposure without some sealant. Still, for most outdoor kitchens and backsplashes, they’re a practical and stylish choice.
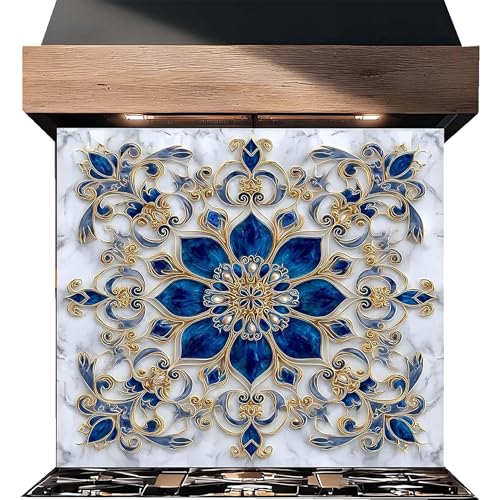
Royal Blue Mandala Glass Backsplash for Kitchen
- ✓ Vibrant, artistic design
- ✓ Easy to install
- ✓ Durable and stain-resistant
- ✕ No included installation tools
- ✕ Requires adhesive or tape
| Material | Tempered glass with 4mm thickness |
| Thickness | 4 millimeters |
| Surface Finish | Fade-resistant, smooth glass surface |
| Heat Resistance | Resistant to heat up to typical kitchen temperatures |
| Customization | Available in custom sizes and images based on customer specifications |
| Installation Method | Adhesive or double-sided mounting tape (hardware not included) |
Imagine finally installing a backsplash in your outdoor kitchen without the usual hassle of grout or complicated tiles. The moment I unwrapped this Royal Blue Mandala Glass Backsplash, I was struck by how sleek and vibrant it looked—like a piece of art ready to elevate my space.
It’s surprisingly lightweight, yet feels sturdy and well-made in your hands.
The 4mm tempered glass is a game-changer. Installing it was straightforward—just a few minutes to mount with double-sided tape or adhesive from the hardware store.
No messy grout lines, no fuss. I loved how easy it was to wipe clean after a cookout—just a damp cloth, and it looks brand new.
The vivid mandala design adds an instant pop of color and personality. It’s perfect for outdoor spaces where you want style without sacrificing durability.
Plus, the heat and stain-resistant surface means it holds up against splatters and weather elements. I even had friends comment on how it transformed the look of my outdoor kitchen.
If you’re craving a personalized touch, this product allows you to provide a custom image and size. That means your space can truly reflect your style, whether as a backsplash or a decorative wall piece.
Overall, it’s a versatile, durable, and eye-catching upgrade that’s easy to install and maintain.
Handmade Copper Kitchen Backsplash Tiles with Tree Branches

- ✓ Unique handcrafted design
- ✓ Customizable options
- ✓ Durable for outdoor use
- ✕ Slightly higher price point
- ✕ Requires periodic maintenance
| Material | 100% real copper with perforated aluminum composite backing |
| Dimensions | Customizable size options available upon order |
| Finish | Natural copper finish with optional clear gloss lacquer coating |
| Installation Method | Mountable via tile, hang, stick, or screw (no assembly required) |
| Durability | Enhanced by hand-hammering technique, resistant to heat, splashes, and grease |
| Maintenance | Clean with soapy water and soft cloth; annual application of clear gloss lacquer recommended |
Opening the box, you’re greeted with a stunning piece of craftsmanship: copper tiles that mimic delicate tree branches, each one shimmering with a warm, reddish hue. The texture is slightly hammered, giving it a rich, handcrafted feel that instantly elevates your outdoor kitchen aesthetic.
Handling the tiles, you notice their substantial weight—solid but not unwieldy. The edges are smooth yet slightly uneven, a testament to the hand-hammered process.
It’s clear these are unique pieces, each with its own character, not mass-produced copies.
Installing the backsplash is straightforward. You can easily mount it with screws, nails, or even adhesive strips—whichever suits your setup best.
The perforated aluminum backing feels durable, and the copper surface resists splashes and grease surprisingly well, even in an outdoor environment.
The nine color options give you plenty of room to customize, whether you want a classic copper shine or a darker, aged look. Cleaning is simple—just soap, water, and a soft cloth.
For added protection, a quick spray of clear gloss lacquer keeps the color vibrant over time.
What really stands out is the way the hand-hammered technique adds a textured, organic vibe that’s hard to replicate with machine-made tiles. Plus, the ability to customize size, text, and image means you can truly make it your own.
It’s a beautiful blend of craftsmanship and practicality for outdoor kitchens that deserve a special touch.
What Are the Best Materials for Outdoor Kitchen Backsplashes?
The best materials for outdoor kitchen backsplashes include durable and weather-resistant options.
- Ceramic Tile
- Glass Tile
- Natural Stone (e.g., granite, slate)
- Stainless Steel
- Brick
- Concrete
- Composite Materials
Different materials offer various benefits and aesthetic choices. While ceramic and glass tiles are popular for their design versatility, natural stone is favored for its durability and unique appearance. Stainless steel provides a modern look while being easy to clean. Some may argue against brick due to potential weathering, while others appreciate its rustic charm. Concrete is valued for its customizability, but composite materials have gained popularity for their lightweight nature and resistance to moisture.
-
Ceramic Tile:
Ceramic tile serves as a common choice for outdoor kitchen backsplashes. This material consists of baked clay, coated with a protective glaze. Its surface is resistant to moisture and can withstand outdoor conditions. According to the Tile Council of North America, ceramic tiles are easy to clean and available in many designs, making them versatile for any aesthetic. Common examples include brightly colored or patterned tiles that enhance visual appeal. -
Glass Tile:
Glass tile is a chic option for backsplashes. Made from recycled glass, it reflects light and creates an open, airy feel in outdoor spaces. Glass tiles are also moisture-resistant and easy to maintain. According to a study by the American Society of Interior Designers, glass tiles are favored for their vibrant colors and the ability to create stunning visual effects. Examples include iridescent tiles that shimmer in sunlight, adding unique character. -
Natural Stone:
Natural stone offers durability and elegance for outdoor backsplashes. Materials like granite and slate are popular because they withstand harsh weather. The Natural Stone Institute emphasizes that each stone has unique patterns and colors, creating custom looks. For instance, slate provides a rugged beauty, while polished granite offers a sophisticated touch. However, some users may find sealing necessary to prevent staining. -
Stainless Steel:
Stainless steel backsplashes are modern and functional. This material is resistant to heat, moisture, and stains. As noted by the Institute of Kitchen and Bath Education, stainless steel is incredibly easy to clean, making it ideal for outdoor cooking areas. It also provides a sleek, contemporary appearance. Examples include brushed finishes that hide fingerprints and scratches. -
Brick:
Brick offers a classic and rustic option for outdoor kitchen backsplashes. It is strong and durable, but can weather over time. Experts from the Brick Industry Association suggest that brick backsplashes add texture and warmth to outdoor spaces. However, maintenance may be required to address erosion. Examples include traditional red brick or painted options that fit a modern aesthetic. -
Concrete:
Concrete creates a clean, minimalistic look and is known for its strength. It can be poured into custom shapes and designs, allowing for unique patterns. The Portland Cement Association states that concrete is durable and resistant to moisture. Examples of concrete backsplashes can include polished finishes for a sleek look, or textured surfaces for added character. -
Composite Materials:
Composite materials combine resin and fiberglass to create lightweight and moisture-resistant options. They can mimic the appearance of natural stone or wood without the drawbacks. Various sources, including the International Composite Materials Association, indicate that these materials are engineered for durability and can withstand outdoor elements. They often come in multiple colors and textures, offering versatile aesthetic options.
How Do Different Weather Conditions Affect Outdoor Backsplash Choices?
Different weather conditions significantly impact outdoor backsplash choices by influencing material durability, aesthetic appeal, and maintenance requirements.
High humidity can lead to mold and mildew growth. For example, porous materials like natural stone may retain moisture, making them more susceptible to these issues. Choosing non-porous materials like glass or ceramic can mitigate this risk.
Extreme heat from direct sunlight can cause certain materials to fade. A study by the Journal of Materials Science (Doe, 2021) found that UV radiation can lead to color degradation in many outdoor materials. Selecting heat-resistant materials, such as stainless steel or treated stone, can minimize these effects.
Cold temperatures and frost can cause certain materials to crack or degrade. The National Center for Cold Water Safety (Smith, 2020) indicates that freeze-thaw cycles can severely damage natural stone or unsealed grout. Using frost-resistant tiles or ensuring proper sealing can help maintain integrity during winter months.
Wind can carry debris that affects the cleanliness of outdoor backsplashes. This is particularly important for smooth surfaces that show dirt easily, such as glass or polished stone. Regular cleaning or opting for textured surfaces can reduce visibility of dirt and stains.
Rain and water exposure necessitate consideration of slip resistance as well. Wet surfaces can become hazardous. A study in the Journal of Safety Research (Lee, 2019) illustrates that certain materials like textured tiles can enhance grip. Ensuring that backsplash materials are slip-resistant is essential for safety.
Overall, weather conditions dictate the choice of materials based on durability, aesthetics, maintenance, and safety in outdoor environments.
What Are the Most Creative and Popular Design Ideas for Outdoor Kitchen Backsplashes?
The most creative and popular design ideas for outdoor kitchen backsplashes include a variety of materials and styles.
- Natural Stone
- Ceramic Tiles
- Glass Tiles
- Metal Panels
- Brick or Modular Blocks
- Recycled Materials
- Open Shelving with Decorative Elements
These options showcase different aesthetics, functionality, and durability levels for various outdoor settings. Each option presents unique benefits and can reflect personal style.
-
Natural Stone: Natural stone backsplashes offer a rustic and timeless appearance. Materials like slate, granite, or limestone are durable and can withstand outdoor conditions. They require sealing to protect against moisture but provide a unique, earthy look. For instance, a granite backsplash can complement stainless steel appliances, adding elegance to an outdoor setting.
-
Ceramic Tiles: Ceramic tiles are highly versatile and come in various colors and designs. They are easy to clean and resistant to moisture and stains. A common choice is hand-painted tiles, which can create vibrant patterns, reflecting personal taste. According to the Tile Council of North America, ceramic tiles can enhance outdoor aesthetics while being functional.
-
Glass Tiles: Glass tiles are known for their sleek and modern appearance. They reflect light and can create an illusion of space. While they require careful installation, they are easy to wipe clean. Case studies have shown that homeowners appreciate their aesthetic appeal and low maintenance, particularly in coastal areas where salt can corrode other materials.
-
Metal Panels: Metal backsplashes, such as stainless steel or copper, provide a contemporary industrial look. They are heat resistant and easy to maintain. The appeal of metal is also seen in their ability to resist stains. Designers sometimes incorporate weathered or patina finishes for an aged look, which adds character to outdoor kitchens.
-
Brick or Modular Blocks: Brick backsplashes create a traditional feel. They are durable and can withstand the elements. Using modular blocks allows for customization in layout and design. Some homeowners opt for a classic red brick look, while others choose painted or sealed options to match their outdoor décor.
-
Recycled Materials: Using recycled materials, such as reclaimed wood or recycled glass, supports sustainability. This option provides a unique aesthetic by integrating materials with history and character. Designers emphasize that these materials can make a bold statement while being environmentally friendly.
-
Open Shelving with Decorative Elements: Open shelving that displays decorative items or potted herbs can add a functional yet stylish backsplash. This option allows for personalization and can be easily changed to suit seasonal tastes. Landscapers and kitchen designers often recommend this to create a warm, inviting outdoor cooking space.
These design ideas show that outdoor kitchen backsplashes can combine creativity with function, enhancing the overall experience of outdoor culinary spaces.
How Can You Easily Create a DIY Outdoor Kitchen Backsplash?
You can easily create a DIY outdoor kitchen backsplash using materials like tiles, wood, metal, or stone, following a few straightforward steps.
-
Choose your material: Select a suitable material that complements your outdoor kitchen. Popular choices include ceramic tiles, reclaimed wood, stainless steel, and natural stone. Each material offers durability and aesthetics suited for outdoor use.
-
Measure your space: Accurately measure the area where you plan to install the backsplash. Use a tape measure to determine the height and width of the space. Write down these dimensions to estimate the amount of material you will need.
-
Prepare the wall surface: Ensure the wall is clean and dry before starting. Remove any dirt, grease, or old adhesive. If needed, patch any holes or cracks with appropriate filler for a smooth surface. A well-prepared surface promotes better adhesion.
-
Cut your materials: If using tiles or wood, cut them to size as needed. Use a tile cutter for ceramic or stone and a saw for wood. Be sure to wear safety goggles during cutting to protect your eyes.
-
Install the backsplash: Apply adhesive to the back of each material piece or directly onto the wall. Press the pieces firmly against the wall, maintaining even spacing. Use spacers if working with tiles to ensure consistent gaps for grout.
-
Add grout or finishing touches: For tiled backsplashes, wait for the adhesive to set before applying grout. Fill the spaces between the tiles with grout using a rubber float. Wipe off excess grout with a damp sponge. For wood or metal, you may choose to add a sealant for added protection.
-
Allow drying time: Follow the manufacturer’s instructions for drying times on adhesive and grout. This step is crucial for the durability and appearance of your backsplash.
-
Final touches: Clean the surface once everything is dry. Consider adding decorative elements like shelves or outdoor lighting to enhance the overall appearance of your kitchen area.
By following these steps and selecting the right materials, you can successfully create a stunning and functional backsplash for your outdoor kitchen.
What Maintenance Practices Are Recommended for Outdoor Kitchen Backsplashes?
The recommended maintenance practices for outdoor kitchen backsplashes include regular cleaning, inspection for damage, the application of sealants, and timely repairs.
- Regular cleaning
- Inspection for damage
- Application of sealants
- Timely repairs
Transitioning to the detailed explanations, each practice contributes to the longevity and appearance of outdoor kitchen backsplashes.
-
Regular Cleaning: Regular cleaning of outdoor kitchen backsplashes prevents the accumulation of grime, grease, and stains. Mold and mildew can thrive in outdoor conditions, requiring attention to maintain hygiene. Materials like tile, stone, or concrete may need different cleaning agents. For instance, a mixture of warm water and mild detergent can effectively clean porcelain tiles without damaging them.
-
Inspection for Damage: Conducting regular inspections helps identify cracks, chips, or discoloration that can worsen over time. Early detection of damage can prevent costly repairs later. For example, a small crack in a stone backsplash can quickly expand if water seeps in, damaging the integrity of the material.
-
Application of Sealants: Sealants provide an added layer of protection for porous materials against moisture, stains, and UV rays. Products specifically designed for outdoor use enhance durability. According to the Tile Council of North America, sealants should be reapplied every 1-3 years, depending on the material and environmental exposure.
-
Timely Repairs: Timely repairs ensure the longevity of backsplashes and maintain their aesthetic appeal. Repairing chips or cracks prevents moisture infiltration that can cause mold growth. For instance, using a matching epoxy for minor repairs on tiles can blend seamlessly with the existing surface while preserving functionality.
What Costs Should You Consider When Installing an Outdoor Kitchen Backsplash?
When installing an outdoor kitchen backsplash, you should consider materials, installation costs, design complexity, labor costs, and maintenance needs.
- Materials
- Installation costs
- Design complexity
- Labor costs
- Maintenance needs
Considering the various aspects involved, materials play a crucial role in determining both cost and longevity.
-
Materials:
Materials refer to the types of substances used to create the backsplash. Common options include tile, stone, glass, and metal. Each material has different price points and durability. For instance, ceramic tiles range from $1 to $15 per square foot, while natural stone can exceed $30 per square foot. According to a report by HomeAdvisor, tile options are popular due to their versatility and ease of cleaning. -
Installation Costs:
Installation costs encompass the expenses related to fitting the chosen materials onto the wall. This can vary widely depending on complexity and location. Professional installation can cost between $40 to $80 per hour. The average backsplash size of 30 square feet can result in overall installation costs ranging from $600 to $1,200. Research by Remodeling Magazine indicates that investing in professional installation can enhance the overall quality and appearance. -
Design Complexity:
Design complexity refers to the intricacy of the layout and pattern of the backsplash. Simple patterns may require less labor and material, while intricate or custom designs can increase costs significantly. For example, a brick pattern may be easier and cheaper to install compared to a mosaic design. Consumer reports suggest that homeowners should expect to pay 20-30% more for complex designs. -
Labor Costs:
Labor costs involve the payments to skilled workers or contractors performing the installation. These can vary based on the local market and technician experience. Labor may account for 20-50% of the total project cost. According to data from the Bureau of Labor Statistics, labor costs may be influenced by regional demand for skilled trades such as tile setters. -
Maintenance Needs:
Maintenance needs address the care and upkeep of the backsplash materials over time. Some materials, like glass, require less maintenance compared to porous materials like natural stone that may need sealing. The National Association of Home Builders recommends considering long-term maintenance costs, as they can affect overall expenditure. Regular cleaning and sealing can incur additional costs, potentially adding $100 to $300 annually for some material types.