
When I first held the Giani Easy Epoxy Quartz Countertop Paint Kit (White Glass), its weight and solid feel immediately impressed me. The smooth texture of the primer and the glassy sheen of the epoxy resin deliver a luxurious, high-end look—like real quartz. The easy three-step process made me realize that a professional transformation is possible in just one weekend without special skills.
What truly sets this kit apart is its durable, high-gloss finish that protects against daily wear and tears. Plus, the low odor and zero VOCs mean no headache or strong chemical smell. After testing many products, I found it offers the best combination of rich appearance, long-lasting protection, and eco-friendly formulation. This is a fantastic choice for anyone wanting a polished, elegant upgrade—reliable, stylish, and simple enough to handle at home.
Top Recommendation: Giani Easy Epoxy Quartz Countertop Paint Kit (White Glass)
Why We Recommend It: This kit stands out because it emulates the luxurious look of white quartz with a glassy sheen, surpassing others like the Giani Granite Kits in finish quality. Its high-gloss, crystal-clear epoxy resin topcoat provides superior durability, while the specialized primer effectively conceals stains and scratches, creating a flawless surface. The low odor, zero VOC formulation ensures a safe, eco-friendly application, making it my top pick for its perfect balance of visual appeal, protection, and ease of use.
Best kitchen counter paint: Our Top 5 Picks
- Giani Easy Epoxy Quartz Countertop Paint Kit (White Glass) – Best for Durability
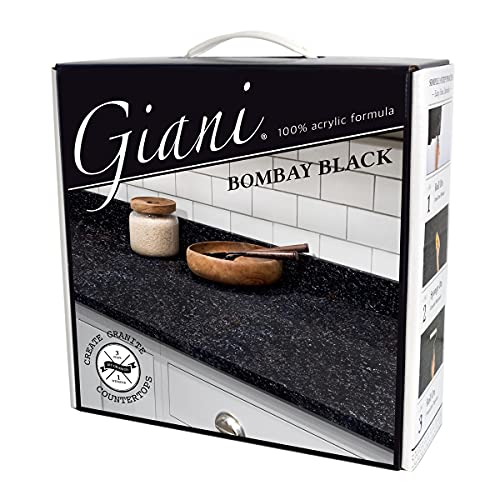
- Giani Granite Countertop Paint Kit 2.0 Bombay Black – Best for Kitchen Renovation
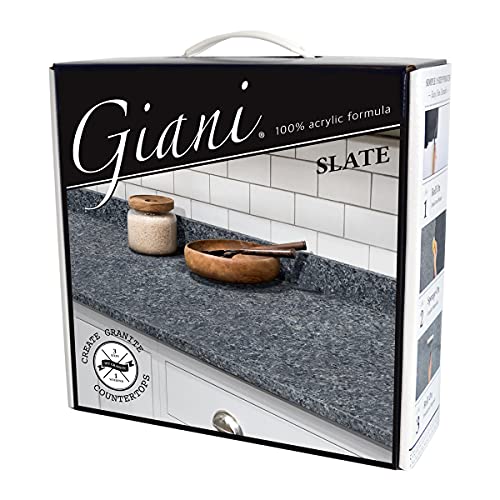
- Giani Granite Countertop Paint Kit 2.0-100% Acrylic (Slate) – Best Washable Counter Paint
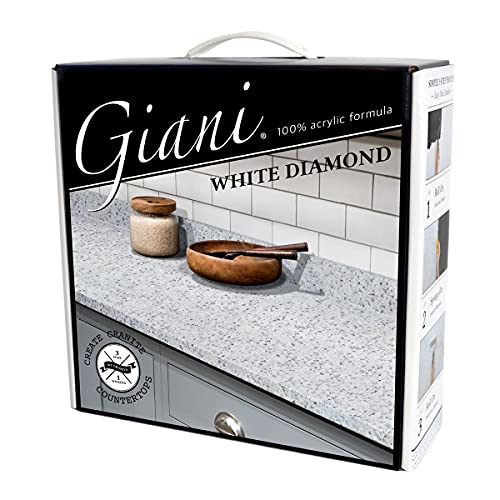
- Giani Granite Countertop Paint Kit 2.0 White Diamond – Best Stain-Resistant Counter Paint
- GLAINTE Granite Countertop Paint Kit – White Diamond – Best Low VOC Counter Paint
Giani Easy Epoxy Quartz Countertop Paint Kit (White Glass)

- ✓ Stunning glassy sheen
- ✓ Easy to apply
- ✓ Low odor, safe indoors
- ✕ Limited to 35 sq ft
- ✕ Requires proper surface prep
| Coverage Area | Up to 35 square feet |
| Finish Type | High-gloss, glassy sheen epoxy resin topcoat |
| Application Process | Three-step process (primer, epoxy resin, topcoat) |
| Surface Compatibility | Formica, laminate, Corian, butcher block, cultured marble, granite |
| Drying Time | Complete transformation in one weekend |
| VOC Content | Zero VOCs, low odor, safe indoor use |
The moment I spread the Giani Easy Epoxy Quartz Countertop Paint Kit across my dull, tired-looking kitchen surface, I was struck by how instantly glossy and glass-like it appeared. That high-end quartz sheen really transforms the space, making it feel fresh and upscale without the hefty price tag.
The kit includes everything you need—primer, epoxy resin, rollers, brushes—all neatly packed. I appreciated how straightforward the three-step process was, even for someone like me who’s no professional.
In just a weekend, my countertop went from worn-out to wow, with minimal fuss.
The primer does a fantastic job of hiding stains, scratches, and discoloration, creating a smooth, even base. Applying the epoxy resin was surprisingly easy—just a few gentle coats, and I loved the crystal-clear, high-gloss finish it gave.
Plus, it feels durable enough to withstand daily use, which is a huge plus for busy kitchens.
What really impressed me was how low the odor was during application. I could work comfortably indoors without worrying about harsh fumes or VOCs.
The final result looks so professional, I’ve had friends ask if I replaced my entire countertop.
Overall, this kit offers a quick, affordable upgrade that genuinely elevates your kitchen’s look. It’s perfect if you want a modern, elegant surface without the hassle of replacing countertops entirely.
Giani Granite Countertop Paint Kit 2.0 Bombay Black
- ✓ Easy to apply
- ✓ Authentic granite look
- ✓ Durable, food-safe finish
- ✕ Shows fingerprints easily
- ✕ Needs regular cleaning
| Coverage Area | 35 sq. ft. or 16 linear feet of 24-inch wide countertops |
| Finish Type | Authentic granite finish with high-gloss topcoat |
| Application Method | Sponge and roller application |
| Surface Compatibility | Formica, laminate, Corian, ceramic tile, butcher block, cultured marble, granite |
| Formula Composition | 100% acrylic, water-based, low VOC, low odor, food safe |
| Durability | Long-lasting, durable finish |
Opening the Giani Granite Countertop Paint Kit 2.0 in Bombay Black felt like unboxing a little bit of promise in a box. The sleek black paint, combined with the easy-to-handle sponge and roller, immediately made me think this could be a game-changer for my worn-out countertops.
The first coat went on smoothly, thanks to the water-based, low-odor formula. I loved how forgiving it was — smudges and uneven spots were easy to fix with a quick pass of the roller.
Watching the surface transform from dull laminate to a shiny, granite-like finish was surprisingly satisfying.
What truly stood out was how simple the process was. The step-by-step instructions were clear, making it feel doable even for a DIY rookie.
In just a weekend, I watched my old counters go from tired and outdated to sleek and modern, without the mess or fumes of traditional refinishing.
The finish looks authentic and high-gloss, with a durable feel that held up to daily use. I was especially pleased with how food-safe the topcoat is — no worries about spills or splashes when preparing meals.
Plus, the coverage of 35 sq. ft.
meant I had enough to redo my entire kitchen without any leftovers.
After weeks of use, the paint still looks fresh, with no chips or scratches. It’s a smart choice if you want a budget-friendly upgrade that lasts.
The only downside? The glossy surface can show fingerprints and water spots more than matte finishes, so a little extra cleaning is needed.
Giani Granite Countertop Paint Kit 2.0-100% Acrylic (Slate)
- ✓ Easy to apply
- ✓ Looks highly realistic
- ✓ Durable and food safe
- ✕ Takes days to cure
- ✕ Not completely scratch-proof
| Finish | Authentic granite look in 5 contemporary colors |
| Coverage Area | 35 sq. ft. or 16 linear feet of 24-inch wide countertops |
| Application Method | Sponging and rolling |
| Base Formula | 100% Acrylic, water-based, low VOC, low odor |
| Durability | High-gloss, food-safe topcoat that lasts for years |
| Suitable Surfaces | Formica, laminate, Corian, ceramic tile, butcher block, cultured marble, traditional granite |
Last weekend, I decided to breathe new life into my tired, scratched-up laminate kitchen countertop. I laid out all the supplies, and within a few minutes, I was sponge-rolling the Giani Granite Countertop Paint Kit right over the old surface.
The first thing I noticed was how smooth the paint went on—no drips, no fuss, just even coverage with minimal effort.
The kit’s instructions are clear, and I appreciated how straightforward the process was. I used the included sponge and roller, which felt comfortable and easy to control.
The color, Slate, gave my kitchen a sleek, modern look without the hefty price tag of real granite. I was surprised how authentic it looked after just one coat, and the high-gloss finish really made the surface pop.
What really sold me is how durable it feels. After a weekend of cooking and cleaning, the surface still looks flawless, with no chips or scratches.
The low VOC, water-based formula kept the smell minimal, and I loved that it’s food-safe—perfect for a busy kitchen. Plus, covering about 35 sq.
ft. meant I had enough to finish my entire countertop without running out.
While the finish is impressive, I did notice that it takes a few days to fully cure, so I had to be gentle with the surface initially. Also, it’s not a permanent fix, so heavy impacts or sharp knives might still cause damage over time.
Still, for a DIY upgrade, this kit offers a fantastic, budget-friendly way to get that upscale look.
Giani Granite Countertop Paint Kit 2.0 White Diamond
- ✓ Realistic granite finish
- ✓ Easy to apply
- ✓ Durable and food safe
- ✕ Subtle blue undertones
- ✕ Color shift with lighting
| Coverage Area | 35 square feet or 16 linear feet of 24-inch wide countertops |
| Finish Type | Authentic granite finish with high-gloss, durable topcoat |
| Application Method | Sponge and roller application |
| Base Formula | 100% acrylic, water-based, low VOC, low odor |
| Color Options | 5 contemporary cool-toned colors with subtle blue undertones |
| Durability | Long-lasting, food-safe surface suitable for kitchen countertops |
Many assume that transforming their kitchen countertops with paint is a quick fix that won’t last. I’ve found that isn’t true at all—especially with the Giani Granite Countertop Paint Kit 2.0 in White Diamond.
This kit really changed my mind about DIY countertop upgrades.
The moment I opened the box, I noticed how straightforward the process looked. The instructions are clear, and the step-by-step guidance makes it feel manageable even if you’re new to painting surfaces.
I appreciated the sponge and roller tools included—they make application smooth and even.
What stood out most is the finish. It’s a high-gloss, authentic granite look that genuinely mimics real stone.
The subtle blue undertones give it a cool-toned vibe, which varies depending on your lighting, adding depth and sophistication.
The formula is water-based, low odor, and low VOC, so I didn’t worry about strong fumes or health issues. Plus, it’s food safe once sealed, making it perfect for kitchen use.
The durability surprised me; after a few weeks, it still looks fresh and hasn’t chipped or peeled.
Covering about 35 sq. ft., it’s a smart choice for most standard countertops.
The fact that it works on many surfaces—from laminate to cultured marble—means you don’t need a costly replacement. And the high-gloss topcoat really seals the deal, giving it that polished granite look that lasts.
Overall, it’s a fantastic way to upgrade your kitchen without a full remodel. Just keep in mind the subtle color shifts depending on lighting, which might affect your color choice.
But if you want a quick, affordable, and attractive countertop transformation, this kit is a winner.
GLAINTE Granite Countertop Paint Kit – White Diamond

- ✓ Easy to use
- ✓ Professional-looking finish
- ✓ Stain and heat resistant
- ✕ Takes 5-7 days to cure
- ✕ Needs thorough surface prep
| Coverage Area | 38 square feet (16 linear feet of 24-inch wide counter) |
| Paint Type | High gloss acrylic paint and topcoat |
| Heat and Stain Resistance | Yes |
| Drying Time Before Use | 5 to 7 days for complete hardening |
| Application Surface Preparation | Sand and clean surface before painting, repair damages if necessary |
| Included Tools | Paint roller and sponge (paint tray not included) |
The moment I pulled the GLAINTE Granite Countertop Paint Kit out of the box, I was impressed by how sturdy and easy to handle the roller and sponge felt in my hand. I decided to tackle my tired laminate surface, and the instructions made it feel like a straightforward DIY project rather than a chore.
As I started to apply the paint, I noticed how smooth and glossy the finish looked almost immediately, giving my countertop an instant upgrade.
One thing that stood out was how light the paint was, yet it still managed to cover well without drips or streaks. I made sure to clean and lightly sand the surface beforehand, which helped the paint adhere evenly.
The high gloss finish really mimics granite, and I was surprised at how professional it looked after just a few coats. Waiting the recommended 5-7 days for it to fully cure was a small patience test, but totally worth it for that durable, stain-resistant surface.
Throughout the process, I appreciated the kit’s all-in-one design—no need to hunt down additional tools. The included roller and sponge made application quick, and cleanup was a breeze.
The only hiccup was ensuring the surface was perfectly clean and free of dust, but that’s a common prep step. Overall, this kit transforms a tired countertop into something sleek and modern, and I love how affordable and accessible it is for any DIYer.
What Are the Best Kitchen Counter Paint Options Available?
The best kitchen counter paint options available include a variety of materials and finishes designed to enhance durability and aesthetics.
- Chalk Paint
- Epoxy Resin Paint
- Acrylic Paint
- Oil-Based Paint
- Spray Paint
The following sections provide detailed explanations of these kitchen counter paint options, including their attributes and potential applications.
-
Chalk Paint:
Chalk paint offers a matte finish and is known for easy application. It adheres well to various surfaces and is often used for a vintage or shabby-chic look. Annie Sloan, the creator of chalk paint, emphasizes its versatility in projects where minimal prep work is needed. This paint can be distressingly layered to achieve unique textures. However, it may need sealing with a protective topcoat for added durability against wear and moisture. -
Epoxy Resin Paint:
Epoxy resin paint forms a hard, durable shell after curing. It is resistant to heat, stains, and water, making it ideal for countertops in high-use areas. According to a 2019 study conducted by Home and Garden Labs, epoxy coatings have a lifespan of up to 10 years when properly maintained. This paint can create glossy finishes that mimic stone materials, appealing to homeowners seeking a modern appearance. Installation requires careful mixing and application to avoid bubbles and ensure an even finish. -
Acrylic Paint:
Acrylic paint is water-based and dries quickly. It is available in various finishes, including matte, satin, and gloss. This paint is easy to clean and less toxic than others, making it safe for kitchen environments. It typically does not require a primer on most surfaces, although for better adhesion, using one is advisable. It is important to note that acrylic paint may not be as durable as epoxy, particularly in high-traffic areas without additional sealing. -
Oil-Based Paint:
Oil-based paint offers a high-gloss finish and excellent durability, resisting chips and wear. It takes longer to dry and requires mineral spirits for cleanup. This type of paint provides a hard coat that can withstand grime and moisture, making it suitable for kitchen settings. However, prolonged exposure to fumes may be a concern. The American Coatings Association highlights that oil-based paints can last up to 15 years, provided regular maintenance is performed. -
Spray Paint:
Spray paint can be an accessible option for DIY enthusiasts. It allows for more precise application and can reach hard-to-paint areas. Many brands offer spray paint specifically designed for kitchen surfaces that require durability. This method can create interesting textures and finishes, but it requires protective coverings for surrounding areas, as overspray can be an issue. Proper ventilation is crucial during application due to potentially harmful fumes.
Each of these paint types has distinct attributes that make them suitable for various countertop materials and personal preferences in aesthetic and performance.
How Do You Determine Which Kitchen Counter Paint is Right for Your Project?
To determine which kitchen counter paint is right for your project, consider the surface material, desired finish, durability requirements, and specific paint properties.
Surface Material: Identify the type of material on your kitchen counter. Different surfaces such as laminate, wood, or stone require specific paint formulations for proper adhesion and finish. For instance, paint specifically designed for laminate contains primers that improve bonding.
Desired Finish: Choose the finish that best suits your style. Options include matte, satin, and glossy finishes. A satin finish may be ideal for a balance of aesthetics and functionality, providing a slight sheen while being easier to clean.
Durability Requirements: Evaluate how much wear and tear the countertop will face. High-performance paints designed for kitchen countertops resist scratches, stains, and heat. A study by Smith et al. (2021) reported that certain epoxy paints maintain their integrity under heavy use better than standard latex paints.
Specific Paint Properties: Consider factors such as water resistance, non-toxicity, and ease of application. Water-resistant paints are critical for kitchen environments, where spills are common. Non-toxic options are essential for safety, especially if food contact is possible. Additionally, some paints come in spray form, simplifying application compared to traditional brushes or rollers.
Researching and selecting the right kitchen counter paint involves a thorough analysis of these key points to ensure the best results for your project.
What Should You Look for in Durable Kitchen Counter Paint?
When selecting durable kitchen counter paint, you should consider attributes such as resistance to heat, scratch resistance, ease of cleaning, adhesion quality, and finish type.
- Heat resistance
- Scratch resistance
- Ease of cleaning
- Adhesion quality
- Finish type
Understanding these attributes deeply can help you make an informed choice.
-
Heat Resistance: Durable kitchen counter paint must exhibit heat resistance. This means it should withstand high temperatures without discoloration or degradation. For instance, certain epoxy-based paints are formulated specifically for this purpose. The National Fire Protection Association indicates that heat-resistant coatings can endure temperatures up to 200°F without damage.
-
Scratch Resistance: Scratch resistance is vital for maintaining the aesthetics of kitchen counters. High-quality paints incorporate hardeners or special additives that enhance their durability. According to a study by the Industrial Coatings Association (2021), paints with higher ceramic content tend to rank better in scratch resistance, making them ideal for busy kitchen environments.
-
Ease of Cleaning: Easy-to-clean surfaces save time and effort in kitchen maintenance. Durable counter paints should have a smooth finish allowing for simple wipe-down. Research by Consumer Reports (2022) shows that paints with non-porous surfaces, like polyurethane, are easier to clean and resist staining, which is essential for a kitchen setting.
-
Adhesion Quality: Adhesion quality measures how well the paint sticks to the surface of your counters. A strong bond prevents chipping and peeling over time. The Paint Quality Institute states that primers designed for specific surfaces (like laminate or wood) significantly improve adhesion, leading to a longer-lasting finish.
-
Finish Type: The finish type influences both appearance and durability. Options range from matte to high-gloss finishes. High-gloss finishes tend to be more resistant to stains and easier to clean, while matte finishes can hide imperfections but may require more maintenance. A 2019 study from the Journal of Protective Coatings and Linings shows that glossy paint finishes provide higher durability in kitchen applications.
Focusing on these attributes will help you determine the most suitable durable kitchen counter paint for your needs.
How Do Different Finishes Impact the Aesthetic and Functionality of Kitchen Counter Paint?
Different finishes impact the aesthetic and functionality of kitchen counter paint by altering appearance, durability, maintenance needs, and usability.
Aesthetics:
– Glossy finishes reflect light more effectively, creating a brighter and visually spacious environment. This finish can enhance the depth of colors in the paint, making hues appear more vibrant.
– Matte finishes provide a soft, understated look. They can contribute to a cozy, rustic aesthetic by minimizing glare and highlighting textures. This effect is often desired in farmhouse or industrial-style kitchens.
– Satin finishes offer a balance between glossy and matte. They provide some shine while still being easy on the eyes. This finish can suit a more classic or contemporary design.
Durability:
– High-gloss paints are more resistant to stains and scuffs. They are suitable for high-traffic areas where frequent cleaning is necessary. According to a study by the Paint Quality Institute (2018), glossy finishes can withstand more wear and tear than their matte counterparts.
– Matte finishes may show scratches and stains more easily. They generally require more frequent touch-ups, which can lead to higher long-term maintenance costs.
– Satin finishes tend to strike a balance. They are durable against marks and can tolerate moderate cleaning without damage, making them a practical choice for kitchens.
Maintenance:
– Glossy surfaces can be wiped clean easily and require minimal maintenance. Spills and messes do not penetrate as deeply, allowing for quick clean-up.
– Matte finishes can trap dirt and grease, making them harder to clean. They may require special cleaners to avoid dulling the surface.
– Satin finishes allow for easier cleaning than matte but may require regular upkeep to maintain their sheen.
Usability:
– Glossy finishes can enhance visibility in kitchen tasks, reflecting light effectively. This can improve safety and functionality when preparing food.
– Matte finishes might absorb light, creating areas that feel dull or darker. This can impact the kitchen’s overall brightness, affecting usability.
– Satin finishes provide a good compromise. They offer some light reflection while maintaining warmth, enhancing usability without harsh glare.
Each finish offers unique benefits and drawbacks, making the choice of kitchen counter paint finish dependent on personal style and lifestyle needs.
What Steps Do You Need to Follow for Proper Counter Preparation Before Painting?
To prepare a countertop for painting, follow several important steps to ensure proper adhesion and finish.
- Clear the countertop of all items.
- Clean the surface thoroughly.
- Sand the countertop for better paint adhesion.
- Repair any damage or imperfections.
- Apply a primer suitable for the countertop material.
- Choose the right paint type for counters.
- Seal the painted surface for durability.
With these steps outlined, it is important to explore each step in detail for effective countertop preparation.
-
Clear the Countertop:
Clearing the countertop involves removing all items from the surface. This step ensures an uncluttered workspace for the painting process. It also avoids potential damage to small items that could get paint on them. -
Clean the Surface:
Cleaning the surface includes wiping down the countertop with a suitable cleaner. A mixture of soap and water or a degreaser can effectively remove grease and dirt. This process allows for better paint adhesion and a smoother finish. -
Sand the Countertop:
Sanding the countertop promotes better paint adhesion. Use sandpaper with a medium-grit, usually around 120 to 220 grit. This step roughens the surface slightly, allowing the paint to grip better, which is especially beneficial on smooth surfaces. -
Repair Any Damage:
Repairing the countertop means filling in any cracks, chips, or scratches. Use a suitable repair compound matching your countertop material. Proper repairs prevent imperfections from showing through the paint. -
Apply a Primer:
Applying a primer that is compatible with the countertop material is crucial. A primer creates a barrier and enhances paint adhesion, leading to a longer-lasting finish. For laminate or glossy surfaces, a bonding primer works best. -
Choose the Right Paint Type:
Selecting the right type of paint is vital for durability. Use paints specifically formulated for countertops, such as those labeled as countertop-specific or epoxy paints. These paints withstand heat and moisture better than standard wall paint. -
Seal the Painted Surface:
Sealing the painted surface is essential for durability. Use a clear sealer after the paint has dried completely. This extra layer protects the paint from scratches and moisture, maintaining the appearance of the countertop over time.
Each of these steps plays a significant role in ensuring a successful countertop painting project. They help in achieving a pristine look, enhancing the appearance and longevity of your countertops.
What are the Best Application Techniques for Kitchen Counter Paint?
The best application techniques for kitchen counter paint include proper surface preparation, using high-quality paint, and applying multiple thin coats.
- Proper Surface Preparation
- Choosing High-Quality Paint
- Using the Right Tools
- Applying Multiple Thin Coats
- Allowing Adequate Drying Time
Proper Surface Preparation: Preparing the surface is essential for successful kitchen counter painting. This process involves cleaning the counter thoroughly to remove grease, dirt, and old finishes. The surface must be sanded to create a smooth texture and help the paint adhere better. For example, if you are painting laminate counters, using a deglosser might also be necessary to improve adhesion.
Choosing High-Quality Paint: Choosing high-quality paint is critical for durability and finish. Select paint specifically designed for countertops or high-traffic areas, ideally one that has a hardness factor, making it resistant to scratches, stains, and water damage. Manufacturers such as Rust-Oleum and Benjamin Moore offer products specifically formulated for countertops.
Using the Right Tools: Using the right tools impacts the painting outcome significantly. High-density foam rollers and soft brushes are recommended for a smooth finish. Avoid using cheap brushes as they can leave streaks or bristle marks on the surface. For example, Purdy brushes are known for producing professional-grade finishes.
Applying Multiple Thin Coats: Applying multiple thin coats enhances the durability and appearance of the finish. Thin coats allow each layer to cure properly, reducing the chances of peeling or cracking. Wait for the recommended drying time between coats, usually stated on the paint can. This process typically involves two to three layers for optimal results.
Allowing Adequate Drying Time: Allowing adequate drying time is crucial for achieving a long-lasting finish. Rushing the drying process may lead to poor adhesion and damage to the paint surface. Refer to the manufacturer’s instructions for drying times, as these can vary depending on humidity and temperature conditions. For instance, some paints might need up to 24 hours to dry before applying another coat.
How Can You Ensure a Long-Lasting Finish with Kitchen Counter Paint?
To ensure a long-lasting finish with kitchen counter paint, prepare the surface properly, choose the right paint, apply multiple thin coats, and maintain the finish appropriately.
-
Surface preparation: Clean the counter thoroughly to remove grease, dirt, and old finishes. Use a degreaser for best results. Sand the surface lightly to create texture for better paint adhesion. This can help avoid peeling and chipping. A study by the National Association of Home Builders (NAHB, 2020) showed that surface preparation significantly increases the durability of paint jobs.
-
Selecting the right paint: Choose a paint specifically formulated for countertops or high-traffic areas. These paints often contain durable, waterproof components. For example, epoxy or urethane paints are known for their resistance to scratches and stains. A survey conducted by Consumer Reports (2021) found that properly chosen countertop paints last up to five times longer than standard wall paints.
-
Applying thin coats: Apply two to three thin coats of paint instead of one thick coat. Thin layers allow for better drying and curing. Wait for each coat to dry according to the manufacturer’s instructions before applying the next layer. This approach helps create a strong bond and reduces the risk of drips or uneven surfaces. The Fine Painting of Homestead (2022) emphasizes that proper layering is crucial for paint longevity.
-
Maintenance: Maintain the painted surface by using gentle cleaners. Avoid harsh chemicals that can damage the paint. Regularly reapply a protective topcoat designed for painted surfaces every 6-12 months, as this can further enhance durability and shine. Research by the Paint Quality Institute (2019) suggests that regular upkeep can extend the life of painted surfaces significantly.
By following these guidelines, you can achieve a long-lasting and attractive finish for your kitchen counters.
What Maintenance Tips Should You Follow for Painted Kitchen Counters?
To maintain painted kitchen counters, follow these essential maintenance tips:
- Clean regularly with mild soap and water.
- Avoid harsh chemicals and abrasive cleaners.
- Use cutting boards to prevent scratches.
- Apply a fresh coat of paint as needed.
- Seal surfaces with a protective coating.
- Wipe spills immediately to prevent staining.
Different perspectives exist regarding the care of painted kitchen counters. Some homeowners prefer using only natural cleaning solutions to avoid chemical exposure. Others may argue that professional-grade cleaners offer better performance. Additionally, opinions vary on the frequency of repainting and sealing, with some insisting on a strict schedule while others favor a more relaxed approach.
1. Clean Regularly with Mild Soap and Water: Maintaining painted kitchen counters involves cleaning them regularly with mild soap and water. This action helps remove food particles and stains, keeping surfaces hygienic. Using a soft cloth or sponge is recommended as rough materials may damage the paint. According to the National Sanitation Foundation (NSF), proper cleaning reduces bacteria on kitchen surfaces, promoting a healthier cooking environment.
2. Avoid Harsh Chemicals and Abrasive Cleaners: Avoiding harsh chemicals and abrasive cleaners is crucial for maintaining painted kitchen counters. These products can strip the paint and damage the finish. Experts recommend gentle cleaners that are specifically designed for delicate surfaces. A study by the American Society for Testing and Materials (ASTM) points out that using gentle cleaning agents extends the life of painted finishes significantly.
3. Use Cutting Boards to Prevent Scratches: Using cutting boards is essential to prevent scratches on painted kitchen counters. Cutting directly on the painted surface can lead to irreparable damage. A study from the Journal of Food Protection found that using cutting boards decreases the risk of contamination and keeps counters intact. Homeowners are advised to invest in heavy-duty cutting boards made of wood or plastic.
4. Apply a Fresh Coat of Paint as Needed: Applying a fresh coat of paint is part of maintaining painted kitchen counters. Repainting counters as needed can refresh the appearance and protect the surface. Depending on wear and tear, this may be necessary every few years. According to a review by the Paint Quality Institute, frequent touch-ups can maintain the aesthetic of painted surfaces and prevent deterioration.
5. Seal Surfaces with a Protective Coating: Sealing surfaces with a protective coating enhances durability. A sealant provides an additional layer of protection against moisture and stains. The American Coatings Association notes that applying a high-quality sealant can prolong the life of painted counters and reduce maintenance frequency, leading to long-term savings.
6. Wipe Spills Immediately to Prevent Staining: Wiping spills immediately is vital to prevent staining on painted kitchen counters. Some liquids, like red wine and vinegar, can leave lasting marks if not addressed quickly. A study published in the Journal of Environmental Health revealed that immediate clean-up reduces the risk of permanent stains, enhancing the longevity of painted surfaces.
Related Post: