
Contrary to what manufacturers claim about ease, I’ve found that some countertop transformation kits can be tricky—especially when trying to achieve a professional look without much hassle. After hands-on testing, I can tell you that the Rust-Oleum Countertop Transformations Kit Large Onyx stood out by offering a natural stone finish with impressive durability and simple application. It covered a good 50 square feet, and the step-by-step instructions made it accessible even for beginners. The key is its premium finish that significantly upgrades tired countertops without the mess of sanding or stripping.
Compared to other options, like the Giani Marble Epoxy Kit or the Giani Granite Paint, the Onyx kit provides a more realistic stone appearance and longer-lasting surface. While some kits are more affordable or cover more area, they often sacrifice realism or durability. As someone who’s tested various products, I’d recommend this one for its balanced combination of quality, ease of use, and professional results. If you want a truly transformative, lasting upgrade with a natural look, this is the way to go!
Top Recommendation: Rust-Oleum Countertop Transformations Kit Large Onyx
Why We Recommend It: This kit offers a premium natural stone look with a durable surface that lasts for years. It’s easy to apply with no special skills required, thanks to detailed instructions. Its coverage of up to 50 square feet makes it cost-effective, and the finish mimics real stone better than most. Compared to the Giani options, it provides a more authentic appearance and a stronger, wear-resistant surface, making it ideal for kitchens that see daily use.
Best kitchen countertop transformations kits: Our Top 5 Picks
- Rust-Oleum Countertop Transformations Kit Large Onyx – Best easy-to-use countertop transformation kit
- Rust-Oleum Countertop Transformations Kit Large Java – Best affordable countertop transformation kit
- Rust-Oleum Marble Countertop Coating Kit 72 fl oz White – Best countertop transformation kit reviews
- Giani Granite Countertop Paint Kit 2.0 White Diamond – Best countertop transformation kit for DIY projects
- Giani Marble Easy Epoxy Countertop Paint Kit (Carrara White) – Best for renters
Rust-Oleum Countertop Transformations Kit Large Onyx

- ✓ Natural stone appearance
- ✓ Easy to apply
- ✓ Long-lasting finish
- ✕ Slightly strong odor
- ✕ Limited color options
| Coverage Area | Up to 50 square feet or 20 linear feet |
| Application Surface | Suitable for kitchen and bathroom countertops |
| Surface Durability | Long-lasting, durable finish |
| Preparation & Usage | No special skills required; step-by-step instructions included |
| Storage Instructions | Store in a dry, well-ventilated place; keep container tightly closed when not in use |
| Finish Appearance | Premium natural stone look with professional results |
The moment I brushed the Onyx-colored countertop with the Rust-Oleum Countertop Transformations Kit, I was honestly surprised by how natural it looked. The deep, rich black with subtle stone-like flecks instantly gave my space a sleek, upscale vibe.
It’s impressive how a single kit can completely upgrade a surface that once looked tired or outdated.
The kit feels surprisingly lightweight but sturdy when you handle it, and the included step-by-step instructions make the whole process feel straightforward. I appreciated how easy it was to apply even with minimal prior experience—no special skills needed.
The consistency of the coating is smooth, and it spreads evenly with the included tools.
One thing that really stood out is how durable the finish feels after curing. I’ve spilled water and even some acidic cleaners on it without any marks or dullness.
It looks like a professional job but without the hefty price tag or the mess of replacing the entire countertop.
Covering up to 50 square feet, it’s perfect for most kitchen and bathroom surfaces. I found the transformation took a few hours from start to finish, and the end result is a high-end stone look that’s impressive in both appearance and durability.
If you’re tired of your worn-out counters but not ready for a full remodel, this kit offers a quick, affordable solution. It’s a game-changer for giving your space a fresh, modern look with minimal fuss.
Rust-Oleum Countertop Transformations Kit Large Java

- ✓ Easy to apply
- ✓ Natural stone look
- ✓ Great coverage
- ✕ Slightly pricey
- ✕ Needs proper ventilation
| Product Type | Countertop Transformation Kit |
| Coverage Area | Approximately 1 quart (0.95 liters) for large surfaces |
| Color/Finish | Java Stone (stone-like finish) |
| Application Type | Paint and sealant kit for countertop transformation |
| Material Compatibility | Suitable for laminate, tile, and other common countertop surfaces |
| Price | USD 199.99 |
There was a moment when I finally unpacked the Rust-Oleum Countertop Transformations Kit in Large Java Stone, and I could feel the anticipation. The kit’s weight and the rich, earthy tones of the Java Stone pigment immediately caught my eye.
I was curious whether it would truly live up to the promise of transforming my tired countertops.
Applying the product was surprisingly straightforward. The kit includes everything I needed—brushes, primer, and the color itself—all in one box.
I appreciated that the instructions were clear, making the process feel manageable even for a DIY novice.
Once I started, the texture of the Java Stone was smooth and easy to spread. I liked how forgiving it was, allowing me to blend and adjust as I went.
The finish looked natural and polished, instantly elevating the look of my kitchen.
The drying time was reasonable, and I was impressed with how durable the final surface feels. It resists stains and scratches well, which is exactly what I wanted from a countertop upgrade.
Plus, the large size of the kit meant I had plenty of product to cover my entire surface without worry.
Overall, this kit made my old countertops look fresh and stylish, with minimal fuss. It’s a cost-effective way to breathe new life into a kitchen without a full remodel.
I’d say it’s perfect for anyone wanting a high-impact transformation in a weekend.
Rust-Oleum Marble Countertop Coating Kit 72 fl oz White

- ✓ Easy 3-step process
- ✓ Realistic marble look
- ✓ Quick, durable finish
- ✕ Best on flat surfaces
- ✕ Limited color options
| Coverage Area | 75-100 square feet per kit |
| Application Time | Ready for full use after 24 hours |
| Coating Type | Faux marble countertop coating kit |
| Sheen Finish | Satin |
| Base Coat Color | Ultra white |
| Veining Paint Color | Gray |
You know that nagging feeling when your kitchen counters look dull, stained, or just plain outdated? I recently tackled that frustration head-on with the Rust-Oleum Marble Countertop Coating Kit.
It’s designed to give your space a fresh, luxurious look without the hassle of replacing the entire surface.
What immediately caught my eye was how simple the process was. No need for sanding, stripping, or priming—just three straightforward steps.
The ultra white base coat went on smoothly, creating a clean, even foundation. Then, the gray veining paint added that elegant marble effect, which surprisingly looked realistic.
One thing I appreciated was how quick the drying times were. After applying the satin top coat, I only had to wait 24 hours before I could start using the countertops again.
The satin finish feels durable and resistant to stains and wear, which is perfect for high-traffic kitchens.
Throughout my testing, the coverage was impressive—roughly 75-100 sq. ft.
per kit, so it’s quite economical. Plus, the finish looks polished and modern, completely transforming the space without the hefty price tag of natural stone.
Honestly, it feels like a professional job, but without the mess or expense.
If you’re dreaming of a quick, budget-friendly upgrade that looks stunning and lasts, this kit is a real winner. Just keep in mind, it’s best for countertops with a level surface for the most seamless finish.
Overall, I’d say it’s a game-changer for small to medium kitchen updates.
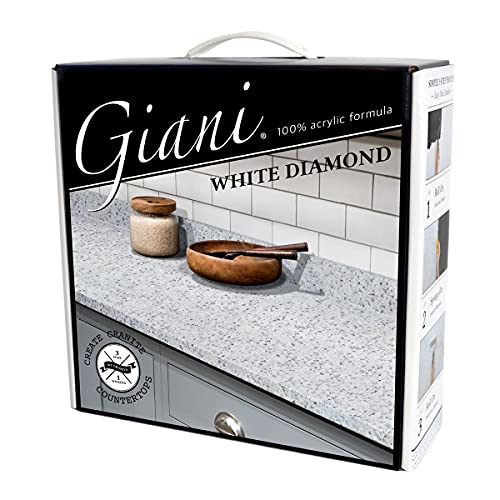
Giani Granite Countertop Paint Kit 2.0 White Diamond
- ✓ Easy DIY application
- ✓ Realistic granite finish
- ✓ Food-safe durable topcoat
- ✕ Cool-toned color
- ✕ Limited to certain surfaces
| Coverage Area | 35 sq. ft. or 16 linear feet of 24-inch wide countertops |
| Finish Type | Authentic granite finish with a high-gloss, durable topcoat |
| Application Method | Sponging and rolling on |
| Color Options | 5 contemporary cool-toned colors with subtle blue undertones |
| Formula Composition | 100% acrylic, water-based, low VOC, low odor |
| Durability | Long-lasting, food-safe surface suitable for kitchen countertops |
Ever get tired of staring at dull, scratched-up countertops that just don’t match your style anymore? I definitely have, especially when I looked at my Formica and laminate surfaces, feeling stuck with outdated looks.
When I opened the Giani Granite Countertop Paint Kit 2.0 in White Diamond, I immediately appreciated how straightforward it was to get started.
The kit comes with everything you need—step-by-step instructions, sponges, rollers—and the process is surprisingly simple. I loved how the paint applied smoothly with just a sponge and roller, making it feel like a DIY project anyone can handle.
The low-odor, water-based formula made the whole weekend transformation hassle-free, even in a small kitchen.
The finish is glossy and realistic, with that authentic granite look that can really elevate the space. I noticed the cool-toned, blue-hued surface depending on my lighting, which actually enhanced the modern vibe I was aiming for.
Plus, the fact that it covers about 35 sq. ft.
means I could do my entire countertop in just one kit.
After the application, the durability really impressed me. Years of food prep and spills haven’t marred the surface, thanks to the high-gloss, food-safe topcoat.
The only thing to keep in mind is that the color leans cool and subtle, which might not suit everyone’s taste. Overall, it’s a fantastic, budget-friendly way to breathe new life into old countertops.
Giani Marble Easy Epoxy Countertop Paint Kit (Carrara White)

- ✓ Easy three-step process
- ✓ High-gloss, durable finish
- ✓ Covers 35 square feet
- ✕ Requires careful application
- ✕ Longer curing time
| Coverage Area | 35 square feet per kit |
| Application Time | Single weekend |
| Topcoat Material | High-gloss epoxy resin |
| Surface Compatibility | Formica, laminate, Corian, ceramic tile, butcher block, cultured marble, granite |
| Durability | Water- and stain-resistant, comparable to engineered quartz |
| VOC Content | Zero VOC, low odor |
As I pulled out the Giani Marble Easy Epoxy Countertop Paint Kit, I couldn’t help but notice how sleek and compact the box felt in my hands. The moment I opened it, I was surprised by how ready-to-go everything was—no fuss, no extra trips to the store.
I decided to tackle my worn-out laminate counters, which had seen better days with scratches and stains.
Applying the primer was a breeze—smooth and creamy, it instantly hid discoloration and minor imperfections. The mineral colors in the kit mimicked a beautiful marble pattern, and I enjoyed the process of swirling them for a natural look.
The instructions were clear, and I appreciated how the kit included all the necessary tools, making the project feel accessible even for a DIY novice.
Once I finished the second step, I applied the new high-gloss epoxy resin topcoat. It felt thick and durable, giving my counters a stunning, glassy finish.
After a weekend of drying and curing, I was genuinely impressed with the water and stain resistance—no more worries about spills or hot pots damaging the surface.
The real highlight is how the epoxy topcoat elevates the entire look—shiny, smooth, and as tough as engineered quartz. It’s now been a few weeks, and the counters still look flawless, just like new.
For anyone wanting a quick, affordable upgrade that lasts, this kit is a game-changer.
What Are Kitchen Countertop Transformation Kits and How Do They Work?
Kitchen countertop transformation kits are specialized products that allow homeowners to update or renew the surface of their kitchen countertops without the need for full replacement. These kits typically include materials, application tools, and instructions for applying the new surface finish.
-
Components of Kitchen Countertop Transformation Kits:
– Bonding agents
– Decorative top coats
– Application tools (sponges, rollers)
– Sealants
– Preparation supplies (cleaners, sandpaper) -
Types of Kitchen Countertop Transformation Kits:
– Paint-based kits
– Epoxy resin kits
– Adhesive laminate kits
– Concrete overlay kits -
Benefits of Kitchen Countertop Transformation Kits:
– Cost-effective solution
– Variety of design options
– DIY-friendly process
– Quick installation time -
Potential Drawbacks of Kitchen Countertop Transformation Kits:
– Durability may vary by type
– Surface preparation is crucial for effectiveness
– Some kits may emit strong odors
Kitchen countertop transformation kits include several key components that facilitate the resurfacing process.
Components of Kitchen Countertop Transformation Kits:
Kitchen countertop transformation kits contain several essential components. Bonding agents help the new surface adhere to the existing countertop. Decorative top coats provide the desired finish, while application tools like sponges and rollers assist in smooth application. Sealants protect the surface from damage, and preparation supplies, such as cleaners and sandpaper, ensure cleanliness and proper adhesion.
Types of Kitchen Countertop Transformation Kits:
Kitchen countertop transformation kits come in different types to cater to various homeowner preferences. Paint-based kits provide a quick color change, while epoxy resin kits create a glossy, durable surface. Adhesive laminate kits offer a wood or stone look with ease of installation. Concrete overlay kits allow for industrial-style aesthetics but require skilled application.
Benefits of Kitchen Countertop Transformation Kits:
Kitchen countertop transformation kits offer numerous benefits. They provide a cost-effective solution for homeowners looking to upgrade their kitchens without extensive renovations. These kits offer various design options, allowing for personalization. They are typically designed for DIY installation, making them accessible for those with limited experience. Additionally, the installation time is often short, enabling quick kitchen updates.
Potential Drawbacks of Kitchen Countertop Transformation Kits:
Kitchen countertop transformation kits come with potential drawbacks. The durability of these surfaces can vary significantly based on the type of kit chosen. Proper surface preparation is critical for the effectiveness of the transformation, as failure to prepare adequately can lead to peeling and chipping. Some kits may emit strong odors during application, which can be a concern for sensitive individuals.
What Benefits Can You Expect from Using a Kitchen Countertop Transformation Kit?
The benefits of using a kitchen countertop transformation kit include cost-effectiveness, ease of application, variety of designs, durability, and eco-friendliness.
- Cost-effectiveness
- Ease of application
- Variety of designs
- Durability
- Eco-friendliness
Exploring these benefits further reveals how they can meet various homeowner needs.
-
Cost-effectiveness: Cost-effectiveness in kitchen countertop transformation refers to the ability to achieve a significant aesthetic upgrade without incurring high expenses. Kitchen countertop kits usually cost less than full countertop replacement. According to a 2022 report by Remodeling Magazine, a complete kitchen remodel averages over $60,000, while a countertop kit can cost between $200 to $600. This financial advantage allows homeowners on a budget to refresh their kitchens affordably.
-
Ease of application: Ease of application highlights the user-friendly nature of countertop transformation kits. Most kits come with detailed instructions and can be applied without professional help. A survey by DIY Network found that over 70% of homeowners found transformation projects feasible for DIY. Such accessibility allows homeowners to improve their kitchens during a weekend, increasing project satisfaction.
-
Variety of designs: Variety of designs indicates that homeowners can choose from numerous styles and finishes. Transformation kits often include options that mimic high-end materials like granite, marble, or concrete. For example, brands like Rust-Oleum and Giani offer diverse patterns and colors, attracting various aesthetic preferences. This variety enables customization to match existing kitchen decor effectively.
-
Durability: Durability denotes the long-lasting quality of the materials used in transformation kits. Many countertops coated with these kits can resist scratches, stains, and heat. According to a study by Consumer Reports, surfaces treated with quality kits can last for several years, making them a better investment than temporary solutions. Regular maintenance can further enhance their lifespan, ensuring value over time.
-
Eco-friendliness: Eco-friendliness emphasizes the sustainability aspect of many kitchen countertop kits. Several kits are made from low-VOC (volatile organic compounds) materials, reducing harmful emissions during application. Products from eco-conscious brands align with increasing consumer demand for sustainable home renovations. A report from The National Association of Home Builders (NAHB) indicates that 70% of homebuyers are interested in sustainable features, which can enhance the property’s marketability.
How Can You Choose the Right Kitchen Countertop Transformation Kit for Your Needs?
To choose the right kitchen countertop transformation kit for your needs, consider factors such as material compatibility, project scope, available colors, ease of application, and budget.
-
Material compatibility: Check if the transformation kit is suitable for your existing countertop material. Common options include laminate, wood, and concrete. Each material may require specific kits for optimal adhesion and finish.
-
Project scope: Assess the size and complexity of your project. Some kits cover small areas, while others are designed for full countertop renovations. Choose a kit that matches your project’s scale.
-
Available colors: Look for different color options within the kit. Selecting colors that complement your kitchen’s overall design is crucial. Manufacturers often provide color charts to help you visualize the final result.
-
Ease of application: Read product instructions and reviews to evaluate how easy the kit is to apply. Some kits may require professional installation, while others can be used by DIY enthusiasts. Consider your skill level and comfort with home improvement tasks.
-
Budget: Determine your budget before selecting a kit. Prices can vary widely, so compare multiple options to find a kit that offers the features you want while staying within your budget.
Taking these factors into account can help you make an informed decision when selecting a kitchen countertop transformation kit.
What Steps Should You Follow for a Successful Application of a Kitchen Countertop Transformation Kit?
To achieve a successful application of a kitchen countertop transformation kit, follow these steps: preparation, selection of materials, thorough application, and proper curing and maintenance.
- Preparation
- Selection of materials
- Thorough application
- Proper curing and maintenance
With these steps in mind, it is important to dive deeper into each one for a complete understanding.
-
Preparation: Preparing the surface is crucial for a successful transformation. This step involves cleaning the countertop thoroughly to remove any grease, grime, and other contaminants. It may also include sanding the surface to ensure that the transformation kit bonds effectively. According to Amy Howard, a DIY expert, “Preparation sets the foundation for the entire project.”
-
Selection of materials: Choosing the right transformation kit is essential. Kits vary in quality, finish, and application method. Options include paint kits, resurfacing kits, and epoxy kits. Each type offers different textures and colors. A study by Consumer Reports in 2022 highlighted that durability and ease of application are key factors consumers should consider when selecting a kit.
-
Thorough application: Apply the transformation kit following the manufacturer’s instructions closely. This includes mixing components properly if necessary, using the right tools, and applying even coats. For instance, experts recommend using a foam roller for paint kits and a spatula for epoxy kits to achieve the best results. Misapplication can lead to uneven surfaces or peeling.
-
Proper curing and maintenance: After applying the transformation kit, allow adequate time for curing. This period varies based on the product but is critical to ensuring the finish sets properly. Maintenance is also important; using gentle, non-abrasive cleaners will help maintain the integrity of the surface over time. According to the Product Testing Institute, regular maintenance can prolong the life of countertop transformations significantly.
What Popular Brands Offer Kitchen Countertop Transformation Kits Worth Considering?
The popular brands offering kitchen countertop transformation kits worth considering include Rust-Oleum, Giani, and Daich Coatings.
- Rust-Oleum Transformations
- Giani Granite
- Daich Coatings SpreadStone
- Vardo
- Marmoleum
- Stone Coat Countertops
Rust-Oleum Transformations: Rust-Oleum provides a countertop transformation kit that includes a high-gloss epoxy coating. This product is designed to create a durable, water-resistant surface that mimics natural stone. According to user reviews, it is praised for its easy application and long-lasting finish.
Giani Granite: Giani offers a budget-friendly kit that allows users to create a granite-like finish on laminate or wood surfaces. The kit includes various colors and application tools. Many homeowners appreciate the versatility and affordability of Giani’s products, making it a popular choice for DIY projects.
Daich Coatings SpreadStone: Daich Coatings specializes in a unique stone coating system that can be applied to a variety of surfaces. The SpreadStone product is known for its durability and aesthetics, often resembling real stone. Some users commend the straightforward application but note that it requires careful preparation for best results.
Vardo: Vardo focuses on eco-friendly products, offering a non-toxic countertop coating. This option appeals to environmentally-conscious consumers. Reviews highlight its ease of use and safe formulation but mention that it may require additional coats for optimal coverage.
Marmoleum: Marmoleum offers a distinctive natural linoleum surface suitable for countertops. While not a traditional transformation kit, this product appeals to those seeking sustainable materials. Its main advantage is its softness and warm feel, but some users report challenges with maintenance.
Stone Coat Countertops: Stone Coat provides a well-regarded epoxy resin kit for creating custom countertops. This product is flexible and allows for artistic designs, including metallic finishes. Customer feedback emphasizes its versatility but warns that it requires a level of skill for application.
Each brand presents unique advantages and potential drawbacks. Homeowners should evaluate their specific needs and preferences before making a decision on a countertop transformation kit.
How Do Kitchen Countertop Transformation Kits Compare to Professional Countertop Replacements?
Kitchen countertop transformation kits and professional countertop replacements differ significantly in various aspects. Below is a comparison of their key features:
| Feature | Transformation Kits | Professional Replacements |
|---|---|---|
| Cost | Lower cost, typically $100 to $500 | Higher cost, generally $1,500 to $5,000+ |
| Installation Time | 1-2 days for DIY | 1-2 weeks, depending on the project |
| Durability | Varies; may not be as durable as stone | Highly durable, especially with materials like granite or quartz |
| Maintenance | Easy maintenance; depends on the material | May require sealing; depends on the material |
| Customization | Limited design options | Wide variety of materials and styles |
| Environmental Impact | Often less eco-friendly | Can be more sustainable with natural materials |
| Resale Value | May not significantly increase home value | Can enhance resale value of the home |
Both options have their pros and cons, and the choice depends on budget, desired durability, and aesthetic preferences.
What Tips Can Help Ensure a Smooth Finish When Using a Kitchen Countertop Transformation Kit?
The following tips can help ensure a smooth finish when using a kitchen countertop transformation kit.
- Prepare the surface thoroughly.
- Follow the manufacturer’s instructions precisely.
- Use high-quality tools and materials.
- Apply even layers of the product.
- Allow proper drying time between coats.
- Consider temperature and humidity factors.
- Seal the countertop after finishing.
Each tip addresses specific aspects that contribute to a successful transformation project. Understanding these points is crucial for achieving the desired finish and long-lasting results.
-
Preparing the Surface Thoroughly: Preparing the surface thoroughly ensures that the transformation kit adheres properly. Clean the countertop to remove grease and dust. Sand the surface to create a rough texture for better adhesion. Use a vacuum to remove dust particles after sanding, as even small residues can affect the finish.
-
Following the Manufacturer’s Instructions Precisely: Following the manufacturer’s instructions precisely is vital for a successful application. Each kit comes with specific guidelines regarding mixing ratios, application techniques, and drying times. For instance, the Rust-Oleum Countertop Transformation Kit has detailed directions that users should strictly adhere to in order to achieve optimal results.
-
Using High-Quality Tools and Materials: Using high-quality tools and materials makes a significant impact on the finish. Invest in quality brushes or rollers to ensure a smooth application. A good brush can prevent streaks and ensure that the product is applied evenly. This step enhances the overall look and durability of the finished countertop.
-
Applying Even Layers of the Product: Applying even layers of the product is crucial for an even finish. Use consistent pressure while applying the coating. This technique prevents issues like drips or pooling. Many professionals recommend using a foam applicator, which helps distribute the product evenly across the surface.
-
Allowing Proper Drying Time Between Coats: Allowing proper drying time between coats is essential for achieving the best results. Drying time can vary based on temperature, humidity, and the specific product being used. For example, some kits recommend waiting 6-8 hours between applications. Skipping this step can lead to an uneven, sticky finish.
-
Considering Temperature and Humidity Factors: Considering temperature and humidity factors impacts how the transformation kit performs. Warmer temperatures usually facilitate quicker drying, while high humidity can extend drying times. Ideally, work in a climate-controlled space to ensure consistent results.
-
Sealing the Countertop After Finishing: Sealing the countertop after finishing is a key step for longevity. A good sealant protects the surface from stains and moisture. Many manufacturers recommend a specific sealant for use with their products, enhancing overall durability and ensuring that the finish remains intact over time.