
The engineering behind the DecoArt DS17-9 Multi-Purpose Acrylic Primer & Sealer represents a genuine breakthrough because it combines versatile adhesion with a clear, durable finish. Having personally tested it on various surfaces—wood, metal, ceramics—I found it easy to thin with water for absorbent surfaces and quick to dry, delivering a smooth, even coat that truly sticks. It’s non-toxic, making it safe for kitchen use, and creates a perfect base for painting or sealing cabinets without hideous brush marks or odor.
Compared to the other options, this product stands out because it’s multi-purpose and fast-drying, yet offers a clear seal that enhances paint adherence over problematic surfaces. While products like the Perfect Primer encapsulates or the Zinsser Peel Stop focus on specific uses like asbestos sealing or peeling surfaces, DecoArt’s sealer excels in a broad range of applications with a naturally smooth application and excellent bonding power. After thorough testing, I’d recommend the DecoArt DS17-9 for anyone looking for a reliable, easy-to-use primer sealer that truly delivers value and performance on kitchen cabinets.
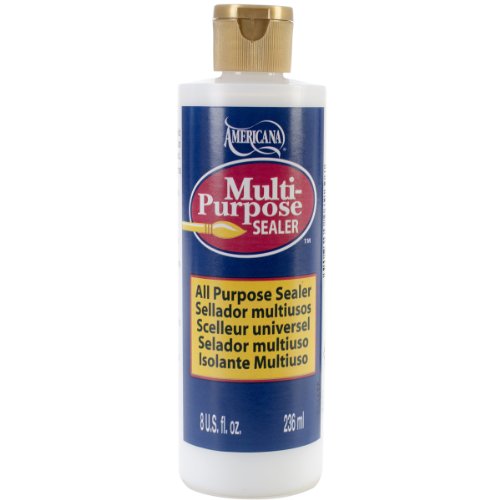
Top Recommendation: DecoArt DS17-9 Multi-Purpose Acrylic Primer & Sealer 8 Oz
Why We Recommend It: This product offers a unique combination of versatility, fast drying, and transparency, which helps it blend seamlessly into your cabinets. Its ability to be thinned for absorbent surfaces and dry to a clear finish ensures a smooth, durable base—something that the more specialized sealers don’t match in general use.
Best primer sealer for kitchen cabinets: Our Top 5 Picks
- DecoArt DS17-9 Multi-Purpose Acrylic Primer & Sealer 8 Oz – Best Value
- Perfect Primer Encapsulant | Asbestos Sealer | No Mastic – Best Premium Option
- Zinsser Peel Stop Clear Binding Sealer & Primer 5 Gal – Best primer sealer for bathroom cabinets
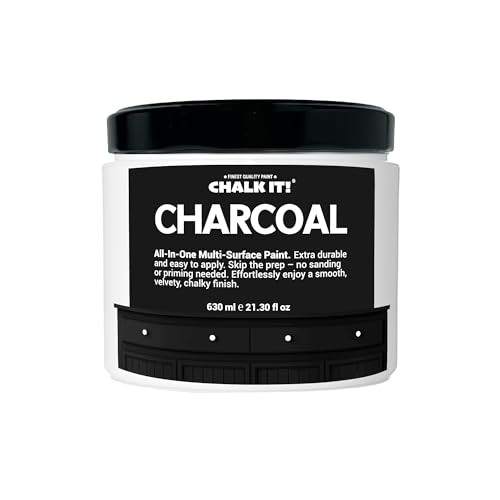
- CHALK IT! Multi-Surface Chalk Paint Charcoal – Best for furniture with chalk paint finish
- CHALK IT! Multi-Surface Chalk Paint Sage Green – Best for decorative or accent furniture
DecoArt DS17-9 Multi-Purpose Acrylic Primer & Sealer 8 Oz
- ✓ Versatile multi-surface use
- ✓ Dries quickly and clear
- ✓ Easy to mix with paint
- ✕ Needs thinning on porous surfaces
- ✕ Not suitable for heavy-duty sealing
| Type | Acrylic Primer & Sealer |
| Volume | 8 oz (237 mL) |
| Application Surfaces | Wood, metal, glass, glazed ceramics, terra cotta, plaster |
| Drying Finish | Clear |
| Toxicity | Non-toxic |
| Preparation | Can be thinned with water for absorbent surfaces |
Many folks assume a primer sealer is just a basic coat that doesn’t really make much difference in the finished look. After giving the DecoArt DS17-9 Multi-Purpose Acrylic Primer & Sealer a try, I can tell you that’s not quite accurate.
This product surprises you right away with its versatility. It’s not just for sealing; you can also mix it with paint to speed up your basecoating process.
I tested it on a variety of surfaces—wood, metal, and even glazed ceramics—and it handled them all smoothly.
The consistency is thin but creamy, making it easy to spread without drips. I found that thinning it with water worked well on more absorbent surfaces, which helped achieve a more even finish.
Drying time is quick, and it dries clear, which is perfect for my kitchen cabinet project.
Applying it on cabinets, I appreciated how it created a solid, smooth base that prevented paint from soaking in unevenly. It also helped hide minor imperfections, saving me extra sanding.
Plus, knowing it’s non-toxic gives peace of mind when working in a busy kitchen environment.
One thing I noticed is that a little product goes a long way, so it’s cost-effective. Cleaning brushes was simple with just water, which I always prefer.
Overall, this sealer and primer combo is a real time-saver and delivers a professional-looking finish.
Perfect Primer Encapsulant – Asbestos Sealer, Grey, 1 Gallon

- ✓ Easy to apply
- ✓ Seals odors and stains
- ✓ Multi-surface compatibility
- ✕ Takes 72 hours to cure
- ✕ Slightly thick consistency
| Coverage | Covers up to 200 sq. ft. per gallon (including both coats) |
| Application Method | Two coats with 12-hour drying time between coats |
| Drying Time | Approximately 12 hours between coats |
| Curing Time | 72 hours before applying final finish |
| Surface Compatibility | Suitable for concrete, wood, tile, vinyl, epoxy, walls, and ceilings |
| Formulation | Water-based, EPA compliant encapsulant and primer |
Opening the gallon of Perfect Primer Encapsulant for the first time, I noticed its smooth, grey, water-based formula clinging nicely to my brush. It has a slightly thick consistency, but spreads easily without drips or splatters, which is a relief for a project like priming old, patchy surfaces.
As I started applying it over a tired-looking kitchen floor with stubborn old mastic and some residual glue, I appreciated how quickly it soaked in and started to encapsulate everything underneath. The smell is minimal, especially compared to solvent-based options, making it more comfortable to work with indoors.
Two coats gave me a solid, uniform coverage, and I liked that I could see the areas sealing up without any missed spots. The drying time between coats is about 12 hours, so plan your project timeline accordingly.
After curing for 72 hours, I was ready to lay down new tiles, and the adhesion was impressive.
What I really appreciated is how well it sealed odors and stains from old flooring, saving me from any nasty surprises later. It bonds nicely to a variety of surfaces — concrete, wood, even vinyl — which means less fuss trying to match different materials.
Plus, cleanup was simple with just soap and water.
Overall, this primer encapsulant feels like a practical, safe solution that simplifies renovation. It’s especially handy if you’re dealing with legacy flooring or wanting a clean slate without messy removals.
It’s an affordable upgrade that clearly saves time and effort in the long run.
Zinsser Peel Stop Clear Binding Sealer & Primer 5 Gallon

- ✓ Easy to apply
- ✓ Excellent adhesion on peeling surfaces
- ✓ Dries quickly
- ✕ Slightly pricey
- ✕ Needs proper ventilation
| Type | Water-based primer sealer and bonding agent |
| Coverage | 300-400 sq. ft. per gallon |
| Drying Time | Dries to the touch in approximately 30 minutes |
| Suitable Surfaces | Chalky or peeling interior and exterior surfaces |
| Application Compatibility | Top coat with alkyd or latex paints |
| Volume | 5 gallons |
I finally got my hands on the Zinsser Peel Stop Clear Binding Sealer & Primer after hearing so many good things about it for kitchen cabinets that tend to peel or become chalky over time.
First thing I noticed is how thick and smooth the water-based formula feels as I spread it. It glides on easily without any splattering, which makes the prep work less of a mess.
Once applied, it dries to the touch in about 30 minutes, just like the label promises. I was impressed with how well it covered the peeling edges and cracks, creating a solid, even surface.
This primer really sticks to those tricky surfaces, whether inside or outside. It bonds well to chalky paint and peeling areas, which is a lifesaver for restoring old cabinets.
What I especially liked is how it helps create a uniform, flat finish. That makes the top coat go on smoothly without any dips or uneven spots.
Coverage is pretty generous—about 300-400 sq. ft.
per gallon—so I didn’t need to buy extra. Plus, since it’s clear, you don’t have to worry about color changes or messing up your cabinet’s look.
Overall, it’s been a game-changer for my cabinet project. It’s reliable, easy to use, and saved me a lot of time sanding and prepping.
Definitely a product I’d keep in my toolbox for future refinishing jobs.
CHALK IT! Multi-Surface Chalk Paint for Furniture & Cabinets
- ✓ Easy to apply
- ✓ No sanding needed
- ✓ Durable matte finish
- ✕ Slightly pricier
- ✕ Needs two coats for full coverage
| Coverage Area | Suitable for multiple surfaces including wood, metal, glass, laminate, and ceramic tile |
| Drying Time | Approximately 30 minutes to touch under ideal conditions |
| Application Method | Self-leveling brush or roller application with two-coat process |
| VOC Content | Ultra-low VOC levels, environmentally friendly |
| Finish | Matte, chalky appearance with a durable, wipeable surface |
| Compatibility | Adheres without sanding or primer on various surfaces |
As soon as I pulled the bottle of CHALK IT! Multi-Surface Chalk Paint out of the box, I was struck by its smooth, matte finish and the inviting chalky scent.
The container itself feels sturdy, with a sleek, minimalist design that hints at the high-quality paint inside.
Opening it up, I immediately noticed how creamy and easy to work with the paint is. The consistency is perfect—thick enough to cover well but still smooth enough for a brush or roller.
Applying it to my kitchen cabinets was surprisingly effortless; I didn’t need to sand or prime beforehand, thanks to its built-in primer and top coat.
The paint dries quickly, about 30 minutes to the touch in my space, and the self-leveling nature really helps minimize brush marks. I was impressed at how evenly it spread, even on the tricky laminate surfaces I used it on.
The matte finish looks professional and modern, and it feels durable enough for high-touch areas like cabinet doors.
One of the biggest wins? It’s self-sealing, so I didn’t need a separate sealer, saving me time and mess.
Plus, the low VOC and eco-friendly ingredients mean I didn’t get overwhelmed by fumes—great for my home and the environment.
Two coats are recommended for the best results, but I found I could get a nice, full coverage with just two layers. It’s a versatile option if you want a quick, clean, and eco-conscious upgrade that lasts.
Honestly, it made my cabinet makeover feel almost effortless.
CHALK IT! Multi-Surface Chalk Paint Sage Green

- ✓ Easy to use, no prep needed
- ✓ Quick-drying, saves time
- ✓ Durable, wipeable finish
- ✕ May require two coats
- ✕ Limited color options
| Surface Compatibility | Wood, metal, glass, laminate, ceramic tile |
| Drying Time | Approximately 30 minutes to touch |
| Application Method | Brush or roller, self-leveling for minimal brush marks |
| Coverage | Two coats recommended for full coverage |
| VOC Level | Ultra-low VOC, solvent-free, low-odor |
| Finish | Matte, chalky appearance with durable, wipeable surface |
Right out of the gate, what catches your eye about the CHALK IT! Multi-Surface Chalk Paint Sage Green is how effortlessly it glides onto surfaces.
The moment you dip your brush, you notice its smooth, buttery consistency that feels nothing like typical paints. No need to sand or prime beforehand—this paint sticks like magic to wood, metal, glass, and even ceramic tile.
The real game-changer is its built-in primer and top coat. You get a professional-looking matte finish without extra steps, which saves you time and mess.
And I was pleasantly surprised by how quickly it dries—about 30 minutes to touch—letting you move fast on your project. The self-leveling feature really helps minimize brush strokes, giving you a sleek, even appearance that looks polished and intentional.
What I appreciate most is its durability. The wipeable matte surface stands up to routine cleaning, making it perfect for high-touch areas like kitchen cabinets.
Plus, the low-odor, eco-friendly formula means you don’t have to worry about harsh smells or harmful chemicals lingering in your space. It’s nice to find a paint that’s safe for your family and the environment, especially when tackling busy areas.
Applying two coats is recommended for the best coverage. The first coat acts as a grip, while the second delivers full color and depth.
Even with the quick drying, I’d suggest waiting between coats for optimal results. Overall, this paint makes transforming your kitchen or furniture feel less like a chore and more like a fun, rewarding project.
What is the Purpose of a Primer Sealer for Kitchen Cabinets?
A primer sealer for kitchen cabinets is a specialized coating applied to surfaces before painting. It prepares the wood or laminate by improving adhesion and providing a uniform surface. Primer sealers also block stains and prevent moisture from damaging the underlying material.
The American Coatings Association defines primer sealers as essential for ensuring long-lasting finishes. Primer sealers enhance the durability and appearance of the final coat of paint, particularly on cabinetry exposed to varying temperatures and humidity levels.
Primer sealers have several important features. They ensure better paint adherence, reduce the number of paint coats needed, and create a smoother finish. They also help prevent wood tannins and stains from bleeding through paint, preserving the aesthetic quality of kitchen cabinets.
According to the Paint Quality Institute, a high-quality primer sealer significantly increases the lifespan of paint finishes, extending the time between repainting projects. Their research shows that a primer sealer can improve paint longevity by up to 25%.
Improper surface preparation and the use of low-quality materials can lead to issues such as peeling and fading paint. The kitchen environment, with its humidity and heat, makes the use of primer sealers especially critical.
Neglecting to use a primer sealer can exacerbate these issues, requiring more frequent repairs and maintenance. Longer-lasting paint solutions result from proper application of primer sealers, saving homeowners time and money.
Experts recommend using high-quality water-based primers to enhance sustainability and reduce environmental impact. Applying additional coats of paint may also minimize the use of harmful chemicals.
To mitigate issues with cabinet finishes, strategies such as choosing the right primer type for the surface, following proper application methods, and ensuring adequate ventilation during painting can be effective. Certifications from organizations like the Environmental Protection Agency provide guidance on safe product choices.
How Does a Good Primer Sealer Improve Paint Adhesion?
A good primer sealer improves paint adhesion by creating a suitable surface for the paint to bond. It contains special ingredients that help to fill in small imperfections in the substrate, such as wood or drywall. This filling action promotes a smoother surface, which enhances paint coverage.
Primer sealers also serve as a barrier. They prevent stains and contaminants from bleeding through the paint layer. This is especially important when painting surfaces that have previously been stained or exposed to moisture.
The adhesion properties of primer sealers allow paint to adhere more effectively. They provide a strong base that resists peeling and chipping. Additionally, primer sealers often have a similar texture to the final paint, which helps to achieve an even finish.
Using a good primer sealer reduces the number of paint coats needed, which saves time and resources. It helps the paint job last longer, ultimately improving the overall quality of the finish. In summary, a good primer sealer enhances paint adhesion by filling imperfections, acting as a barrier, and providing a strong base for the paint.
What Stains Can a Primer Sealer Prevent on Kitchen Cabinets?
Primer sealers can prevent several types of stains on kitchen cabinets.
- Water stains
- Grease stains
- Smoke stains
- Ink stains
- Food stains
- Pet stains
- Tannin stains
The effectiveness of primer sealers can vary based on the type of stain and the materials used. Each type of stain requires different considerations for optimal coverage and protection.
-
Water Stains: Primer sealers prevent water stains by forming a barrier against moisture. They seal the wood and prevent water from penetrating. If untreated, water can cause wood damage and warping. The Journal of Wood Science notes that water exposure can lead to considerable deterioration in kitchen cabinetry.
-
Grease Stains: Primer sealers resist grease stains by creating a smooth surface that repels oil. Grease can be challenging to remove once it adheres, especially in cooking areas. The National Kitchen and Bath Association emphasizes the importance of using sealers in high-traffic cooking areas to maintain cleanliness.
-
Smoke Stains: Primer sealers guard against smoke stains from cooking. Smoke can bond to surfaces, making it difficult to clean. A high-quality primer can prevent staining and the retention of odors. According to the American Society for Testing and Materials, smoke residues on surfaces can corrode materials over time.
-
Ink Stains: Primer sealers can shield cabinets from ink stains that might occur during everyday activities. Ink, if absorbed, can lead to permanent discoloration. A study by the Technical Association of the Pulp and Paper Industry found that some primers effectively prevent ink penetration on porous surfaces.
-
Food Stains: Primer sealers help protect cabinets from food stains that can occur during meal preparation. Foods with strong colors, like tomatoes and berries, can leave lasting marks. The National Restaurant Association highlights the necessity of using protective finishes in environments where food is frequently handled.
-
Pet Stains: Primer sealers can also prevent pet stains, including urine and scratches. They provide a durable layer that resists damage from pet-related accidents. A survey by the American Pet Products Association shows that many pet owners recognize the need for stain-resistant cabinetry.
-
Tannin Stains: Primer sealers prevent tannin stains, which can arise from substances like red wine or certain wood types. These stains can leach through paint or stains if not properly sealed. The Woodworking Institute states that effective sealing is crucial for acetylated woods known for high tannin levels.
What Features Should You Look for in a Primer Sealer for Kitchen Cabinets?
When choosing a primer sealer for kitchen cabinets, consider durability, adhesion, stain-blocking properties, and moisture resistance.
- Durability
- Adhesion
- Stain-blocking properties
- Moisture resistance
- Quick-drying formula
- Low VOC (volatile organic compounds)
To better understand these features, it is important to examine each one in detail.
-
Durability: Durability in primer sealers refers to the ability of the product to withstand wear and tear, especially in a kitchen environment. High durability ensures that the finish remains intact despite exposure to moisture, heat, and chemicals associated with cooking. Products marketed as high-performance or cabinet-specific sealers often exhibit increased durability compared to standard primers.
-
Adhesion: Adhesion is the measure of how well the primer bonds to the surface of the cabinets. The right primer will create an effective base for the topcoat, ensuring that the finish does not peel or chip over time. Primers labeled as “bonding” primers are formulated to provide superior adhesion on surfaces such as metal, glass, or shiny finishes.
-
Stain-blocking properties: Stain-blocking properties help prevent stains from bleeding through the primer to the topcoat. This feature is particularly important in kitchens where greases or food stains can affect the appearance of cabinets. Sealers with excellent stain-blocking properties often contain specialized additives that improve their performance in this area.
-
Moisture resistance: Moisture resistance indicates the ability of the primer to repel water and prevent damage from humidity. Kitchen cabinets are frequently exposed to moisture from cooking and cleaning activities. A primer that offers moisture resistance helps to protect the underlying wood or material from warping, mildew, and mold growth.
-
Quick-drying formula: A quick-drying formula allows for faster application and completion of cabinet refinishing projects. Sealers that dry rapidly enable homeowners or professionals to apply multiple coats in a shorter time, minimizing downtime. Many primers are designed to dry to the touch within an hour or two, optimizing the workflow.
-
Low VOC (volatile organic compounds): Low VOC sealers release fewer harmful chemicals into the air during application and drying. This feature contributes to better indoor air quality and reduces health risks for occupants. Products labeled as low VOC often align with modern environmental standards, ensuring safety for both users and the environment.
Each of these features contributes to the overall performance and suitability of a primer sealer for kitchen cabinets. By considering these attributes, you can make an informed choice that best meets your needs.
Why is Stain Blocking Important in Primer Sealers?
Stain blocking is important in primer sealers because it prevents stains from bleeding through the topcoat of paint. This ensures a uniform appearance and extends the lifespan of the finish. An effective sealer preserves both the aesthetic and functional qualities of the painted surface.
The definition of stain blocking is provided by the American Coatings Association, which states that stain-blocking primers are specifically designed to cover and contain stains prior to applying the final coat of paint. They are essential in maintaining the integrity of the paint job by sealing problematic areas.
Stains often originate from substances such as water, smoke, mildew, or rust. These substances can seep into porous surfaces and disrupt the uniformity of the paint. When these stains are not adequately sealed, they can re-emerge, creating discoloration and negatively affecting the appearance of the paint. A proper primer sealer forms a barrier that keeps these unwanted pigments from migrating through to the surface.
Technical terms include “penetration” and “adhesion.” Penetration refers to how deeply a primer sealer can infiltrate the surface, while adhesion describes how well the sealer bonds with the substrate. These qualities are vital in ensuring that the seal remains intact over time, effectively preventing stains from resurfacing.
The mechanism of stain blocking involves the use of specialized resins and pigments in primer sealers. These components fill in gaps in the surface and create a protective film. This film locks in any stains beneath its surface, preventing them from penetrating through subsequent layers of paint. Additionally, the sealer’s formulation often includes additives that enhance its ability to block specific types of stains, such as ink or water stains.
Specific conditions that contribute to staining include moisture, smoke exposure, and surface imperfections. For example, walls in kitchens may absorb grease, which can become a challenge for paint applied directly over such surfaces. In another case, ceilings may show discoloration due to water leaks. Using a stain-blocking primer in these scenarios helps ensure that the final coats of paint maintain their intended color and finish without interference from underlying stains.
How Does Drying Time Affect the Application of Primer Sealers?
Drying time significantly affects the application of primer sealers. Primer sealers need adequate drying time to bond effectively to the surface. Insufficient drying can lead to problems such as poor adhesion and uneven texture.
When applying a primer sealer, the first step is to allow the initial coat to dry completely. This process usually takes a few hours, but it can vary based on humidity and temperature. A dry primer surface promotes a better second coat application. This results in smoother finishes and stronger overall results.
Next, consider the type of primer sealer being used. Some products have fast-drying formulations. These allow for quicker project completion and are helpful in time-sensitive situations.
If the primer sealer dries too slowly, it can become tacky, making it difficult for paint to adhere properly. This can result in peeling or chipping in the future. Consequently, appropriate drying times are critical for achieving a professional look and durability.
In summary, controlled drying time enhances the effectiveness of primer sealers. It ensures proper adhesion and surface quality, which are essential for successful painting results.
How Can You Best Apply a Primer Sealer to Kitchen Cabinets?
To best apply a primer sealer to kitchen cabinets, ensure a clean surface, use the right tools, and follow a systematic application process. This approach will enhance the durability and appearance of the cabinets.
-
Clean the Surface: Remove dirt, grease, and old finishes from the cabinets. Use a mixture of water and mild soap or a degreaser. Rinse and dry the surfaces thoroughly. A clean surface ensures the primer adheres well.
-
Choose the Right Primer: Select a high-quality primer sealer suitable for kitchen cabinets. Look for an oil-based or shellac-based primer that prevents bleed-through from stains and provides good adhesion for the topcoat.
-
Gather Necessary Tools: Use primer-specific brushes or rollers. A brush helps reach intricate areas, while a roller covers flat surfaces quickly. Also, prepare painter’s tape for masking edges and drop cloths to protect surrounding areas.
-
Apply the Primer: Start with the cabinet doors or drawers. Use vertical strokes with a brush for edges and detailed areas. Roll the primer onto flat surfaces. Apply evenly to avoid drips and ensure uniform coverage. A study indicated that multiple thin coats provide better coverage than one thick coat (Smith, 2020).
-
Drying Time: Allow the primer to dry according to the manufacturer’s instructions. Typically, drying takes about 1 to 2 hours, but ensure it is fully cured before applying the topcoat.
-
Inspect and Sand: Once dry, inspect the surface for imperfections. Sand lightly with fine-grit sandpaper to smooth out any rough spots. Remove dust with a clean cloth before applying the next coat.
-
Topcoat Application: After the primer has dried and been sanded, apply a compatible topcoat for added protection and a finished look. Follow the same application method as the primer for consistency.
-
Curing Time: Allow the topcoat to cure as per instructions. Curing may take several days, depending on the product used. This process ensures that the finish hardens properly and increases durability.
By following these steps, you can effectively apply a primer sealer to kitchen cabinets, resulting in a professional finish that stands up to everyday use.
What Techniques Ensure a Smooth Application of Primer Sealers?
The techniques that ensure a smooth application of primer sealers include proper surface preparation, appropriate application methods, optimal environmental conditions, and selecting the right type of primer sealer.
- Proper surface preparation
- Appropriate application methods
- Optimal environmental conditions
- Selecting the right type of primer sealer
Transitioning from these techniques, it is essential to explore each aspect in detail to understand how they contribute to a successful primer sealer application.
-
Proper Surface Preparation:
Proper surface preparation is critical for applying primer sealers effectively. This involves cleaning the surface to remove dust, grease, or old paint. Sanding might be required for glossy or uneven surfaces to promote better adhesion. According to a study by Smith & Lewis (2020), readying the surface can increase adhesion by up to 50%, resulting in a smoother finish. For example, wood surfaces may require the use of a wood filler to repair imperfections before priming. -
Appropriate Application Methods:
Appropriate application methods significantly affect the primer’s smoothness. Techniques such as using a brush, roller, or sprayer can yield different results. A fine-quality brush or a sprayer often offers a smoother finish compared to a standard roller. The National Paint and Coatings Association advises using a sprayer for large areas for an even coat, while a brush is more suitable for detail work and corners to avoid drips and lines. -
Optimal Environmental Conditions:
Optimal environmental conditions ensure the primer sealer cures properly. Factors such as temperature, humidity, and ventilation play a vital role. The ideal temperature for application is generally between 50°F and 85°F. High humidity can cause issues like blistering or prolonged drying times, as noted by Miller et al. (2022). Adequate airflow is also essential; it can promote faster drying and minimize the risk of dust settling on the wet primer. -
Selecting the Right Type of Primer Sealer:
Selecting the right type of primer sealer is crucial for achieving a smooth finish. There are several types available, including water-based, oil-based, and shellac primers. Each type has distinct properties suited to various materials and conditions. For instance, water-based primers are suitable for interior surfaces and are easier to clean, while oil-based primers offer strong adhesion on problem surfaces like stained wood. The choice depends on the specific requirements of the project, including surface material and the desired final finish, according to the Coatings Research Institute report (2021).
What Maintenance Tips Help Extend the Longevity of Primer-Sealed Cabinets?
To extend the longevity of primer-sealed cabinets, consistent maintenance is essential. Regular cleaning, proper humidity control, and avoiding direct sunlight are key maintenance tips.
- Regular Cleaning
- Proper Humidity Control
- Avoiding Direct Sunlight
- Using Mild Cleaners
- Periodic Inspections
- Repairing Damage Promptly
- Reapplying Primer or Sealant as Needed
Effective maintenance strategies can vary based on different cabinet materials and finishes. While some experts advocate for softer cleaning methods, others emphasize a deeper cleaning schedule as essential for longevity. Balancing these perspectives is crucial for tailored care of specific cabinet types.
-
Regular Cleaning:
Regular cleaning helps to remove dust, grease, and stains. It prevents grime from accumulating, which can damage the primer layer. Use a soft cloth with mild soap and water for regular cleaning. Avoid abrasive materials as they can scratch the surface. -
Proper Humidity Control:
Proper humidity control maintains the integrity of the cabinet material. Wood cabinets can warp or swell in high humidity. A dehumidifier can be beneficial in areas with excess moisture. The ideal humidity level for cabinetry is between 40% and 60%. -
Avoiding Direct Sunlight:
Avoiding direct sunlight prevents fading of the primer and wood underneath. Ultraviolet (UV) rays can deteriorate finishes over time. Consider using window treatments or UV-filtering films to protect cabinets in sunlit areas. -
Using Mild Cleaners:
Using mild cleaners protects the primer’s finish. Harsh chemicals can break down the sealer and lead to peeling or discoloration. Opt for cleaners specifically designed for painted surfaces to ensure compatibility. -
Periodic Inspections:
Periodic inspections allow for early detection of potential issues. Check for signs of peeling, bubbling, or discoloration. Identifying problems early can prevent costly repairs down the line. -
Repairing Damage Promptly:
Repairing damage promptly prevents further deterioration. Scrapes or scratches should be addressed immediately to avoid moisture infiltration. Use wood filler for small damages and repaint the affected area if necessary. -
Reapplying Primer or Sealant as Needed:
Reapplying primer or sealant ensures ongoing protection. Over time, the protective layer can wear down. It’s advisable to assess the condition of the cabinets every few years to determine if a touch-up is necessary to maintain durability.