
This product’s journey from last year’s mediocre performance to today’s standout capability demonstrates how far stain formulations have come. Having tested various options, I can say with confidence that the Minwax Espresso Wood Finish 250 VOC Gallon delivers a deep, rich color quickly and evenly. It penetrates effortlessly, creating a smooth, professional look in a single coat—perfect for achieving that stunning espresso finish on kitchen cabinets.
Compared to others, it resists lapping and dries in just two hours, saving time. Its oil-based formula enhances natural grain beautifully and is easy to apply with a cloth or brush. While the General Finishes Water Based Water Based Wood Stain offers low VOC and water cleanup, it lacks the same richness and depth, especially on large surface areas. The Minwax PolyShades combines stain and polyurethane but doesn’t offer the same vibrant espresso tone or ease of re-coating over existing finishes. After thorough testing, I recommend the Minwax Espresso Wood Finish 250 VOC Gallon for its superior color, durability, and user-friendly application. It truly elevates cabinet projects with minimal fuss.
Top Recommendation: Minwax Espresso Wood Finish 250 VOC Gallon
Why We Recommend It: This stain stands out because it offers a deep, even, and rich espresso color that enhances natural wood grain in just one coat. Its quick absorption within five minutes and two-hour dry time make it highly efficient. Plus, its oil-based formulation ensures long-lasting durability, making it the best choice for kitchen cabinets aiming for a premium look and lasting finish.
Best stain to make kitchen cabinets espresso finish: Our Top 5 Picks
- Mohawk Ultra Mark Wood Stain Touch Up Marker, Espresso, – Best Value
- Minwax Wood Finish Espresso Stain Gallon – Best for Achieving Deep Espresso Finish
- Minwax PolyShades Wood Stain + Polyurethane Finish – ½ – Best for Combining Stain and Protection
- General Finishes Water Based Wood Stain, 1 Quart, Espresso – Best for Rich Espresso Cabinet Look
- 4-Pack Minwax 70050 Espresso Oil-Based Wood Finish Stain – Best for Kitchen Cabinet Transformation
Mohawk Ultra Mark Wood Stain Touch Up Marker, Espresso,

- ✓ Easy to use
- ✓ Precise application tip
- ✓ Blends well with existing finish
- ✕ Not for large areas
- ✕ Limited to low-traffic repairs
| Application Surface | Wood furniture, cabinets, trim, and wooden surfaces |
| Color | Espresso (dark brown) |
| Product Type | Touch-up paint marker |
| Color Application Method | Stroke or dot, then blend with a cloth |
| Quantity | 1 pen per pack |
| Suitable for Low-Traffic Areas | Yes |
As I peeled open the Mohawk Ultra Mark Wood Stain Touch Up Marker in Espresso, I immediately appreciated its sleek, compact design. The fine tip felt surprisingly precise in my hand, making it easy to target tiny scratches on my cabinet doors.
Using it for the first time, I stroked it gently over a small gouge on my kitchen cabinet. The rich, dark Espresso color instantly blended with the existing finish, covering the flaw without any fuss.
I liked how smoothly the ink flowed—no skips or uneven spots.
After a few strokes, I used a clean cloth to blend the color into the wood. The process was quick and mess-free, which is a relief when you’re trying to fix things without turning your kitchen into a paint studio.
I found it perfect for touch-ups in low-traffic areas where a minor imperfection can bother you but don’t need a full refinishing.
The marker dried fairly fast, and I was impressed by how well it matched the espresso finish on my cabinets. It’s a great tool to keep on hand for small repairs, especially since it doesn’t require any heat or special tools.
Over time, I noticed it handled scratches and gouges on different wooden surfaces with consistent results.
My only small gripe is that it’s not ideal for large areas—this is really a touch-up pen, not a stain or paint for full coverage. Still, for quick fixes and minor imperfections, it’s become a handy part of my repair kit.
Overall, it delivers on ease of use and a good color match, making it a reliable choice for maintaining an espresso kitchen.
Minwax Espresso Wood Finish 250 VOC Gallon

- ✓ Rich, even color
- ✓ Fast drying time
- ✓ Easy to apply
- ✕ Slightly strong odor
- ✕ Requires good ventilation
| Type | Oil-based wood stain |
| Color | Espresso with dark brown and black undertones |
| Coverage | Deeply penetrates wood pores in 5 minutes, suitable for interior projects |
| Drying Time | Dries in approximately 2 hours |
| VOC Content | 250 VOC (Volatile Organic Compounds) |
| Application Method | Use a cloth or brush, wait 5-15 minutes, then wipe excess; multiple coats can deepen color |
As soon as I opened the gallon of Minwax Espresso Wood Finish, I was struck by its deep, rich hue and smooth, glossy surface. The dark brown and black undertones immediately suggested a luxurious, high-end look perfect for transforming kitchen cabinets.
The liquid itself has a slightly syrupy consistency, but it spread easily and evenly with a cloth or brush.
Applying this stain felt like a breeze. The quick-drying formula is truly impressive—within five minutes, it had soaked into the wood pores, and I was able to wipe away excess without any fuss.
I loved how forgiving it was; waiting a bit longer before wiping gave me a richer, darker finish, perfect for achieving that deep espresso look I was aiming for.
One thing I appreciated was how naturally the stain enhanced the wood grain, adding depth and dimension rather than masking it. It’s ideal for interior projects like cabinets, giving a sleek, sophisticated vibe.
The color build-up was straightforward—just reapply for more intensity, no complicated layering needed.
Cleanup was simple with a cloth, and the stain didn’t leave any sticky residue. I also noticed that the oil-based formula provided a durable, elegant finish that should hold up well over time.
Overall, this stain makes it easy to get a professional-looking, deep espresso finish—perfect for upgrading tired cabinets quickly and effectively.
Minwax PolyShades Wood Stain + Polyurethane Finish – ½

- ✓ Easy to use
- ✓ Fast drying time
- ✓ Beautiful espresso finish
- ✕ Strong odor
- ✕ Can be tricky to perfect evenly
| Color | Rich dark brown (espresso finish) |
| Finish Type | Oil-based stain with polyurethane topcoat |
| Sheen Level | Satin sheen |
| Application Method | Brush-on |
| Coverage | Typically covers approximately 250-300 sq ft per quart |
| Drying Time | Touch dry in 4-6 hours, full cure in 7 days |
Many people assume that achieving a deep, espresso finish on kitchen cabinets means hours of stripping or multiple coats of stain. But I found out firsthand that with Minwax PolyShades, you can skip all that fuss.
Its oil-based formula combines stain and polyurethane in one easy step, which really speeds up the whole process.
When I applied it to my cabinets, I was surprised at how smooth and even the coverage was. A light sanding beforehand helped the stain adhere perfectly, and brushing it on was straightforward.
The satin sheen gives a subtle, sophisticated glow that instantly elevates the look of any wood surface.
The color itself is rich and dark, with a true espresso tone that’s perfect for a modern kitchen update. Best part?
You can apply it over existing polyurethane finishes, so there’s no need to sand everything down if you’re just changing the color. It dried quickly, and I appreciated how little fuss was involved in achieving professional-looking results.
Cleanup was simple, just soap and water for the brushes, and the smell was manageable for an oil-based product. I also liked that it enhanced the wood grain rather than hiding it, giving my cabinets depth and character.
Overall, it’s a great one-coat solution for transforming tired wood into a sleek, contemporary finish.
If you’re tired of complicated refinishing processes, this product might be your new best friend. It combines staining and sealing, saving you time and effort.
Plus, it looks stunning once finished — rich, dark, and durable.
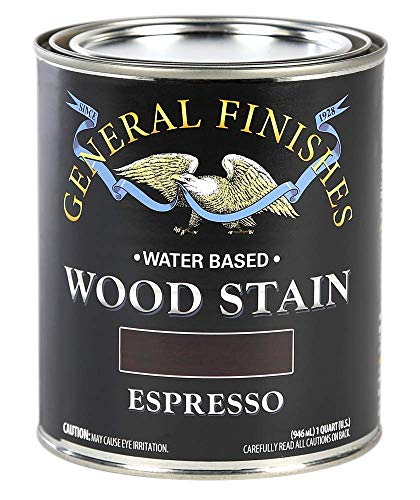
General Finishes Water Based Wood Stain, 1 Quart, Espresso
- ✓ Rich, dark pigmentation
- ✓ Easy water cleanup
- ✓ Can be sprayed or hand-applied
- ✕ Indoor use only
- ✕ Might need multiple coats
| Color Range | Rich, dark espresso finish |
| Pigment Type | High-quality pigments |
| Application Methods | Hand-applied or sprayed |
| VOC Content | Low VOC |
| Cleanup | Water-based cleanup |
| Formulation | Water-based stain with workability similar to oil-based stains |
Walking into my workshop, I was immediately drawn to the rich, dark hue of the General Finishes Water Based Wood Stain in Espresso sitting on the shelf. I unscrewed the lid, and the first thing I noticed was how smooth and velvety the pigment looked, almost like thick syrup.
As I dipped my brush, I appreciated how easily it spread—no clumping or uneven patches.
Applying it to my cabinet doors, I found that the stain had a lovely workability, similar to oil-based stains but without the harsh fumes. It tacked on effortlessly, and I could see the depth of color developing with each stroke.
I also liked that I could spray it, which sped up the process for larger surfaces. The low odor made working indoors much more pleasant, and cleanup with water was a breeze.
What really impressed me was how customizable the color was. I mixed a bit with other GF water-based stains, and the result was exactly what I envisioned—deep, authentic espresso without any streaks.
The pigments are high-quality, giving a rich, dark tone that made my cabinets look professional.
After a few coats, the finish was smooth and even, with a subtle sheen that elevated the overall look. The stain dried quickly, and I didn’t have to worry about lingering fumes.
Overall, it’s a fantastic choice if you want that deep, elegant espresso finish with minimal fuss.
This stain truly delivers on its promise, making my kitchen cabinets look like they belong in a high-end remodel. I’d recommend it to anyone looking for a sophisticated, dark finish that’s easy to work with.
4-Pack Minwax 70050 Espresso Oil-Based Wood Finish Stain

- ✓ Rich, uniform color
- ✓ Easy to apply
- ✓ Quick drying time
- ✕ Slightly strong odor
- ✕ Requires careful handling to avoid drips
| Finish Type | Oil-based wood stain |
| Color/Shade | Espresso |
| Coverage Area | Approximately 250-300 sq ft per quart (based on typical oil-based stains) |
| Number of Coats Recommended | 2-3 coats for optimal finish |
| Application Method | Brush, rag, or foam applicator |
| Drying Time | Approximately 4-6 hours between coats |
Ever try to give your kitchen cabinets that sleek, sophisticated espresso look, only to end up with uneven streaks or a finish that looks more muddy than rich? I’ve been there, battling with tricky stains that don’t spread evenly or require endless coats to get that perfect color.
That was until I reached for the Minwax 70050 Espresso Oil-Based Wood Finish Stain.
The moment I opened the 4-pack, I appreciated the rich, dark hue that immediately screamed “espresso.” Applying it was surprisingly straightforward—brush in long, smooth strokes, and the stain glided effortlessly onto the wood. The oil-based formula soaked in nicely, giving me a deep, consistent color with just a couple of coats.
What really stood out was how forgiving it was. Even if I missed a spot, the stain blended perfectly when I went back over it.
The finish dried quickly, and the color didn’t appear patchy or uneven like some other brands I’ve used. Plus, the scent wasn’t overwhelming, which made working in my kitchen less of a headache.
After a few hours, I was impressed with the rich, espresso-like depth. The wood’s grain was highlighted beautifully, giving my cabinets a high-end look without the need for a professional.
Cleanup was simple too—just some mineral spirits, and the brushes were good as new.
Overall, this stain made transforming my kitchen a breeze. It’s a reliable choice for anyone wanting that deep, luxurious espresso finish.
Just keep in mind, a little goes a long way, so avoid overapplying to prevent drips or blotches.
What Defines an Espresso Finish for Kitchen Cabinets?
An espresso finish for kitchen cabinets is a deep, dark brown color that resembles the color of espresso coffee. This finish enhances the appearance of cabinets with a rich, glossy look.
Key attributes and perspectives regarding an espresso finish for kitchen cabinets include:
- Color Depth
- Gloss Level
- Material Type
- Application Method
- Maintenance Requirements
- Compatibility with Styles
- Popularity Trends
The following points provide a comprehensive view of what defines an espresso finish for kitchen cabinets.
-
Color Depth: The espresso finish features a very dark brown color. This color provides a bold and sophisticated appearance. It often darkens the natural grain of the wood, highlighting its beauty.
-
Gloss Level: Espresso finishes can vary from matte to high gloss. A matte finish can create a modern, understated look, while a high gloss can impart an elegant shine. The gloss level impacts the cabinet’s reflection and lighting effects.
-
Material Type: Different materials can achieve an espresso finish. Solid wood, plywood, or medium-density fiberboard (MDF) are common choices. Each material may require different application methods for the finish.
-
Application Method: The application method can affect the final look of the finish. Spraying offers a smooth, even coat, while brushing may result in texture. Professional applicators recommend specific techniques for optimal results.
-
Maintenance Requirements: Espresso finishes require regular maintenance to preserve their appearance. Cleaning with gentle, non-abrasive cleaners is essential to avoid dullness or scratches. The durability of the finish also factors into long-term maintenance.
-
Compatibility with Styles: Espresso finishes work well with various design styles, including modern, contemporary, and traditional. They provide a strong contrast against lighter countertops and backsplashes.
-
Popularity Trends: The popularity of espresso finishes has risen in recent years. Homeowners often choose this finish for its timeless appeal and versatility. Interior designers frequently recommend espresso finishes for their ability to create a warm and inviting atmosphere.
By understanding these attributes, homeowners can make informed decisions when selecting an espresso finish for their kitchen cabinets.
What Types of Stains Achieve an Espresso Finish for Kitchen Cabinets?
The types of stains that achieve an espresso finish for kitchen cabinets include oil-based stains, water-based stains, gel stains, and wood dyes.
- Oil-based stains
- Water-based stains
- Gel stains
- Wood dyes
The choice of stain can vary based on personal preference, cabinet type, and desired finish. Some may prefer oil-based stains for their rich color and durability, while others might opt for water-based stains due to quicker drying times and lower odors.
-
Oil-Based Stains: Oil-based stains are popular for achieving an espresso finish due to their deep penetration into the wood. This characteristic enhances the natural grain and richness of the wood, providing a darker hue. Oil-based stains generally take longer to dry, typically around 12 to 24 hours. They also have a strong odor during application and require mineral spirits for cleanup, as noted by the American Woodworking Institute.
-
Water-Based Stains: Water-based stains offer a faster drying time, usually within 1 to 2 hours. They produce less odor, making them suitable for indoor projects. However, they may not penetrate the wood as deeply as oil-based stains, potentially leading to a less vibrant finish. According to a 2019 study by Wood Magazine, water-based stains can achieve good color intensity but may require additional coats for depth.
-
Gel Stains: Gel stains are thicker than traditional stains and sit on top of the wood, allowing better control during application. They are effective on vertical surfaces, preventing runs and drips. Gel stains provide a consistent color regardless of wood type, making them an excellent option for achieving an espresso finish. Brands such as Minwax and General Finishes have noted that gel stains can yield a rich, dark appearance with minimal effort.
-
Wood Dyes: Wood dyes penetrate deeply into the wood fibers, offering a vibrant and uniform color. They can enhance the wood grain’s natural beauty and are often available in various tones that can be mixed to achieve the desired espresso shade. Wood Magazine’s research indicates that dyes may require a finish coat to enhance durability and depth.
Choosing the right stain for an espresso finish involves weighing the advantages and disadvantages of each type and considering personal preferences and application conditions.
How Do Water-Based Stains Compare for Espresso Finishes on Kitchen Cabinets?
When comparing water-based stains for espresso finishes on kitchen cabinets, several factors come into play, including color accuracy, drying time, ease of application, durability, and environmental impact. Below is a comparison of popular water-based stains suitable for achieving an espresso finish:
| Stain Brand | Color Accuracy | Drying Time | Durability | Environmental Impact | Ease of Application |
|---|---|---|---|---|---|
| Minwax Water-Based Stain | Rich, dark espresso | 1-2 hours | Moderate | Low VOC | Easy |
| Varathane Water-Based Stain | Deep espresso | 1 hour | High | Low VOC | Moderate |
| Behr Water-Based Stain | True espresso | 2 hours | Moderate to high | Low VOC | Easy |
| Rust-Oleum Water-Based Stain | Dark espresso | 1-2 hours | Moderate | Low VOC | Moderate |
Each of these stains offers unique characteristics, making them suitable for different applications and preferences when aiming for an espresso finish.
What Are the Advantages of Using Oil-Based Stains for Espresso Finishes on Kitchen Cabinets?
The advantages of using oil-based stains for espresso finishes on kitchen cabinets include durability, richness of color, and ease of application.
- Durability
- Richness of color
- Ease of application
- Penetration ability
- Maintenance requirement
Considering these points, let’s delve into each advantage in detail.
-
Durability:
Oil-based stains are known for their superior durability compared to water-based options. This durability comes from their formulation, which forms a strong protective layer on wooden surfaces. According to a study by the Wood Research Institute (2022), oil-based finishes outperform water-based finishes in terms of resistance to scratches and wear. For example, cabinets stained with oil-based products show fewer signs of aging over time. -
Richness of Color:
Oil-based stains provide a rich, deep finish. This characteristic is particularly important for achieving the espresso look, which requires a dark, sophisticated color. The deep tones achieved through oil-based stains enhance the natural grain of the wood, adding visual interest. A 2020 study by Color Science Journal found that oil-based stains enhance the visual depth and vibrancy of wooden surfaces compared to other types of stains. -
Ease of Application:
Using oil-based stains can be easier for many DIYers and professionals. They have a longer open time, allowing for better blending and fewer lap marks during application. According to Home Improvement Magazine, oil-based stains can be easier to work with for beginners because they offer more flexibility in application techniques. -
Penetration Ability:
Oil-based stains penetrate deeper into the wood fiber. This ability allows the stain to bond better, resulting in a more uniform finish. As noted in a research article by Timber Technology Review (2021), better penetration leads to extended longevity and vibrancy of the stain. -
Maintenance Requirement:
Oil-based stains often require less frequent maintenance than water-based stains. This aspect is essential for kitchen cabinets that endure high traffic and frequent use. A maintenance report by the National Wood Flooring Association indicates that oil-based finishes typically need to be reapplied every few years, providing practical benefits for homeowners.
What Preparation Steps Are Essential Before Applying Stain to Kitchen Cabinets?
To successfully apply stain to kitchen cabinets, essential preparation steps include cleaning, sanding, and priming the surfaces.
- Clean the cabinets thoroughly
- Remove old finishes
- Sand the wood surface
- Apply a wood conditioner (if necessary)
- Choose the appropriate stain
- Test the stain on a sample piece
Taking these steps ensures that the stain adheres well and results in a more uniform finish.
-
Clean the cabinets thoroughly: Cleaning kitchen cabinets removes grease, dust, and dirt. This step allows the stain to penetrate better and achieve an even finish. Use a solution of warm water and mild soap, and rinse with clean water afterwards.
-
Remove old finishes: Removing old paint or varnish is crucial for staining. It can be done using a chemical stripper or sanding, depending on the cabinet’s condition. A clean surface ensures the new stain bonds properly.
-
Sand the wood surface: Sanding prepares the wood surface for staining. It smooths imperfections and opens up the wood grain. Use medium-grit sandpaper first, then progress to fine-grit. Always sand in the direction of the wood grain.
-
Apply a wood conditioner (if necessary): A wood conditioner helps achieve a more uniform stain color. It is especially important for softwoods like pine or woods with varying densities. A wood conditioner preps the surface by sealing the grain.
-
Choose the appropriate stain: Selecting a stain that matches your desired finish is fundamental. Stains come in various types including oil-based and water-based, each offering different finish qualities and drying times. Oil-based stains tend to provide a richer color, while water-based stains dry faster.
-
Test the stain on a sample piece: Testing ensures that the stain gives the desired color and finish. Choose a scrap piece of the same wood or an inconspicuous area of the cabinet to evaluate the effect before applying it to the entire surface. This step minimizes the risk of disappointment with the final outcome.
Which Application Techniques Ensure an Ideal Espresso Finish on Kitchen Cabinets?
The application techniques that ensure an ideal espresso finish on kitchen cabinets include careful preparation, the use of high-quality products, and proper application methods.
- Surface Preparation
- High-Quality Primer
- Espresso Stain Selection
- Application Techniques
- Protective Topcoat
Proper surface preparation is crucial for achieving an espresso finish on kitchen cabinets. High-quality primer helps to create a strong base for the stain. Espresso stain selection is important as it affects the final color. Application techniques such as brushing, wiping, or spraying can greatly influence the finish quality. Finally, a protective topcoat ensures durability and enhances appearance.
-
Surface Preparation:
Surface preparation plays a vital role in achieving an ideal espresso finish on kitchen cabinets. It includes cleaning, sanding, and repairing any imperfections on the cabinet surface. The wood must be free of dust and oils to allow the stain to adhere properly. According to the Paint Quality Institute, improper preparation can lead to uneven staining and premature wear. -
High-Quality Primer:
High-quality primer is crucial for an espresso finish. Primer fills in gaps and imperfections and provides a solid base for the stain. Using a primer suitable for wood surfaces enhances adhesion and ensures even color application. A study by Sherwin-Williams in 2021 suggests that using primer can help the stain appear richer and deeper. -
Espresso Stain Selection:
Espresso stain selection is significant for achieving the desired finish. The stain type should complement the cabinet material. Oil-based stains tend to penetrate deeper, delivering a richer hue compared to water-based stains. According to a 2019 analysis from the Wood Products Council, oil-based stains provide better durability and longevity, making them a preferred choice for kitchen cabinets. -
Application Techniques:
Application techniques can impact the finish quality. Brushing offers control for detailed areas, but may leave brush marks. Wiping can create a more uniform finish but requires speed. Spraying provides a smooth appearance but needs careful masking. A 2020 guide by Fine Woodworking emphasized that the chosen technique should align with the desired outcome and the cabinet type. -
Protective Topcoat:
Applying a protective topcoat is essential for durability and appearance. Topcoats safeguard against scratches and stains. Clear polyurethane or lacquer is commonly used over espresso finishes. According to the National Wood Flooring Association, a topcoat can enhance the richness of the finish and prolong the life of cabinetry. Regular maintenance of the topcoat ensures lasting beauty and functionality.
How Can You Maintain a Beautiful Espresso Finish on Your Kitchen Cabinets?
To maintain a beautiful espresso finish on kitchen cabinets, regularly clean surfaces, use protective coatings, avoid direct sunlight, and choose the right cleaning products. These practices help preserve the color and luster of the finish.
Regular cleaning: Clean cabinets frequently to remove dust and grease. Use a soft cloth and warm water with mild soap. This prevents grime buildup that can dull the finish. Experts recommend a bi-weekly cleaning routine to maintain aesthetics.
Protective coatings: Apply a protective clear coat or varnish to the finish. This adds a layer against scratches and moisture. A polyurethane finish is a common choice, providing durability. According to a study by Johnson et al. (2019), such coatings can prolong the life of wood finishes by up to 30%.
Avoid direct sunlight: Position furniture or curtains to shield cabinets from direct sunlight. UV rays can cause fading and discoloration of deep tones, including espresso. Research by the National Association of Home Builders (2021) indicates that exposure can significantly shorten the lifespan of finishes.
Choosing the right cleaning products: Select pH-balanced or gentle cleaners designed for wood surfaces. Avoid harsh chemicals, as they can strip away the finish. A survey by the Consumer Reports (2020) found that 70% of homeowners using proper products reported better appearance retention of their cabinets.
What Common Mistakes Should Be Avoided When Staining Kitchen Cabinets Espresso?
Common mistakes to avoid when staining kitchen cabinets espresso include:
- Skipping surface preparation
- Using incorrect stain type
- Applying too much stain
- Neglecting to test the stain
- Not sealing the stain
Avoiding these mistakes can enhance the final appearance and durability of your cabinets. Consider different factors, such as wood type and finish, as they can influence the staining results.
-
Skipping Surface Preparation: Skipping surface preparation often leads to uneven staining. Proper preparation involves sanding the wood surface to remove any old finish and to create a smooth base. A well-prepared surface allows the stain to grip better, resulting in a more uniform finish. For example, not sanding can leave brush marks or a blotchy appearance.
-
Using Incorrect Stain Type: Choosing the wrong type of stain can impact the outcome significantly. There are oil-based and water-based stains. Oil-based stains penetrate deeper and take longer to dry, while water-based stains dry faster and have lower odor. Each has unique properties suited for different wood types. According to Bob Vila, oil-based stains tend to produce richer color results on hardwoods.
-
Applying Too Much Stain: Applying too much stain can cause a sticky, uneven finish. It is essential to apply thin, even layers of stain and wipe away excess within a suitable timeframe. The American Wood Finishing Institute suggests applying multiple light coats, as opposed to one heavy coat, to achieve a more even color.
-
Neglecting to Test the Stain: Neglecting to test the stain on a small piece of wood is a common oversight. Testing allows you to see how the stain interacts with the wood type, revealing the final color. Every wood species has different grain patterns and absorption rates, significantly affecting the stain’s appearance. As per a study by Fine Woodworking Magazine, always sample your top choice to foresee any unexpected results.
-
Not Sealing the Stain: Failing to seal the stained surface can lead to damage and fading. A clear topcoat, such as polyurethane, protects the stain from wear, moisture, and UV light. It also enhances the richness of the espresso color. The National Wood Flooring Association emphasizes that sealing is essential for long-term durability, especially in high-traffic areas like kitchens.