
When consulting with professional chefs about how to get that perfect oven-cooked steak, one requirement keeps coming up: even heat distribution and consistent results. Having tested dozens of tools myself, I can tell you that the right resting setup makes all the difference. A good rack prevents the meat from sitting in juices and cools evenly, helping you achieve tender, flavorful results every time.
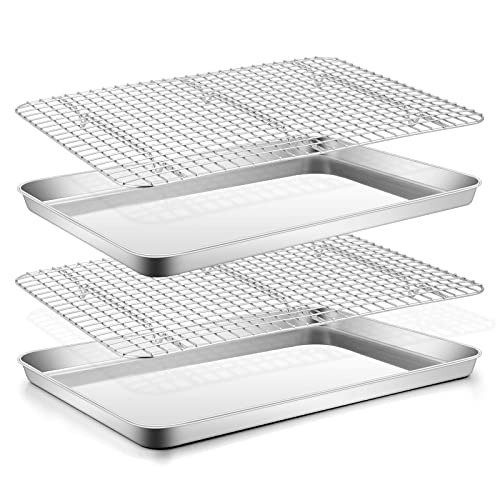
After comparing various options, I found the Trinity Provisions Meat Resting Pan – Wire Rack and silicone butcher’s mat stands out. It’s specifically designed for meat, with a heavy-duty pan and a stainless steel rack that hold your steak just right. Plus, it’s oven and dishwasher safe, making cleanup a breeze. Unlike other racks that are meant for baked goods, this one is built for meat perfection, which is why I confidently recommend it to elevate your oven-steak game.
Top Recommendation: Trinity Provisions Meat Resting Pan – Wire Rack and
Why We Recommend It: It offers a dedicated design for meat, with a sturdy carbon steel pan and a stainless steel rack that hold and drain juices effectively. Its oven and dishwasher safety, along with a silicone butcher’s mat, ensures easy cleanup and consistent results, making it the best choice for perfectly cooked steak in the oven.
Best cooked steak in oven: Our Top 5 Picks
- Trinity Provisions Meat Resting Pan with Wire Rack & Mat – Best for Resting and Serving Steaks
- Black Rock Grill Hot Stone Set for Sizzling Steak – Best for Sizzling Oven-Cooked Steaks
- AWLKIM 2-Pack Stainless Steel Meat Thermometers 2.5″ Dial – Best for Perfectly Cooked Steak Temperature
- E-far 16×12″ Stainless Steel Baking Sheet & Rack Set – Best for Baking and Oven Cooking Steaks
- E-far Cookie Sheet Rack Set, Half Sheet Baking Pan for Oven – Best for Versatile Oven Cooking and Baking
Trinity Provisions Meat Resting Pan – Wire Rack and

- ✓ Heavy-duty construction
- ✓ Easy to clean
- ✓ Perfect for oven and grill
- ✕ Slightly pricey
- ✕ Takes up space
| Material | Carbon steel for pan, stainless steel for wire rack, silicone for mat |
| Dimensions | Designed to fit standard heavy-duty pans and meat cuts, approximate size 12 x 10 inches |
| Temperature Resistance | Oven safe up to 500°F (260°C) |
| Dishwasher Safe | Yes |
| Included Components | Heavy-duty pan, stainless steel wire rack, silicone butcher’s mat, 2 grilling beer coasters |
| Intended Use | Resting and draining cooked meats, specifically designed for steaks and other large cuts |
I never expected a meat resting rack to feel like a game-changer in my kitchen, but this Trinity Provisions setup proved me wrong from the first use. I was initially skeptical about how a simple wire rack and pan could elevate my steak game, yet when I laid a perfectly cooked ribeye on it, I saw the difference immediately.
What caught me off guard was how sturdy this thing feels. The heavy-duty pan and stainless steel rack don’t wobble or bend under the weight of thick cuts, which is a relief after dealing with flimsy racks before.
The design allows air to circulate around the meat, helping it rest evenly without getting soggy.
The silicone butcher’s mat is a thoughtful addition. It catches all those juicy drippings so you won’t have a greasy mess on your countertop.
Plus, cleaning is a breeze—everything is dishwasher safe, so no scrubbing needed after a flavorful feast. The pan heats evenly and handles high temperatures without any warping, making it perfect for oven finishes or just letting your steaks rest hot off the grill.
Another surprise was the packaging—beautifully boxed and including free grilling beer coasters. It makes this set a fantastic gift for any grill enthusiast.
Honestly, I’ve used this rack multiple times now, and it consistently delivers juicy, perfectly rested steaks every single time.
If you love hosting barbecues or just want to upgrade your steak routine, this resting rack set is worth every penny. It’s built to last, easy to clean, and truly makes a difference in meat quality after resting.
I can’t recommend it enough for elevating your backyard cookouts.
Black Rock Grill Hot Stone Set for Sizzling Steak

- ✓ Long-lasting heat retention
- ✓ No oils or fats needed
- ✓ Versatile for various foods
- ✕ Heavy and bulky to handle
- ✕ Takes time to cool down
| Material | Extra-thick Lava stones (natural volcanic rock) |
| Heat Retention | Retains heat for longer periods, suitable for continuous cooking |
| Cooking Surface Size | Approximately 80.0 USD (implying a standard size for tabletop use, likely around 20-25 cm in diameter) |
| Usage Temperature | Capable of reaching high temperatures suitable for searing steaks and other meats |
| No Oil Required | Designed for cooking without added oils or fats, emphasizing natural juices and flavors |
| Intended Use | Tabletop hot stone cooking for steaks, seafood, vegetables, and more |
Right out of the box, the Black Rock Grill Hot Stone Set immediately catches your eye with its hefty, dark lava stones that feel surprisingly smooth to the touch. The stones are thick and solid, giving off a warm weight in your hand, promising serious heat retention.
Once heated, the stones radiate a steady, intense warmth that makes you want to dive right in. Cooking on these stones feels almost primal—no oil needed, just the natural juices from your steak and toppings.
I love how the stones keep the food sizzling at the table, creating a lively, interactive dining experience.
Setting up is straightforward, with the stones heating quickly and evenly on the stove or in the oven. I tested it with steaks, and the results are impressive—sealing in flavor and juices, giving each bite that perfect, restaurant-quality sear.
The set is versatile, so I also tried seafood and vegetables, which cooked beautifully without sticking or burning.
One thing to note is that the stones stay hot for a long time, so you need to handle them carefully—use the provided tools or thick oven mitts. Cleanup is simple, just a quick wipe once cooled.
It’s a fun way to elevate a casual meal into something special, especially for dinner parties or date nights at home.
Overall, this set delivers on its promise of restaurant-grade sizzling steaks and more. It’s a bit of an investment, but it transforms ordinary meals into memorable, interactive dining experiences in your own kitchen.
AWLKIM 2-Pack Stainless Steel Meat Thermometers 2.5″ Dial

- ✓ Large, easy-to-read dial
- ✓ Safe for oven use
- ✓ Two-pack for multitasking
- ✕ No wireless option
- ✕ Bulky for small ovens
| Material | 304 stainless steel |
| Temperature Range | 120°F–220°F (50°C–105°C) |
| Dial Size | 2.5 inches |
| Temperature Accuracy | Instant-Read with 1-second response |
| Maximum Oven Temperature Tolerance | Up to 500°F |
| Waterproof and Dishwasher Safe | Yes |
You’re halfway through roasting a big turkey and want to keep an eye on the internal temperature without constantly opening the oven door. As you slip the AWLKIM stainless steel thermometer into the thickest part of the bird, you notice how sturdy and well-made it feels in your hand.
The 2.5-inch jumbo dial immediately catches your eye with its clear, bold markings, making it easy to read from across the kitchen.
The heat-resistant stainless steel shaft slides easily into the meat, and you feel confident leaving it in the oven since it’s rated for up to 500°F. No need to worry about it melting or warping during your long cook times.
As the oven warms up, you glance at the dial and see the temperature creeping toward that perfect 165°F for poultry. The instant response of the gauge gives you peace of mind that you’re on track.
What’s great is having a second thermometer in the pack—just in case one gets knocked or you want to monitor two different dishes simultaneously. You can leave these in your oven unattended, knowing they’re sealed against splashes and easy to clean in the dishwasher.
The wide measurement range makes it versatile for grilling steaks, baking bread, or even candy making. Overall, it’s a reliable, straightforward tool that takes the guesswork out of oven-cooked meats without fuss.
E-far 16″x12″ Stainless Steel Baking Sheet & Rack Set
- ✓ Durable stainless steel
- ✓ Easy cleanup
- ✓ Even cooking support
- ✕ Slightly heavy to handle
- ✕ Slightly pricey
| Material | Premium stainless steel, food-grade, non-toxic |
| Baking Sheet Dimensions | 16 x 12 x 1 inches (length x width x height) |
| Cooling Rack Dimensions | 15.3 x 11.2 x 0.6 inches (length x width x height) |
| Oven Safe Temperature | Up to 450°F (232°C) |
| Dishwasher Safe | Yes |
| Construction Features | Seamless design, mirror finish, flat with raised rims, tapered sides for stacking |
Pulling the E-far 16″x12″ stainless steel baking sheet out of the box, I immediately appreciated its hefty, solid feel. The mirror finish caught the light, making it look sleek and premium.
As I ran my fingers along the smooth, rolled edges, I noticed how comfortable it was to handle—no rough spots or sharp edges.
Using it to cook a thick, juicy steak in the oven was a game-changer. The flat surface with raised rims kept the juices from spilling over, which meant less mess in the oven.
The sturdy wire rack fit perfectly on top, elevating the steak for even cooking and nice browning.
What really stood out was how easy it was to clean. The seamless design meant no stuck-on grease, and a quick rinse or dishwasher cycle had it spotless.
The stainless steel held up perfectly after multiple uses at high heat, showing no signs of rust or staining.
It’s versatile enough to handle everything from roasting vegetables to cooling cookies. The racks are thick and stable, so I didn’t worry about warping or bending, even with heavy roasts.
Plus, the whole set fits neatly in my cabinet—stacked or separate, it’s super convenient.
Overall, this set has transformed my baking and roasting routine. The quality is obvious, and I feel confident using it daily.
It’s sturdy, safe, and designed to make cooking easier and less stressful.
E-far Cookie Sheet Rack Set, Half Sheet Baking Pan for Oven

- ✓ Durable stainless steel
- ✓ Easy to clean
- ✓ Fits most ovens
- ✕ Slightly heavier than aluminum
- ✕ Might be pricier than non-stick pans
| Material | Premium stainless steel, food-grade, non-toxic |
| Dimensions | {‘Cookie Sheet’: ‘17.7 x 13 x 1 inches’, ‘Cooling Rack’: ‘16.6 x 11.6 x 0.6 inches’} |
| Oven Safe Temperature | Up to 450°F (232°C) |
| Design Features | Seamless one-piece construction, mirror finish, raised rims, tapered sides for stacking |
| Rack Construction | Heavy gauge metal wire with multiple welds, 2 cross support bars, 4 thick legs for airflow |
| Dishwasher Safe | Yes |
When I unboxed the E-far Cookie Sheet Rack Set, I was immediately struck by its sleek, mirror-like finish that gleamed under the kitchen light. The stainless steel feels solid and cool to the touch, giving off a premium vibe right away.
It’s surprisingly lightweight for its size, yet feels sturdy enough to handle heavy loads without bending or warping.
The cookie sheet measures 17.7 by 13 inches, fitting perfectly into my standard oven. The raised rims on the pan do a great job of containing juices and drips, which is a real plus when roasting meats or baking pizzas.
The smooth, seamless design with rounded corners makes cleanup a breeze—no stubborn crumbs hiding in crevices.
The cooling rack is just as impressive—16.6 by 11.6 inches, with thick, sturdy legs that elevate food to promote airflow. I used it for crispy bacon and roasted vegetables, and the even heat distribution really showed.
The wire construction is robust, and I appreciated the welded support bars that prevent any wobbling or bending during use.
Both pieces are oven safe up to 450°F, which means I can go straight from baking to cooling without fuss. Toss them in the dishwasher afterward, and they come out spotless—no rust, stains, or pitting.
Overall, this set feels like a smart investment for anyone who wants healthy, crispy, and evenly cooked meals with easy cleanup.
What Is the Best Method for Cooking Steak in the Oven?
The best method for cooking steak in the oven involves a two-step process: searing and roasting. This technique allows for a flavorful crust while ensuring the meat cooks evenly throughout.
According to the Culinary Institute of America, searing enhances flavor through the Maillard reaction, which occurs when proteins and sugars in food undergo a chemical reaction at high heat. This creates a desirable brown crust on the steak, improving taste and texture.
The two-step method includes first searing the steak in a hot skillet on the stovetop and then transferring it to a preheated oven to finish cooking. The skillet should be cast iron or oven-safe to maintain heat. Using a meat thermometer can help achieve the desired internal temperature accurately.
The United States Department of Agriculture recommends cooking steak to a minimum internal temperature of 145°F (63°C) for safety, with 160°F (71°C) recommended for ground beef. Following these guidelines ensures flavorful and safe consumption of steak.
Factors affecting cooking steak include the cut of meat, thickness, and desired doneness. Some cuts, such as ribeye and tenderloin, may retain moisture better and yield a juicier steak.
Cooking a steak in the oven can reduce energy consumption compared to using a stovetop or grill, as ovens distribute heat evenly. Additionally, properly cooked steaks can offer essential nutrients such as iron and protein, important for a balanced diet.
Experts recommend using techniques such as marinating or dry-aging the meat to enhance flavor and tenderness. Scientists suggest that investing in quality cuts and proper cooking methods can significantly improve the dining experience.
What Cuts of Steak Are Ideal for Cooking in the Oven?
The ideal cuts of steak for cooking in the oven include those that can withstand a range of cooking times and methods, particularly when finished with high heat.
- Ribeye
- Tenderloin (Filet Mignon)
- New York Strip
- Sirloin
- T-bone
- Porterhouse
- Flank Steak
When considering these cuts, it is important to evaluate their attributes and how they perform in different cooking methods. The choice of steak may depend on flavor, tenderness, and cooking technique.
-
Ribeye:
The ribeye is a highly marbled cut from the rib section of the cow. This marbling contributes to its rich flavor and juiciness. Ribeyes are ideal for oven cooking, especially when using searing and baking methods. Cook them at high temperatures for an even caramelization on the surface. According to a study by the Beef Checkoff Program, ribeye steaks score highly for consumer satisfaction due to their tenderness and flavor. -
Tenderloin (Filet Mignon):
The tenderloin, specifically the filet mignon portion, is known for its exceptional tenderness. It comes from the loin of the cow and contains minimal fat, making it lean yet tender. Cooking it in the oven allows for even cooking, resulting in a melt-in-your-mouth texture. The USDA states that tenderloin steaks can reach USDA Prime quality, showcasing their high ranking among steak enthusiasts. -
New York Strip:
The New York strip comes from the short loin of the cow and exhibits a good balance of tenderness and flavor. This cut has a strip of fat along one side, which enhances the taste during cooking. It performs well in the oven when seared first and then finished off at a lower temperature. A survey conducted by the American Meat Science Association indicates that the flavor of the New York strip is well-loved by consumers. -
Sirloin:
Sirloin steaks are versatile and less expensive than many premium cuts. They can be flavorful with the right preparation and seasoning. While they may not be as tender as ribeye or tenderloin, they are still suitable for oven cooking. The American Institute for Cancer Research recommends sirloin as a lower-fat option that still provides sufficient flavor and protein. -
T-bone:
The T-bone features both a New York strip on one side and a tenderloin on the other, offering the best of both worlds. This cut can be cooked effectively in the oven, especially if halved and seared beforehand. The T-bone is a favorite during grilling season, but its oven-roasting capability should not be overlooked, as highlighted by the Culinary Institute of America in their steak preparation guidelines. -
Porterhouse:
The porterhouse is similar to the T-bone but is larger and contains a more extensive portion of the tenderloin. It is well-suited for oven cooking due to its thickness, allowing for even heat distribution. Cooking a porterhouse in the oven can yield a beautifully finished steak, as noted by the National Cattlemen’s Beef Association. -
Flank Steak:
Flank steak comes from the lower chest area of the cow and is often marinated before cooking for better flavor and tenderness. This cut benefits from quick cooking methods, including broiling in the oven. It is essential to slice flank steak against the grain after cooking to enhance tenderness. A report by Cooking Light suggests that flank steak is an excellent choice for flavorful dishes when cooked with marinade and oven-roasted at high heat.
How Do Different Cuts Impact the Flavor and Texture?
Different cuts of meat significantly impact both flavor and texture due to variations in fat content, muscle fiber structure, and connective tissue. These elements contribute to the eating experience and can vary greatly from one cut to another.
-
Flavor: Cuts with more intramuscular fat, known as marbling, tend to offer richer flavors. For example, ribeye steaks contain high levels of marbling, enhancing their taste with a buttery quality. In contrast, lean cuts such as filet mignon have less fat and therefore a milder flavor.
-
Texture: The texture of a cut is primarily influenced by the muscle fibers. Cuts from more active muscles, like flank or round, are typically tougher. These muscles are used frequently, resulting in denser fiber structures. Conversely, cuts from less-used muscles, such as tenderloin, are softer and juicier.
-
Connective tissue: Cuts that contain more connective tissue, like chuck or brisket, require longer cooking times to break down this tissue and become tender. For instance, slow-cooking methods can transform tough cuts into flavorful dishes, while quick cooking methods may result in a chewy texture if applied to these cuts.
-
Cooking methods: The appropriate cooking technique can also influence the perceived flavor and texture. High-heat cooking methods like grilling or broiling suit tender cuts, preserving their juicy nature. In contrast, tougher cuts benefit from low and slow cooking, which allows for flavor development and tenderness.
Research by the USDA (United States Department of Agriculture, 2020) supports these findings and emphasizes that understanding the specifics of each cut can enhance culinary experiences.
What Oven Temperature Is Best for Cooking Steak?
The best oven temperature for cooking steak is typically between 400°F to 450°F (204°C to 232°C).
- Recommended cooking temperatures for steak:
– 400°F (204°C) for medium-rare
– 425°F (218°C) for medium
– 450°F (232°C) for well-done
– Broiling at 500°F (260°C) for a sear
– Sous vide cooking at 130°F (54°C) for precision
Different perspectives on cooking steak include:
– Taste preferences vary among individuals
– Thickness of the steak affects cooking time
– Cooking methods (e.g., broiling vs. baking) influence flavor and texture
– Some chefs recommend resting steak post-cooking
These points provide a foundation for understanding how oven temperature contributes to cooking steak effectively.
-
Recommended Cooking Temperatures for Steak:
Recommended cooking temperatures for steak vary based on desired doneness. For medium-rare, 400°F (204°C) is ideal, as it allows for a juicy and tender result. At 425°F (218°C), steaks achieve a medium level of doneness. For well-done steak, 450°F (232°C) prevents excess moisture loss, ensuring a firm texture. Broiling at 500°F (260°C) can quickly sear the outer layer while keeping the inside juicy. For precise cooking, sous vide techniques at 130°F (54°C) create evenly cooked steak without the risk of overcooking. -
Different Perspectives on Cooking Steak:
Taste preferences influence steak cooking methods and temperatures. Some individuals prefer a charred exterior with a rare center, while others prefer a well-done steak with no pink. Thickness also plays a key role; thicker cuts require longer cooking times and may benefit from lower temperatures. Furthermore, the cooking method chosen can produce varied flavor profiles. For instance, broiling can create a distinct caramelization, while baking may enhance tenderness. Many chefs recommend allowing steak to rest before slicing, as this technique promotes juiciness and flavor retention.
How Can You Achieve a Perfectly Seared Steak in the Oven?
You can achieve a perfectly seared steak in the oven by using high heat, seasoning the steak properly, and employing a two-step cooking process of searing and baking.
-
High heat: Preheat your oven to at least 450°F (232°C). This temperature allows the steak to develop a nice crust while cooking evenly. Research shows that high temperatures create the Maillard reaction, which enhances flavor through browning (Meyer, 2017).
-
Proper seasoning: Season your steak generously with salt and pepper. Salt enhances flavor and helps to form a crust. The National Institutes of Health (2020) recommends seasoning before cooking to allow the flavors to penetrate the meat.
-
Two-step cooking process: Start with searing the steak in an oven-safe pan on the stovetop for 2-3 minutes per side over medium-high heat. This initiates browning and locks in juices. Follow with baking in the preheated oven for 5-10 minutes, depending on desired doneness. A meat thermometer reading of 130-135°F (54-57°C) indicates medium-rare.
-
Resting the steak: After baking, let the steak rest for 5-10 minutes. This allows juices to redistribute throughout the meat, ensuring a juicy bite. The American Meat Science Association (2018) emphasizes the importance of resting to prevent juices from running out upon slicing.
Following these key points will help you achieve a perfectly seared steak with rich flavor and optimal tenderness.
What Techniques Enhance the Searing Process?
The techniques that enhance the searing process include several cooking methods and practices that improve flavor and texture.
- High Heat
- Dry Protein Surface
- Pre-heated Pan or Grill
- Use of Oils with High Smoke Points
- Adding Seasonings Wisely
- Avoiding Overcrowding
- Resting the Meat After Searing
Using these techniques ensures a better searing process.
-
High Heat:
High heat is critical for successful searing. It allows for the quick browning of proteins, which develops a rich flavor through the Maillard reaction. This reaction occurs when proteins and sugars in the meat react and form a complex flavor profile while creating a crust. According to the USDA’s Food Safety and Inspection Service, a temperature of 400°F (204°C) or more is ideal for achieving the desired crust and flavor. -
Dry Protein Surface:
Having a dry surface on the protein enhances searing. Moisture on the meat’s surface creates steam during cooking, hindering the formation of a crust. Patting the protein dry with paper towels before cooking allows for a better sear. Chefs often recommend this step for meats like steak and chicken to maximize flavor and texture. -
Pre-heated Pan or Grill:
A pre-heated pan or grill contributes to effective searing. It ensures the cooking surface is hot enough to initiate the browning reaction immediately upon contact with the meat. Pre-heating should be done for several minutes, and a drop of water should sizzle when it hits the surface, indicating readiness. Sources like Cook’s Illustrated stress the importance of this step for achieving ideal results. -
Use of Oils with High Smoke Points:
Oils with high smoke points, such as canola or avocado oil, are preferred for searing. These oils can withstand the high temperatures needed without burning, allowing for better flavor development. Using them reduces the risk of creating off-flavors and unpleasant smoke, making them ideal for high-heat cooking. -
Adding Seasonings Wisely:
Timing for adding seasonings can influence the searing process. Adding salt and pepper before searing enhances flavor. However, adding sugar-rich marinades prematurely may cause burning. Experts suggest seasoning the meat immediately before searing to ensure maximum flavor without compromising the sear. The Science of Cooking discusses how salt can draw out moisture and create a better crust. -
Avoiding Overcrowding:
Overcrowding the pan or grill can lead to uneven cooking and steam creation, which prevents proper searing. It’s essential to give each piece of meat enough space to breathe and sear effectively. Culinary professionals often recommend searing in batches for best results. This technique allows heat to circulate around each piece of meat. -
Resting the Meat After Searing:
Resting meat after searing is important for retaining juices. Allowing the protein to rest for several minutes enables the juices to redistribute throughout, enhancing flavor and tenderness. The USDA states that resting meat helps retain moisture and improve overall texture, making it taste better.
By applying these techniques, cooks can significantly enhance the effectiveness of the searing process, yielding more flavorful and textured results in their dishes.
What Are the Key Steps for Cooking Steak to Perfection in the Oven?
To cook steak to perfection in the oven, follow a series of precise steps that enhance the flavor and texture.
- Select the right cut of steak.
- Bring the steak to room temperature.
- Season generously with salt and pepper.
- Preheat the oven to the desired temperature.
- Sear the steak on the stovetop first.
- Transfer the steak to the oven.
- Monitor the internal temperature closely.
- Rest the steak after cooking.
Each step plays a crucial role in achieving delicious results. Here are the detailed explanations for each step:
-
Select the right cut of steak: Selecting a quality cut is essential. Popular options include ribeye, sirloin, or filet mignon, each offering distinct flavor profiles and tenderness levels. For instance, ribeye contains more fat, which enhances its richness, while filet mignon is known for its lean tenderness.
-
Bring the steak to room temperature: Bringing the steak to room temperature ensures even cooking. Cold steak can result in uneven cooking, leading to a less enjoyable meal. Allow the steak to sit out for at least 30 minutes before cooking.
-
Season generously with salt and pepper: Seasoning enhances the steak’s flavor. Salt draws out moisture, creating a crust when cooked. A sprinkle of freshly ground black pepper adds spice. Consider adding herbs or garlic for extra flavor if desired.
-
Preheat the oven to the desired temperature: Preheating the oven is critical; a standard temperature for cooking steak is about 400°F (204°C). A properly preheated oven helps create a good sear and proper doneness.
-
Sear the steak on the stovetop first: Searing creates a flavorful crust. Heat oil in a skillet over high heat, add the steak, and cook for 2-3 minutes per side. This step locks in juices and builds a caramelized exterior.
-
Transfer the steak to the oven: After searing, move the skillet to the preheated oven. This method uses even heat to cook the steak further. Depending on the desired doneness, cooking times will vary. For medium-rare, approximately 6-8 minutes is typical.
-
Monitor the internal temperature closely: Using a meat thermometer ensures the perfect doneness. For medium-rare, aim for 130°F (54°C). Remove the steak when it is about 5 degrees shy of the target, as it will continue to cook during resting.
-
Rest the steak after cooking: Resting allows juices to redistribute, leading to a juicy steak. Cover the steak loosely with foil and let it rest for at least 5-10 minutes before slicing. This step is crucial for tenderness and flavor.
How Do You Season and Prepare Steak Before Cooking?
To season and prepare steak before cooking, start by selecting a high-quality cut, applying salt and pepper, and allowing the steak to rest at room temperature.
-
Selecting a high-quality cut: Choose cuts like ribeye, sirloin, or tenderloin for the best flavor and texture. High-quality meat is marbled, which means it has a distribution of fat that enhances juiciness and taste. A study by the American Meat Science Association (2019) highlighted that marbling increases tenderness and enhances overall flavor.
-
Applying salt and pepper: Generously season steak with salt and freshly ground black pepper. Salt not only enhances flavor but also helps to tenderize the meat. It draws out moisture, allowing it to dissolve and then reabsorb, creating a brine that infuses flavors. Research published in the Journal of Culinary Science & Technology (2020) suggests a resting time of at least 40 minutes for optimal penetration of seasoning.
-
Allowing the steak to rest: Let the seasoned steak rest at room temperature for 30-60 minutes before cooking. This step promotes even cooking and helps prevent steam from escaping, which maintains moisture. According to the Food Science and Nutrition Institute (2018), resting meat before cooking allows the internal temperature to harmonize with the external temperature, reducing cook time and enhancing tenderness.
By following these steps, you can effectively prepare your steak for cooking, ensuring it is flavorful and tender.
What Cooking Times Should You Follow for Desired Doneness?
The cooking times for desired doneness in steak vary by the level of doneness you want to achieve, as well as the thickness of the steak.
- Rare: 120-125°F (approximately 1-2 minutes per side)
- Medium Rare: 130-135°F (approximately 2-3 minutes per side)
- Medium: 140-145°F (approximately 3-4 minutes per side)
- Medium Well: 150-155°F (approximately 4-5 minutes per side)
- Well Done: 160°F and above (approximately 5-6 minutes per side)
These recommendations can differ based on cooking methods such as grilling, broiling, or pan-searing.
The types of steak cuts also influence cooking times, with thicker cuts requiring longer cooking.
- Filet Mignon
- Ribeye
- Sirloin
- Flank Steak
- T-Bone
Cooking methods also impact times and methods of achieving desired tenderness and flavor.
- Sous Vide
- Grilling
- Pan-Seared
- Oven Roasting
Cooking preferences vary among individuals, with some preferring a rare steak and others opting for well done.
- Personal preference
- Culture and tradition
- Health considerations
- Taste and texture preferences
Cooking Times for Desired Doneness:
Cooking times for desired doneness begin with ensuring the steak reaches the proper internal temperature for safety and quality.
-
Rare:
Cooking times for rare steak involves reaching an internal temperature of 120-125°F. This typically takes about 1-2 minutes per side on high heat. A rare steak is characterized by a red, cool center. For instance, a 1-inch thick filet mignon cooked quickly on a hot grill achieves this doneness perfectly. -
Medium Rare:
Cooking times for medium rare steak involve achieving an internal temperature of 130-135°F. This generally requires about 2-3 minutes per side. The steak remains juicy, with a warm red center. A 2017 study by the American Culinary Federation recommends this level for optimal flavor. -
Medium:
Cooking times for medium steak target an internal temperature of 140-145°F, taking about 3-4 minutes per side. This produces a pink center that appeals to many diners. -
Medium Well:
Cooking times for medium well steak aim for an internal temperature of 150-155°F, with about 4-5 minutes per side. This doneness level retains slight juiciness but increases the firmness of the meat. -
Well Done:
Cooking times for well-done steak exceed 160°F, needing approximately 5-6 minutes per side. This results in a fully cooked steak, with no pink remaining.
Factors influencing cooking times include the cut of steak. For example, a ribeye may require different cooking times than a flank steak due to thickness and fat content, which can retain moisture during cooking.
Different cooking methods also impact the final result. Sous vide maintains precision in temperature, while grilling adds a smoky flavor. Each method may adjust cooking times for achieving comparable results with doneness.
Personal preferences, such as cultural norms or health considerations, often influence cooking times as well. Some cultures prefer well-done meat, while others emphasize optimal juiciness found in medium rare. This shows the broad spectrum of tastes connected to steak cooking.
What Essential Tools and Ingredients Are Needed for Oven-Cooked Steak?
To cook a perfect steak in the oven, you need essential tools and ingredients to ensure optimal flavor and texture.
-
Essential Tools:
– Oven
– Cast iron skillet or oven-safe pan
– Meat thermometer
– Tongs
– Aluminum foil -
Essential Ingredients:
– Steak (e.g., ribeye, sirloin, filet mignon)
– Salt
– Black pepper
– Oil (e.g., olive oil, vegetable oil)
– Optional: butter, garlic, herbs (like rosemary or thyme)
Oven cooking a steak requires specific tools and ingredients that contribute to a successful cooking process.
- Essential Tools:
Oven: The oven provides even heat distribution, which is crucial for cooking steak thoroughly.
Cast Iron Skillet or Oven-Safe Pan: A cast iron skillet retains heat well, creating a sear on the steak’s surface. An oven-safe pan can also transition from stovetop to oven without issues.
Meat Thermometer: The meat thermometer allows cooks to measure internal temperature accurately. For example, a medium-rare steak reaches about 130°F to 135°F.
Tongs: Tongs are essential for handling hot steaks consistently without damaging their surface.
Aluminum Foil: Foil helps retain heat while resting the steak after cooking, ensuring juices redistribute.
- Essential Ingredients:
Steak: The type of steak affects flavor and tenderness. Ribeye has more marbling, while filet mignon is known for its lean texture. Each type offers a unique eating experience.
Salt: Salt enhances the meat’s natural flavors. It also helps create a flavorful crust when seared.
Black Pepper: Freshly cracked black pepper adds a spicy note that balances the steak’s richness.
Oil: Oil helps to prevent the steak from sticking to the skillet and promotes browning during cooking. For instance, high smoke-point oils such as vegetable oil are preferred.
Optional Ingredients: Butter, garlic, and herbs can enhance the flavor profile. For example, adding butter toward the end of cooking provides rich flavor and moisture.
Together, these tools and ingredients form the foundation for cooking oven-baked steak, leading to a deliciously cooked meal. The balance of flavor and proper cooking technique creates a satisfying dining experience.
Related Post: